Time to make a link. This walkthrough takes you through the full Add New Link screen so you understand every option, even if the wizard already created one for you.
Step 1: Open the Add New Link Screen
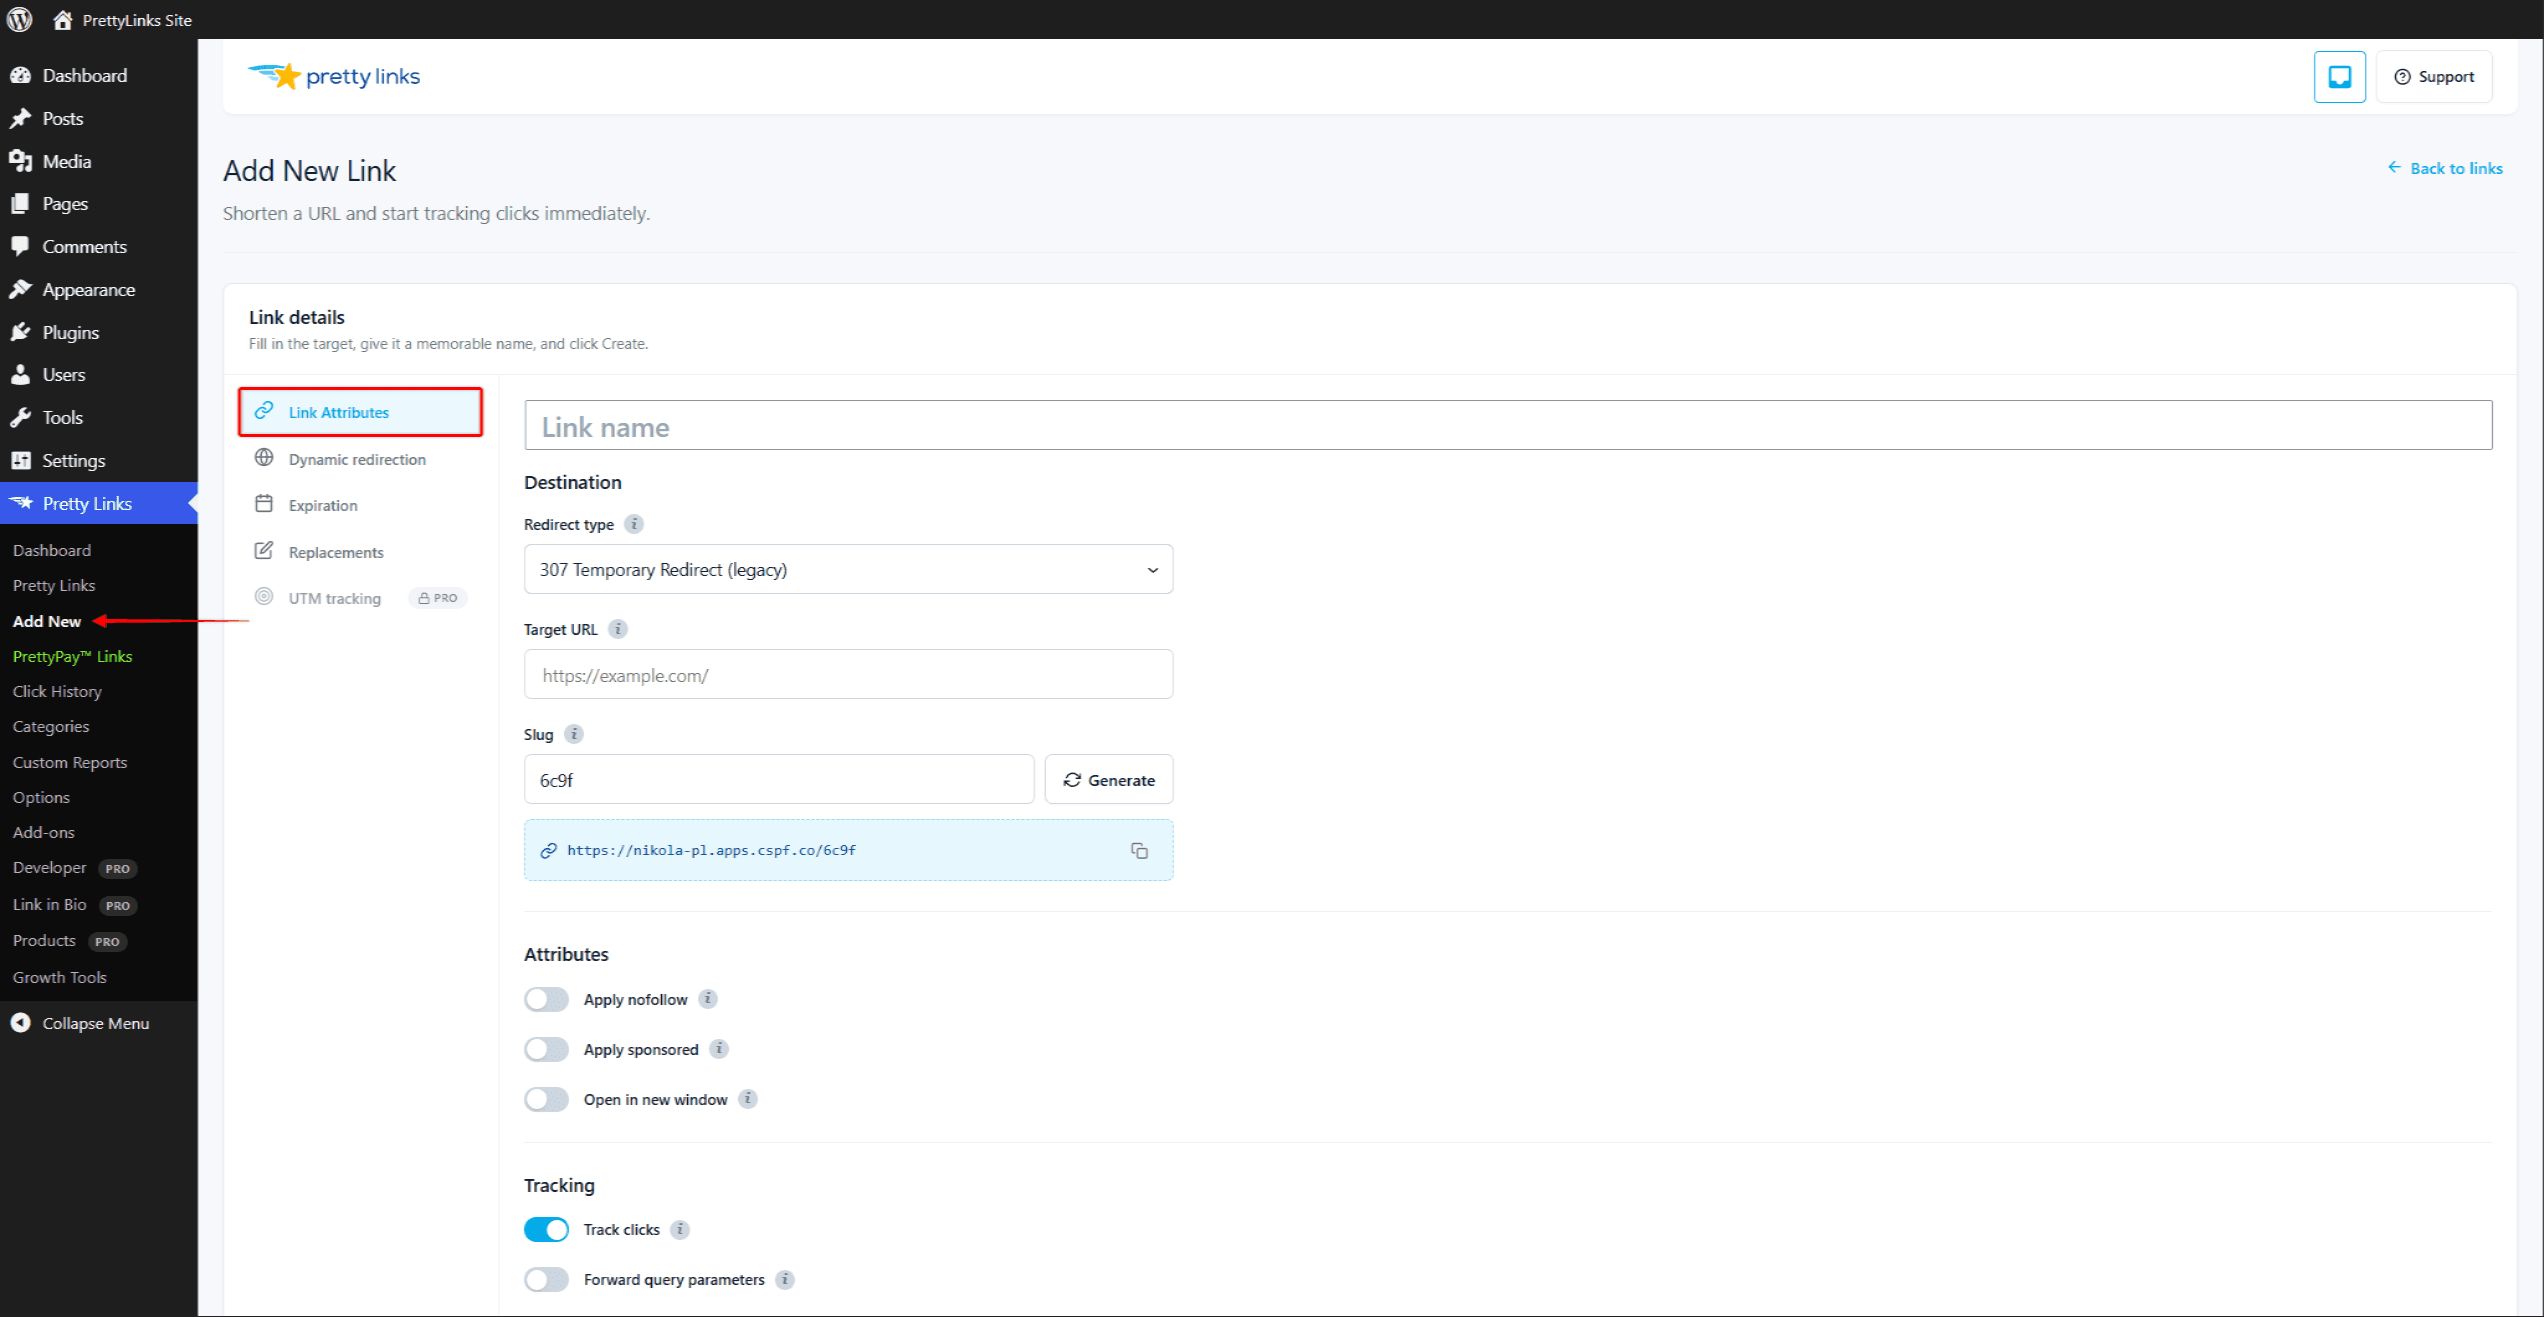
In your WordPress admin, go to Dashboard > Pretty Links > Add New Link.
Step 2: Enter the Target URL
The Target URL is where visitors will end up when they click your pretty link. This is the long, ugly, or affiliate-laden URL you want to hide behind a clean short link.
Examples:
https://affiliate-network.example.com/click?aff=12345&campaign=spring&product=widgethttps://yoursite.com/2024/03/15/the-very-long-blog-post-title-goes-here/https://partner.example.com/checkout?ref=yourname
Paste the full URL into the Target URL field.
Step 3: Customize the Slug
The slug is the part of your short URL that comes after your domain. If your site is yoursite.com and your slug is launch, your pretty link is yoursite.com/launch.
Pick something short and memorable. Good slugs:
go.example.com/saleyoursite.com/recommendsyoursite.com/podcastyoursite.com/launch
If you leave the slug blank, Pretty Links generates a random one for you. Custom slugs are often better for links you’ll share publicly — they’re easier to remember and look more trustworthy.
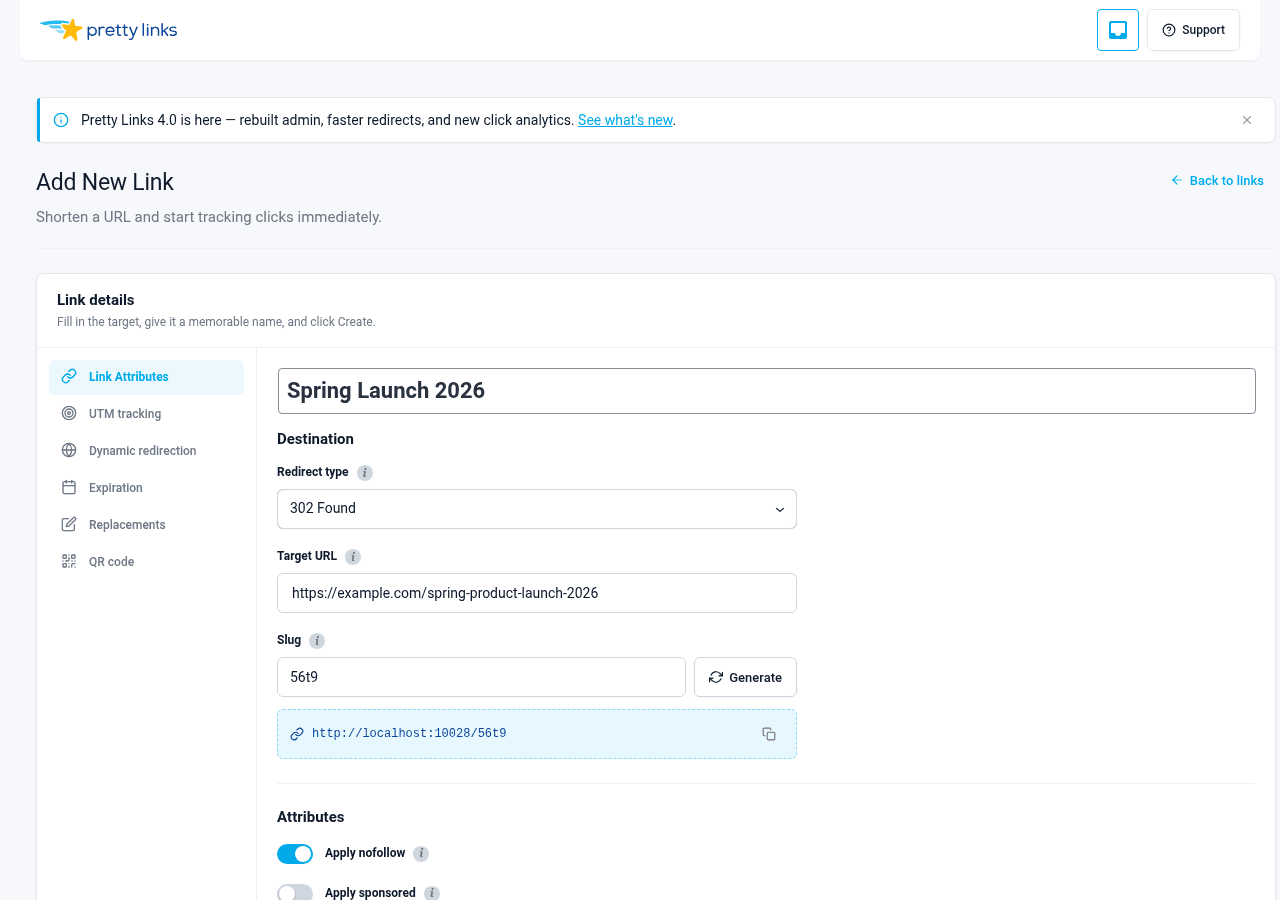
Step 4: Pick a Redirect Type
The redirect type controls how browsers and search engines handle the jump from your short URL to the target.
- 302 Found (temporary) — the default. Use when the destination might change later, like a rotating promo or an affiliate link you want to be able to swap.
- 301 Moved Permanently — tells browsers and search engines this is the permanent destination. A good fit for branded URLs you don’t expect to repoint.
When in doubt, stick with the default. Pretty Links Pro’s add-ons add more advanced redirect types — pixel, JavaScript, meta refresh, cloak, and prettybar — on the Add New Link screen.
Step 5: Give It a Name (Optional but Recommended)
The Title field is for you — it shows up in your link list so you can find this link again later. “Spring sale 2024 affiliate” is a lot easier to spot than xJ7q2.
Step 6: Save
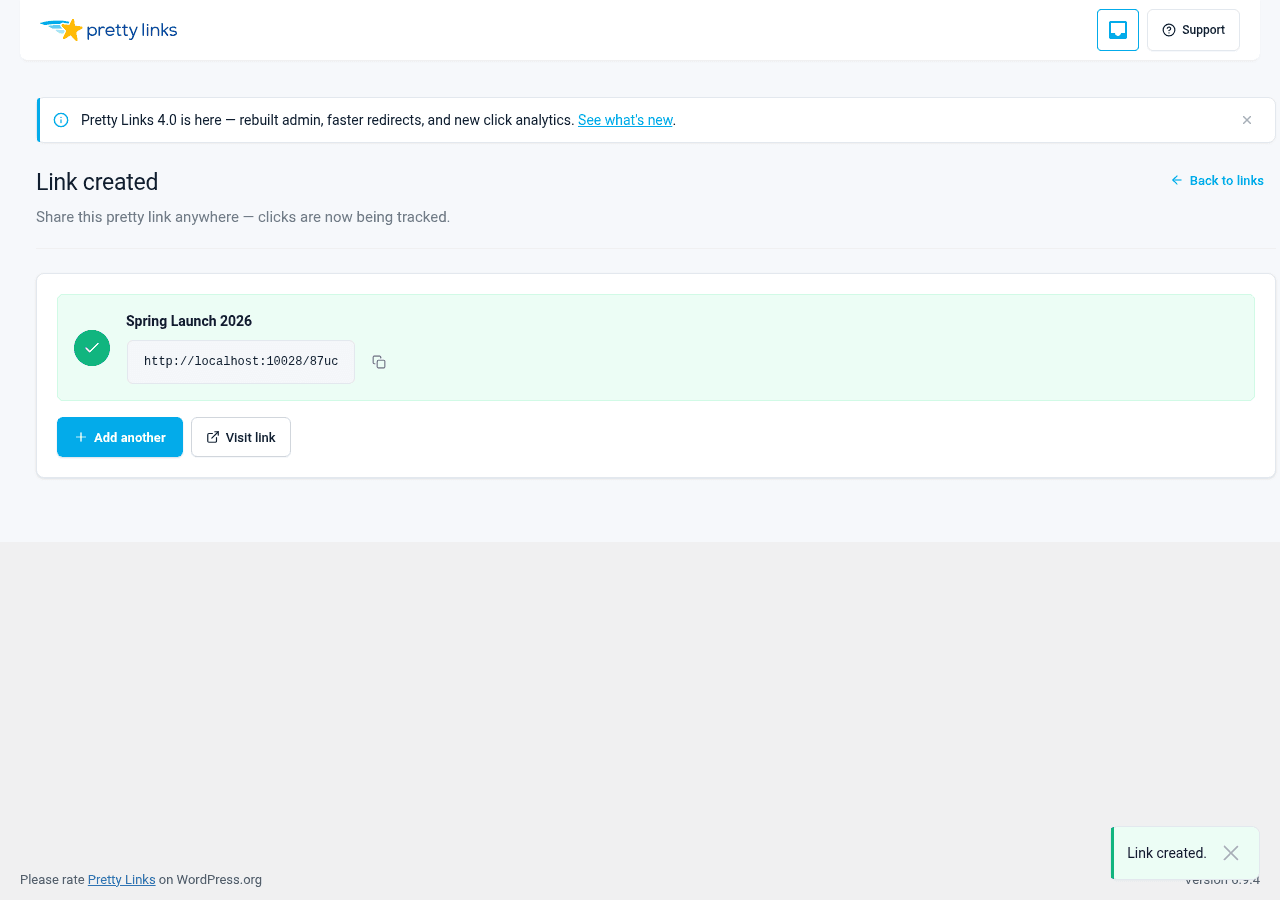
Click the Create link button. Pretty Links saves your link and shows you the finished short URL.
Step 7: Copy and Test It
- Click the copy icon next to your new short URL.
- Paste it into a new browser tab and press Enter.
- Confirm it sends you to your target URL.
If it works, you’re done — the link is live everywhere immediately.
Step 8: Share It
Drop your pretty link anywhere you’d normally share a URL: social posts, email newsletters, video descriptions, podcast show notes, business cards. Every click is now tracked under Dashboard > Pretty Links > Click History, so you can see how each placement is performing.
Want to do more? Explore advanced redirect types, link rotation, expiration, and split testing in the Creating and Editing Links documentation.