Getting Pretty Links Pro running takes about two minutes. You’ll install the plugin, paste in your license key, and you’re done.
Before You Start
Make sure you have:
- A WordPress site you can log into as an administrator;
- Your Pretty Links Pro license key (you received this by email after purchase, and it’s also available in your account dashboard on the Pretty Links website);
- The Pretty Links Pro plugin ZIP file (downloaded from your account).
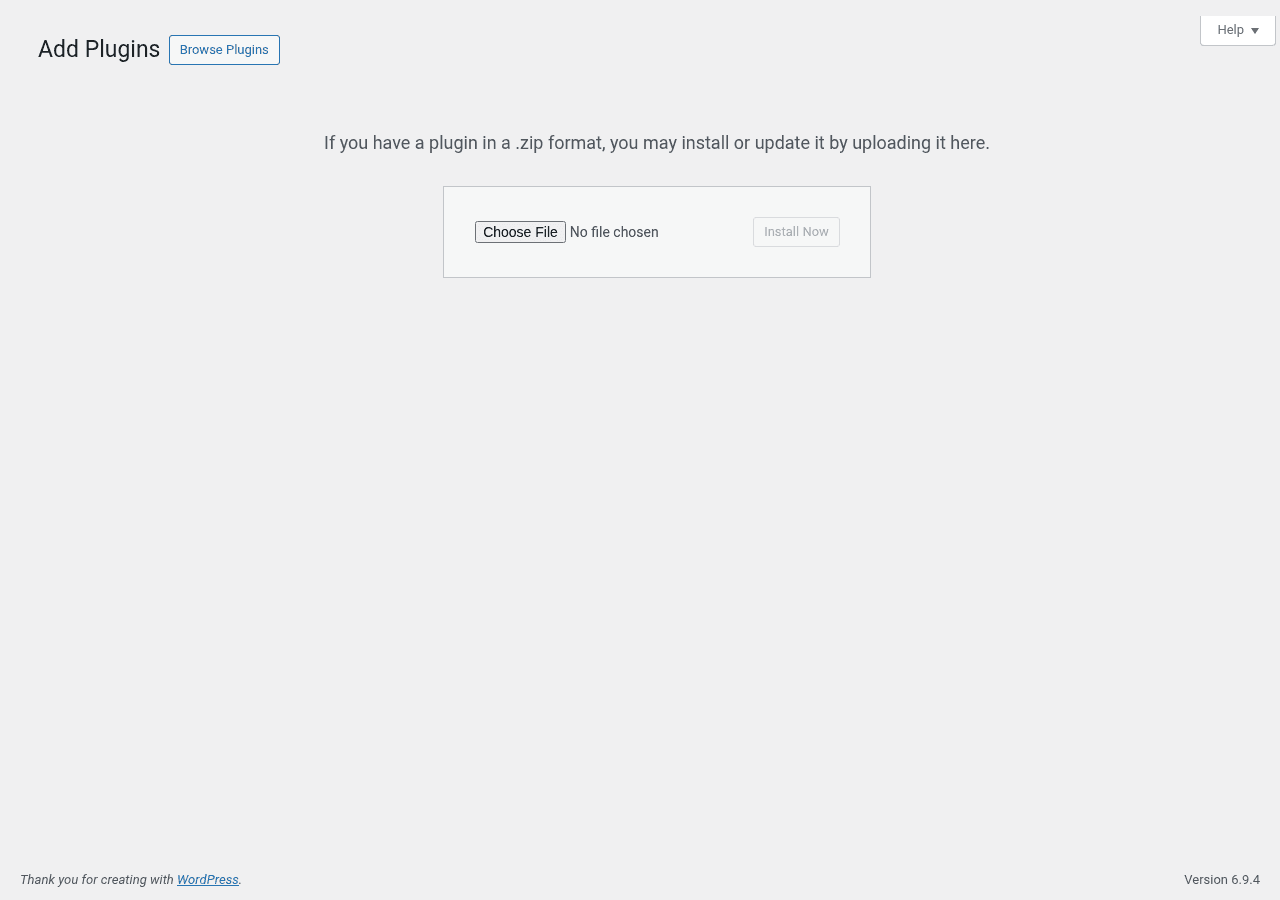
Step 1: Upload the Plugin
- In your WordPress admin, go to Dashboard > Plugins > Add New.
- Click Upload Plugin at the top of the page.
- Choose the Pretty Links Pro ZIP file you downloaded and click Install Now.
- When the upload finishes, click Activate Plugin.
You’ll see a new Pretty Links menu item appear in your WordPress sidebar.
Step 2: Activate Your License Key
Your license unlocks Pro features and lets your site receive automatic updates whenever a new version is released.
- Go to Dashboard > Pretty Links > Options.
- Click the License tab.
- Paste your license key into the field.
- Click Activate.
After a moment, the page will refresh and show your license as Active, along with the plan tier you’re on (Beginner, Marketer, or Super Affiliate) and the date your license expires.
Step 3: Verify Activation
You can confirm everything’s working in a few ways:
- The License tab shows a green active status with your plan name;
- The Dashboard > Pretty Links > Dashboard screen loads with no warning banners about an inactive license;
- Add-ons that match your plan tier appear under Dashboard > Pretty Links > Add-ons as available to install.
Troubleshooting
License key won’t activate. Double-check there are no extra spaces before or after the key when you paste it. Confirm the key matches the site URL you’re activating on — each license is tied to a specific number of sites.
“Pretty Links” menu didn’t appear. Make sure you clicked Activate Plugin after the upload completed. Visit Dashboard > Plugins > Installed Plugins and confirm Pretty Links Pro shows as active.
Updates aren’t showing up. Updates only flow to sites with an active license. If your license recently expired or was deactivated, renew or reactivate it on the License tab.
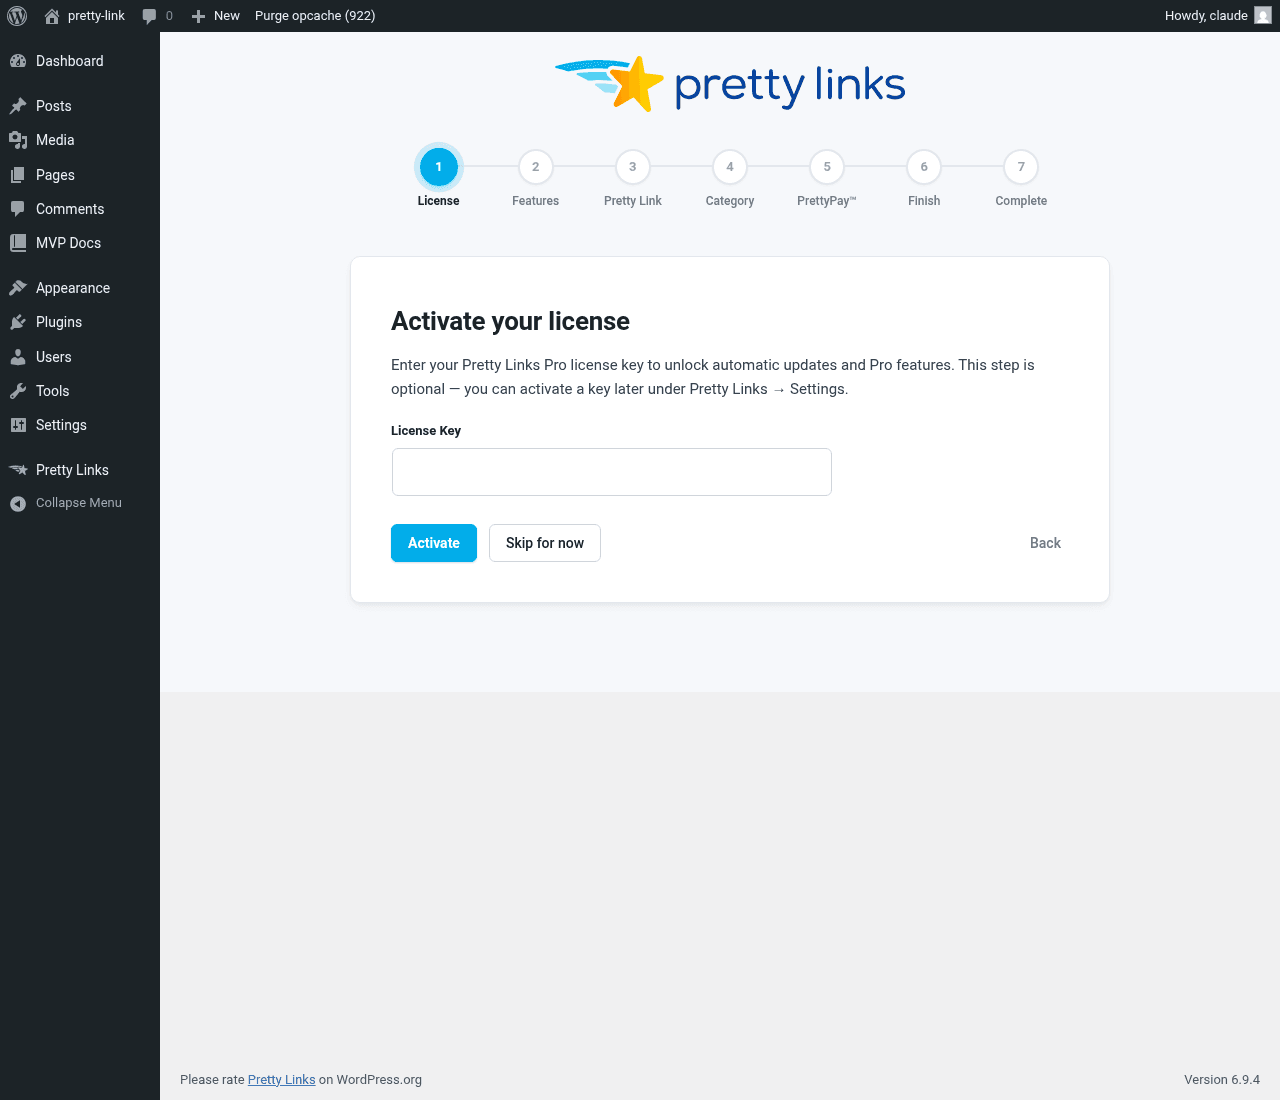
Once your license is active, the Onboarding Wizard launches automatically to walk you through the rest of setup.