Overview
The Link Health feature in PrettyLinks allows you to be easily and quickly notified when links on your site are broken. When enabled, PrettyLinks will scan all of the links on your site to ensure they’re reachable by your users. If a link is broken, then you’ll be notified on the PrettyLinks page but you can also be notified of broken links through email.
Video Tutorial
Getting Started with Link Health
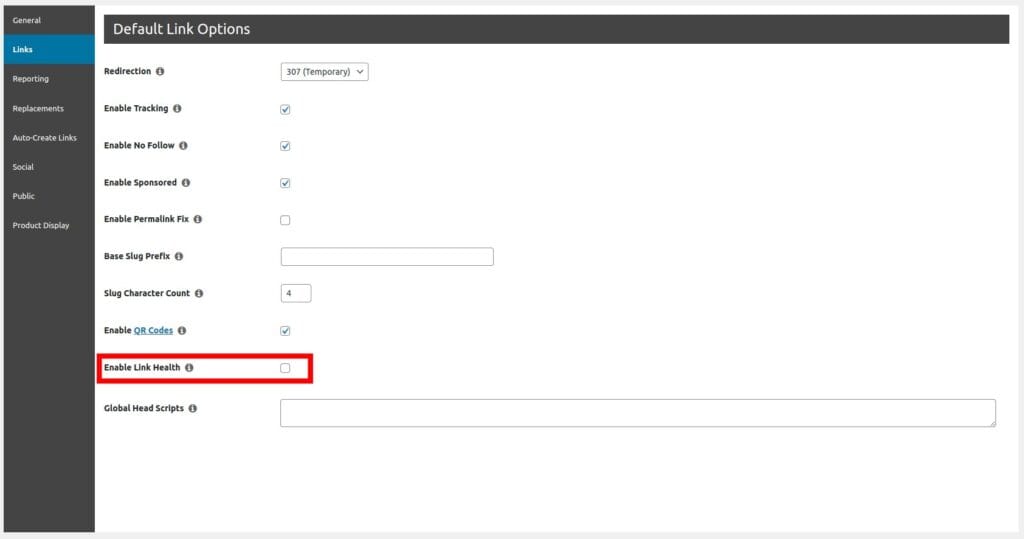
Getting started with Link Health is as simple as enabling an option in PrettyLinks. To enable Link Health, log into your WordPress dashboard and go to PrettyLinks > Options > Links and click the “Enable Link Health” option:
That’s it, you’re done! Just save the settings and you’ll be good to go. However, if you want to be notified of broken links through email as well (which we recommend) then you can enable the Link Health Emails option displayed underneath the Link Health option.
When the Link Health Emails option has been enabled, you’ll see an option underneath it where you can enter one or more comma-separated email addresses that will receive the emails. This will default to the email address entered under your WordPress Admin > Settings > General> Administration Email Address:

Using Link Health
Link Health will prioritize links that are actively getting clicks on your site so you’re notified about them first. Each link will be checked once a week, and if a link is marked as broken then the “Status” column will show as “Broken” on the PrettyLinks page:
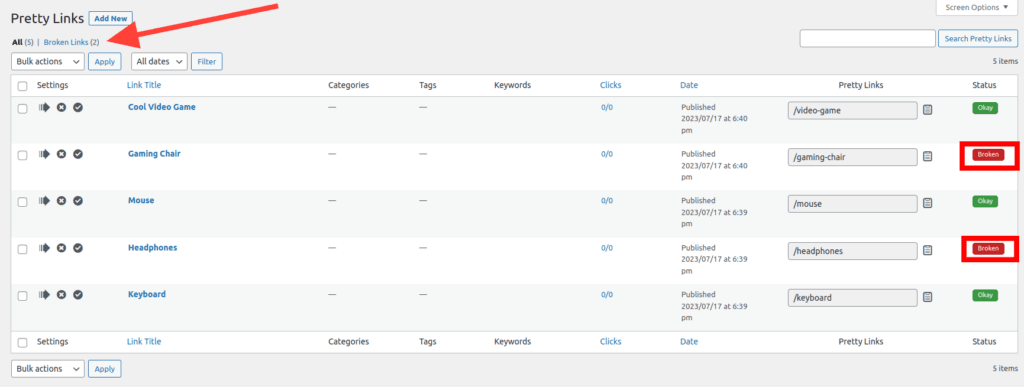
Near the top of the PrettyLinks page, you’ll also see a “Broken Links” link that you can use to filter by broken links only. Whenever the broken link’s Target URL has been changed, PrettyLinks will immediately re-check the link.
If you have Link Heath Emails enabled, then you’ll also be notified each week about your broken links. The email will include the number of broken links on your site and a link where you can go to quickly fix them.
NOTE: Link Health checks your links and sends out emails in the backend through WP Cron, so please ensure that WP Cron is functioning correctly on your site before enabling it.