With Pretty Links, you can add Product Displays to your affiliate links. This add-on allows you to showcase products and embed product displays anywhere on your site. Each product display can contain multiple buttons for different affiliate links related to the same product, images, descriptions, and pricing information.
Furthermore, you can increase engagement by adding badges to your product displays or additional buttons to a reviews page.
This document will explain how to install the add-on and how to create and use Product Displays on your website.
Install and Active the Product Displays Add-on
To start with, you’ll need first to install the Product Displays add-on:
- Navigate your WordPress Dashboard > Pretty Links > Add-ons. If you don’t see this page, you must update to the latest version of the Pretty Links plugin.
- Browse the add-on list to find the add-on, or search for “Product Displays” in the search tool.
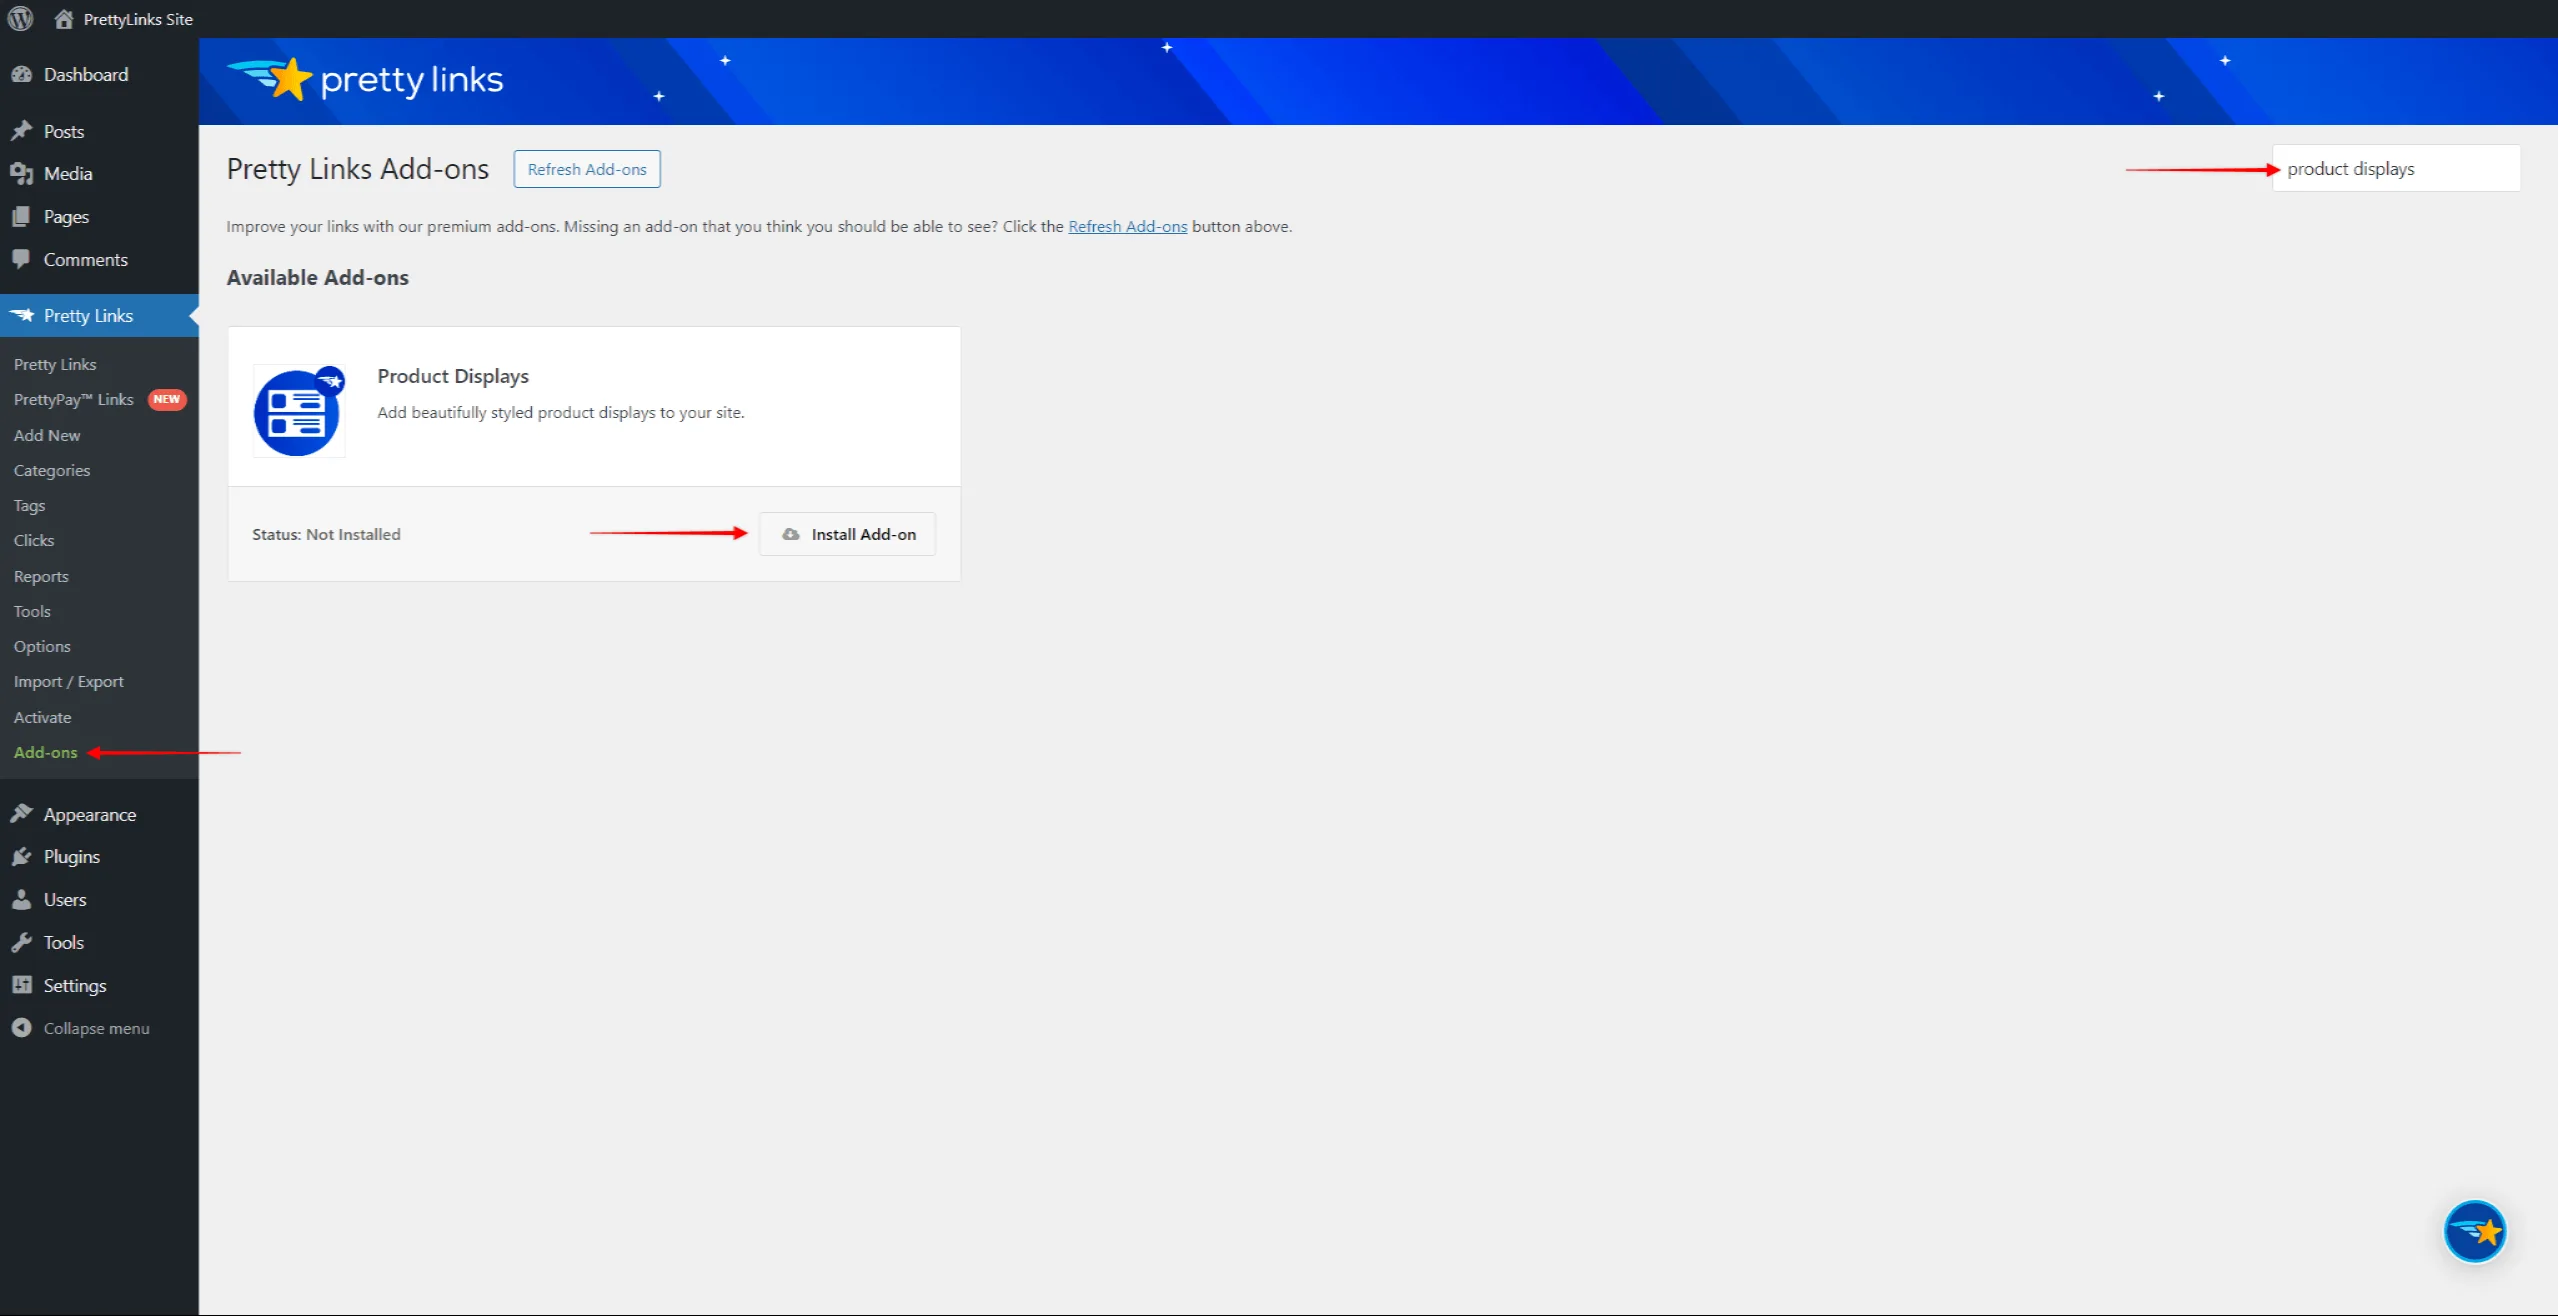
- Click the Install Add-on button to install and activate it.
You can now add and manage your Product Displays at Dashboard > Pretty Links > Product Displays.
Configure Product Displays Settings
Navigate to Dashboard > Pretty Links > Options > Product Displays to find settings for all your Product Displays. The following settings apply to all of your Product Displays:
- Button Background Color – choose the buttons’ background color;
- Button Text Color – choose the buttons’ label text color;
- Button Hover Background Color – choose the buttons’ background color when users hover over them.
- Button Hover Text Color – choose the buttons’ label text color when users hover over them.
- Border Color – choose the buttons’ border color;
- Affiliate Disclosure – add the disclosure text that should be shown on your displays. Usually, this message informs users about your use of the affiliate links and that you’ll receive compensation for each sale;
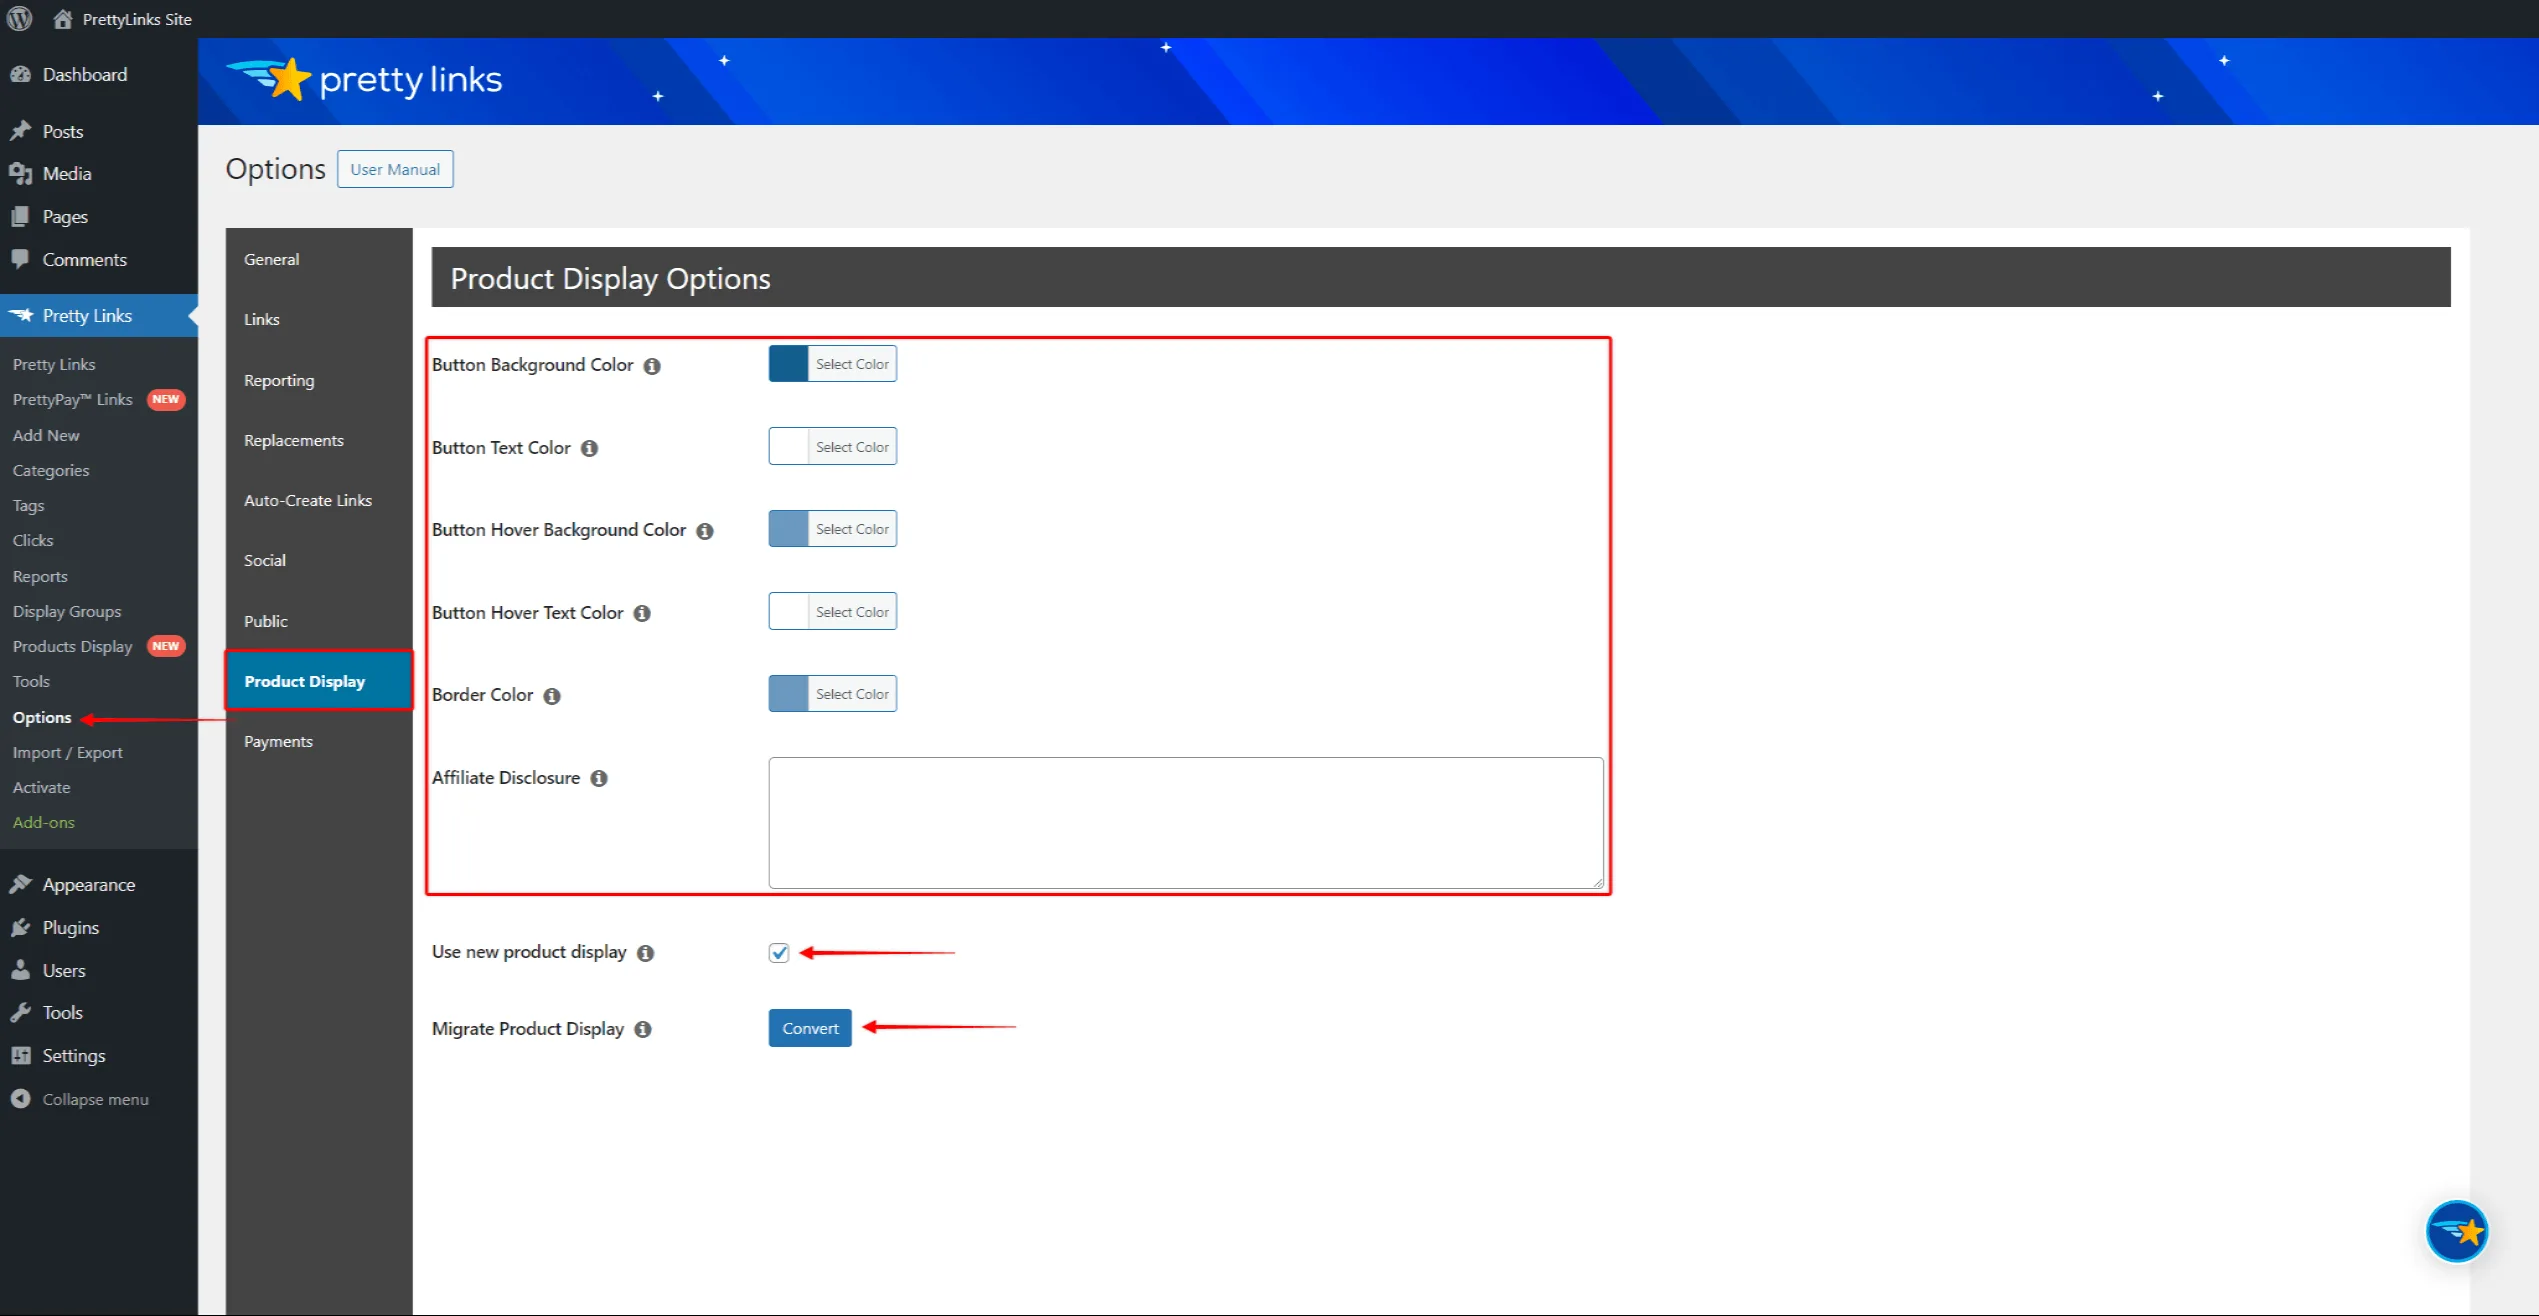
Additionally, if you used Product Displays before version 2.0, there are two additional options:
- Use new product display – this option will be enabled by default, applying the new Product Display features and UI
- Migrate Product Display – click the Convert button if you have any issues with your existing product displays created with older add-on versions.
Using Product Displays With Pretty Links
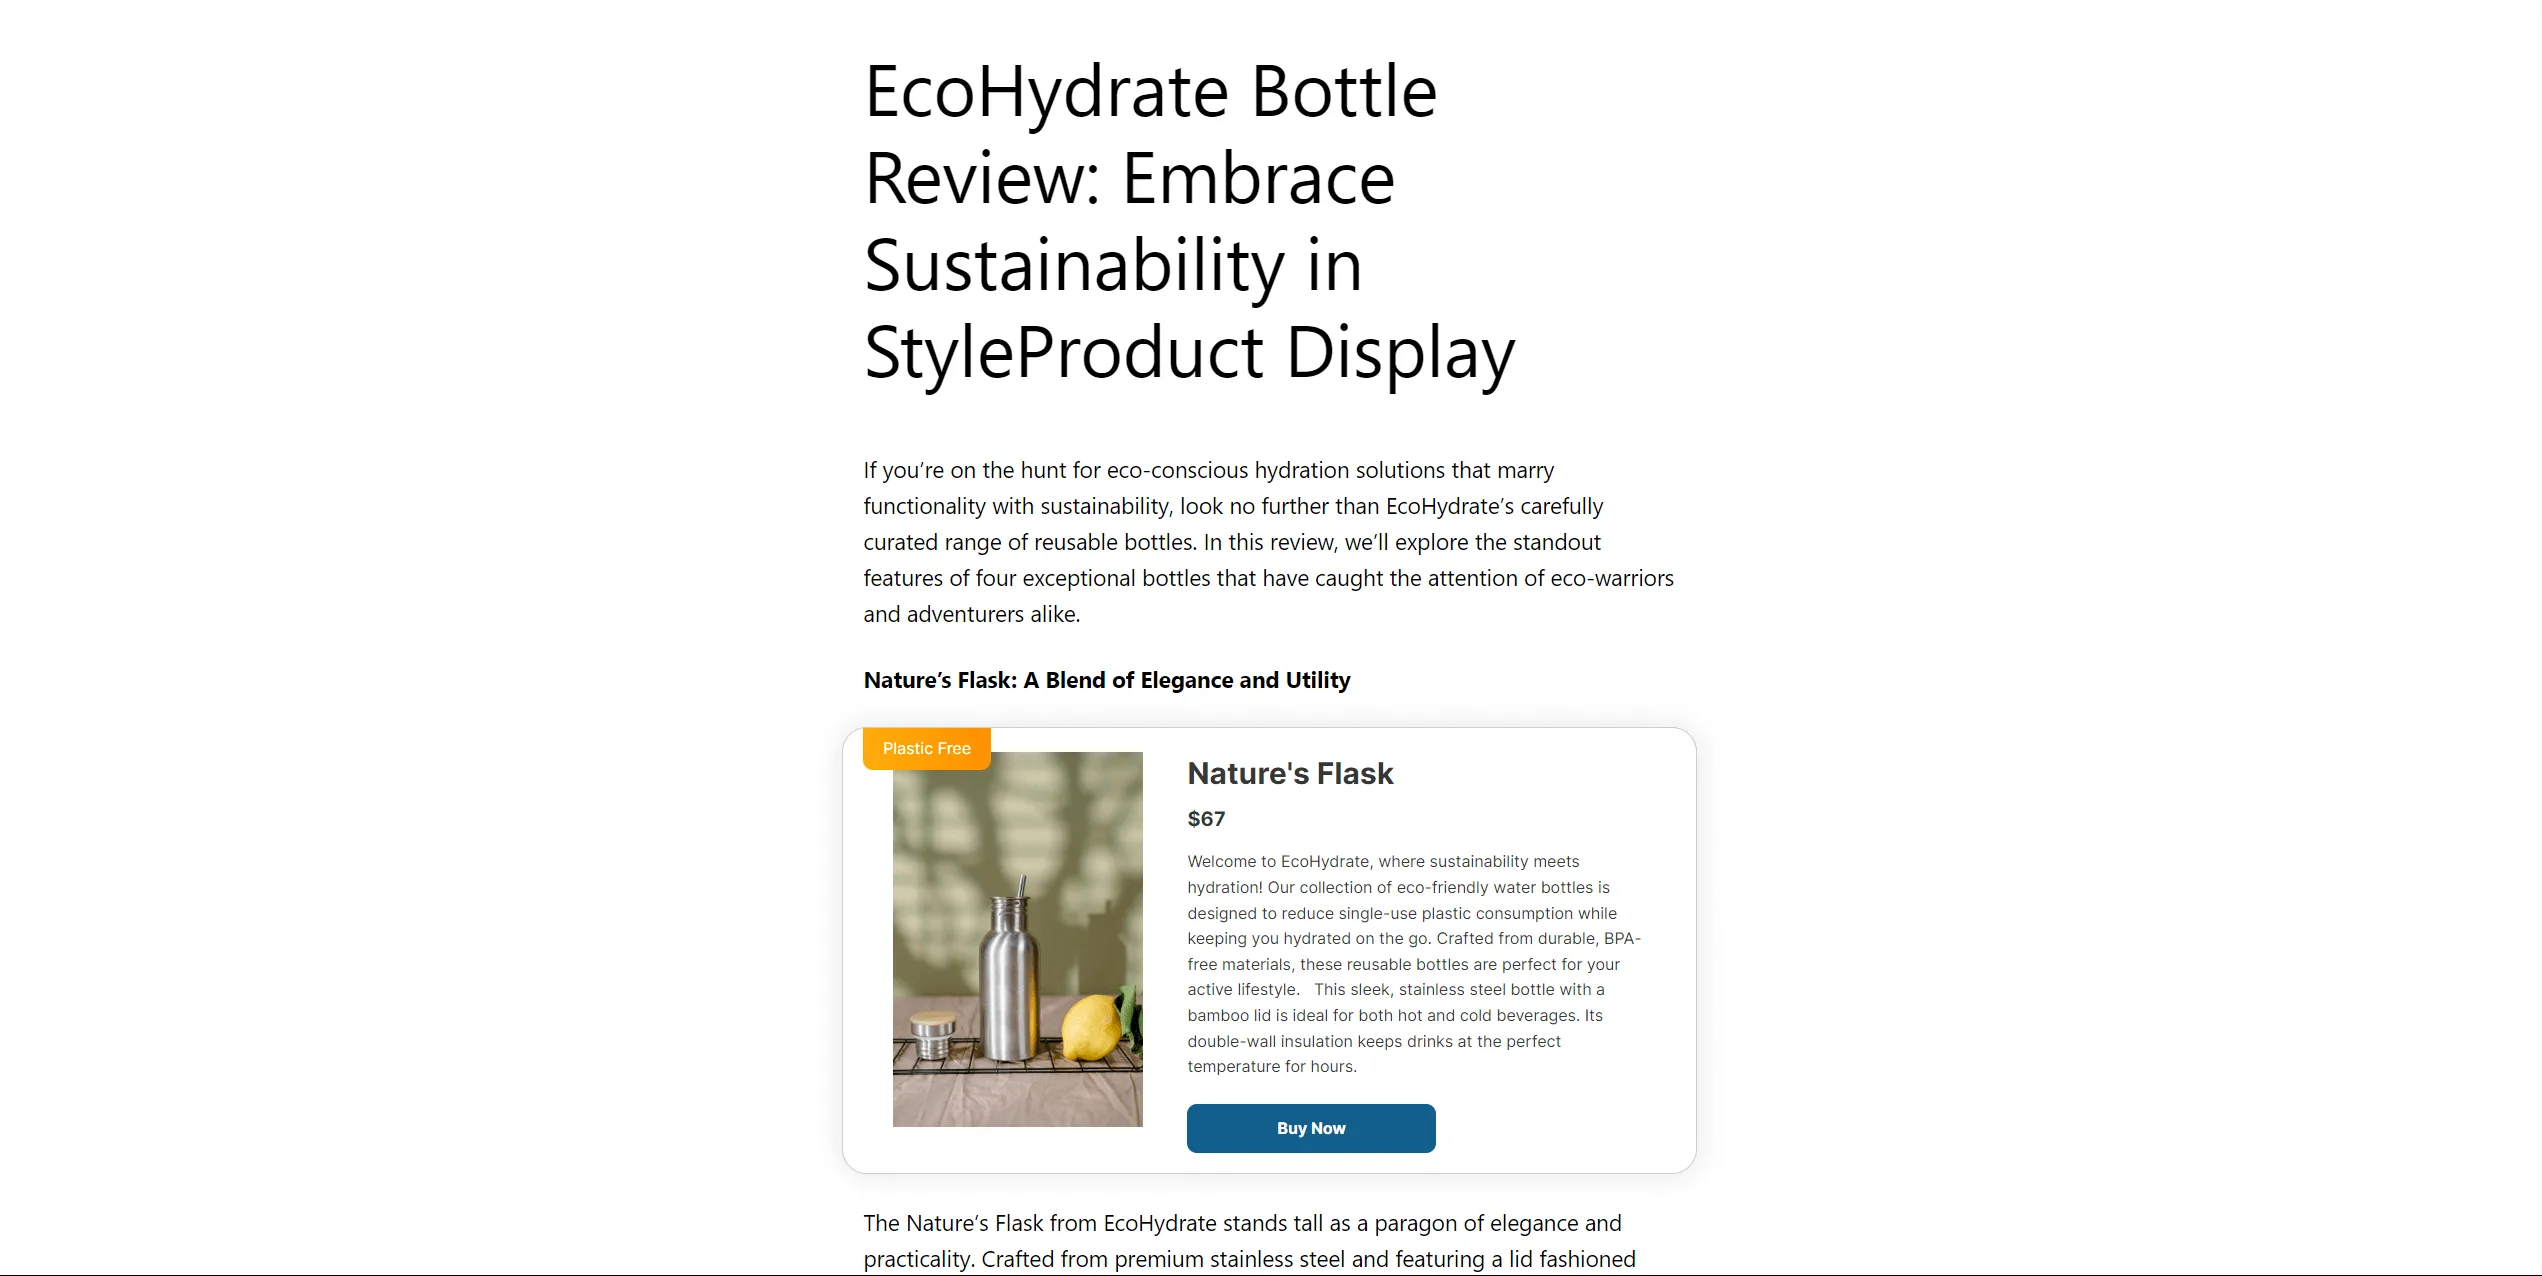
Product displays simplify showcasing products on your website. Embedding product displays into your content will instantly show product images, descriptions, prices, and call-to-action buttons.
Allowing visitors to explore products and initiate purchases from your content using product displays could increase sales and, thus, commissions.
How to Create Product Displays With Pretty Links
Product Displays can be added to published Pretty Links. Once you create a Pretty Link, follow these steps to create a new Product Display for the link:
- Navigate to Dashboard > Pretty Links > Pretty Links.
- Hover over your Pretty Link, and click on Edit.
- Under the Product Display menu option, click the Add Product Display button.
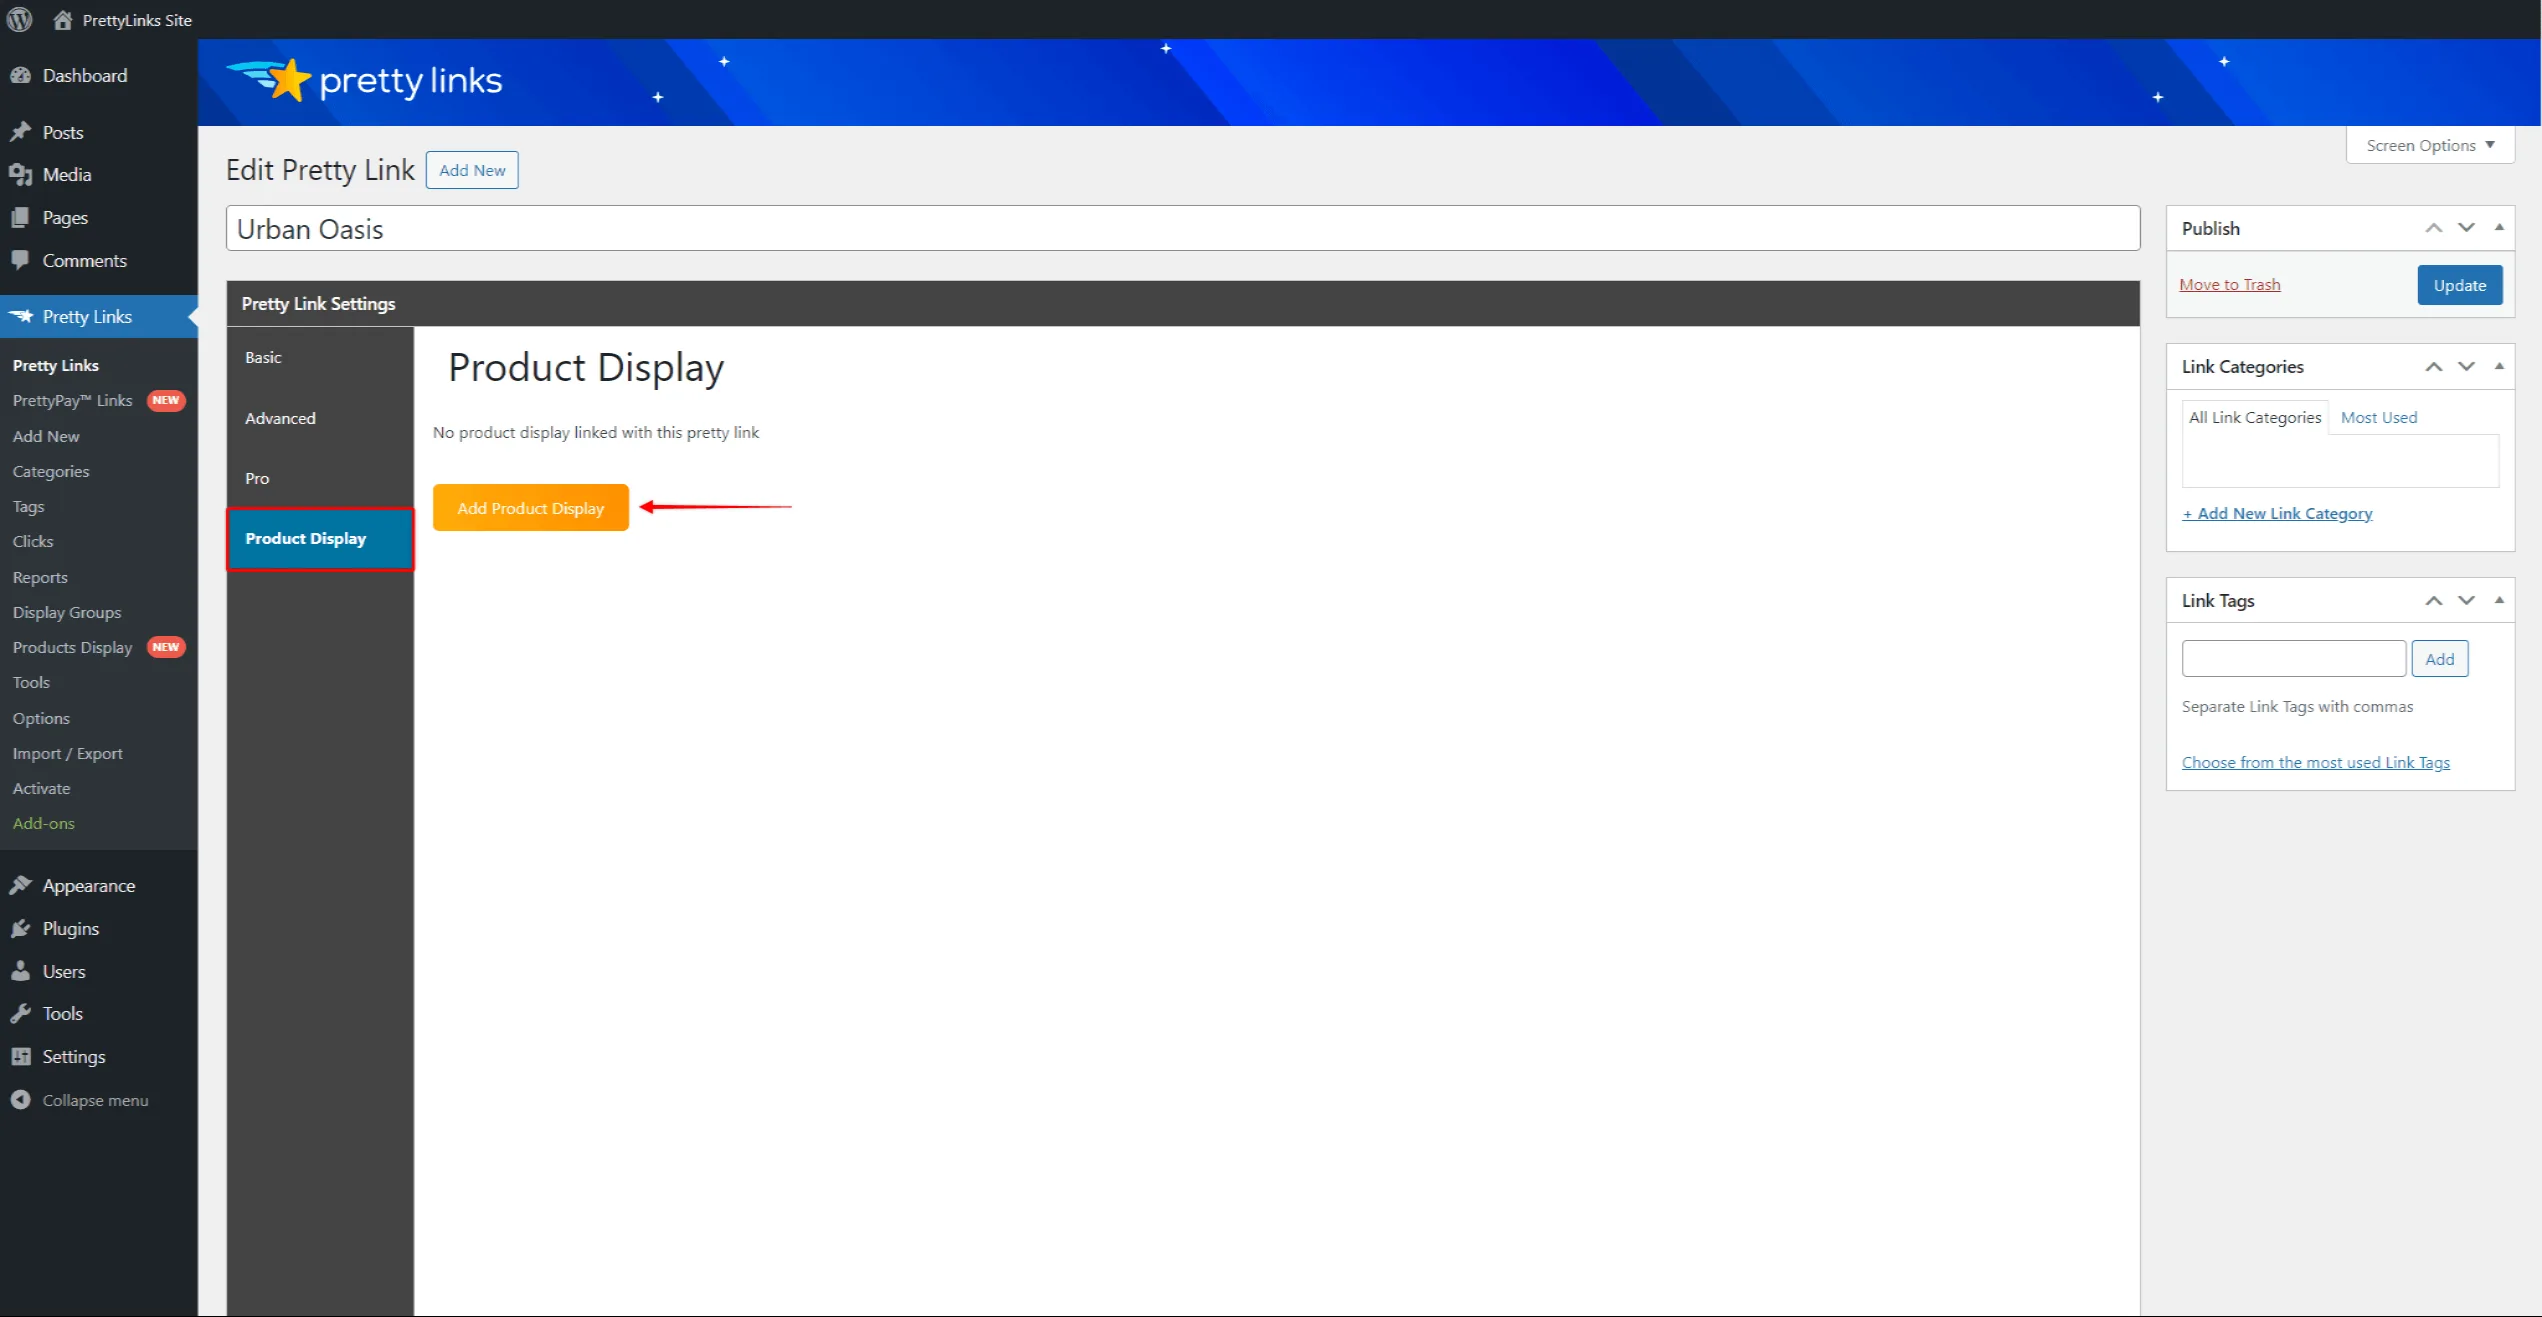
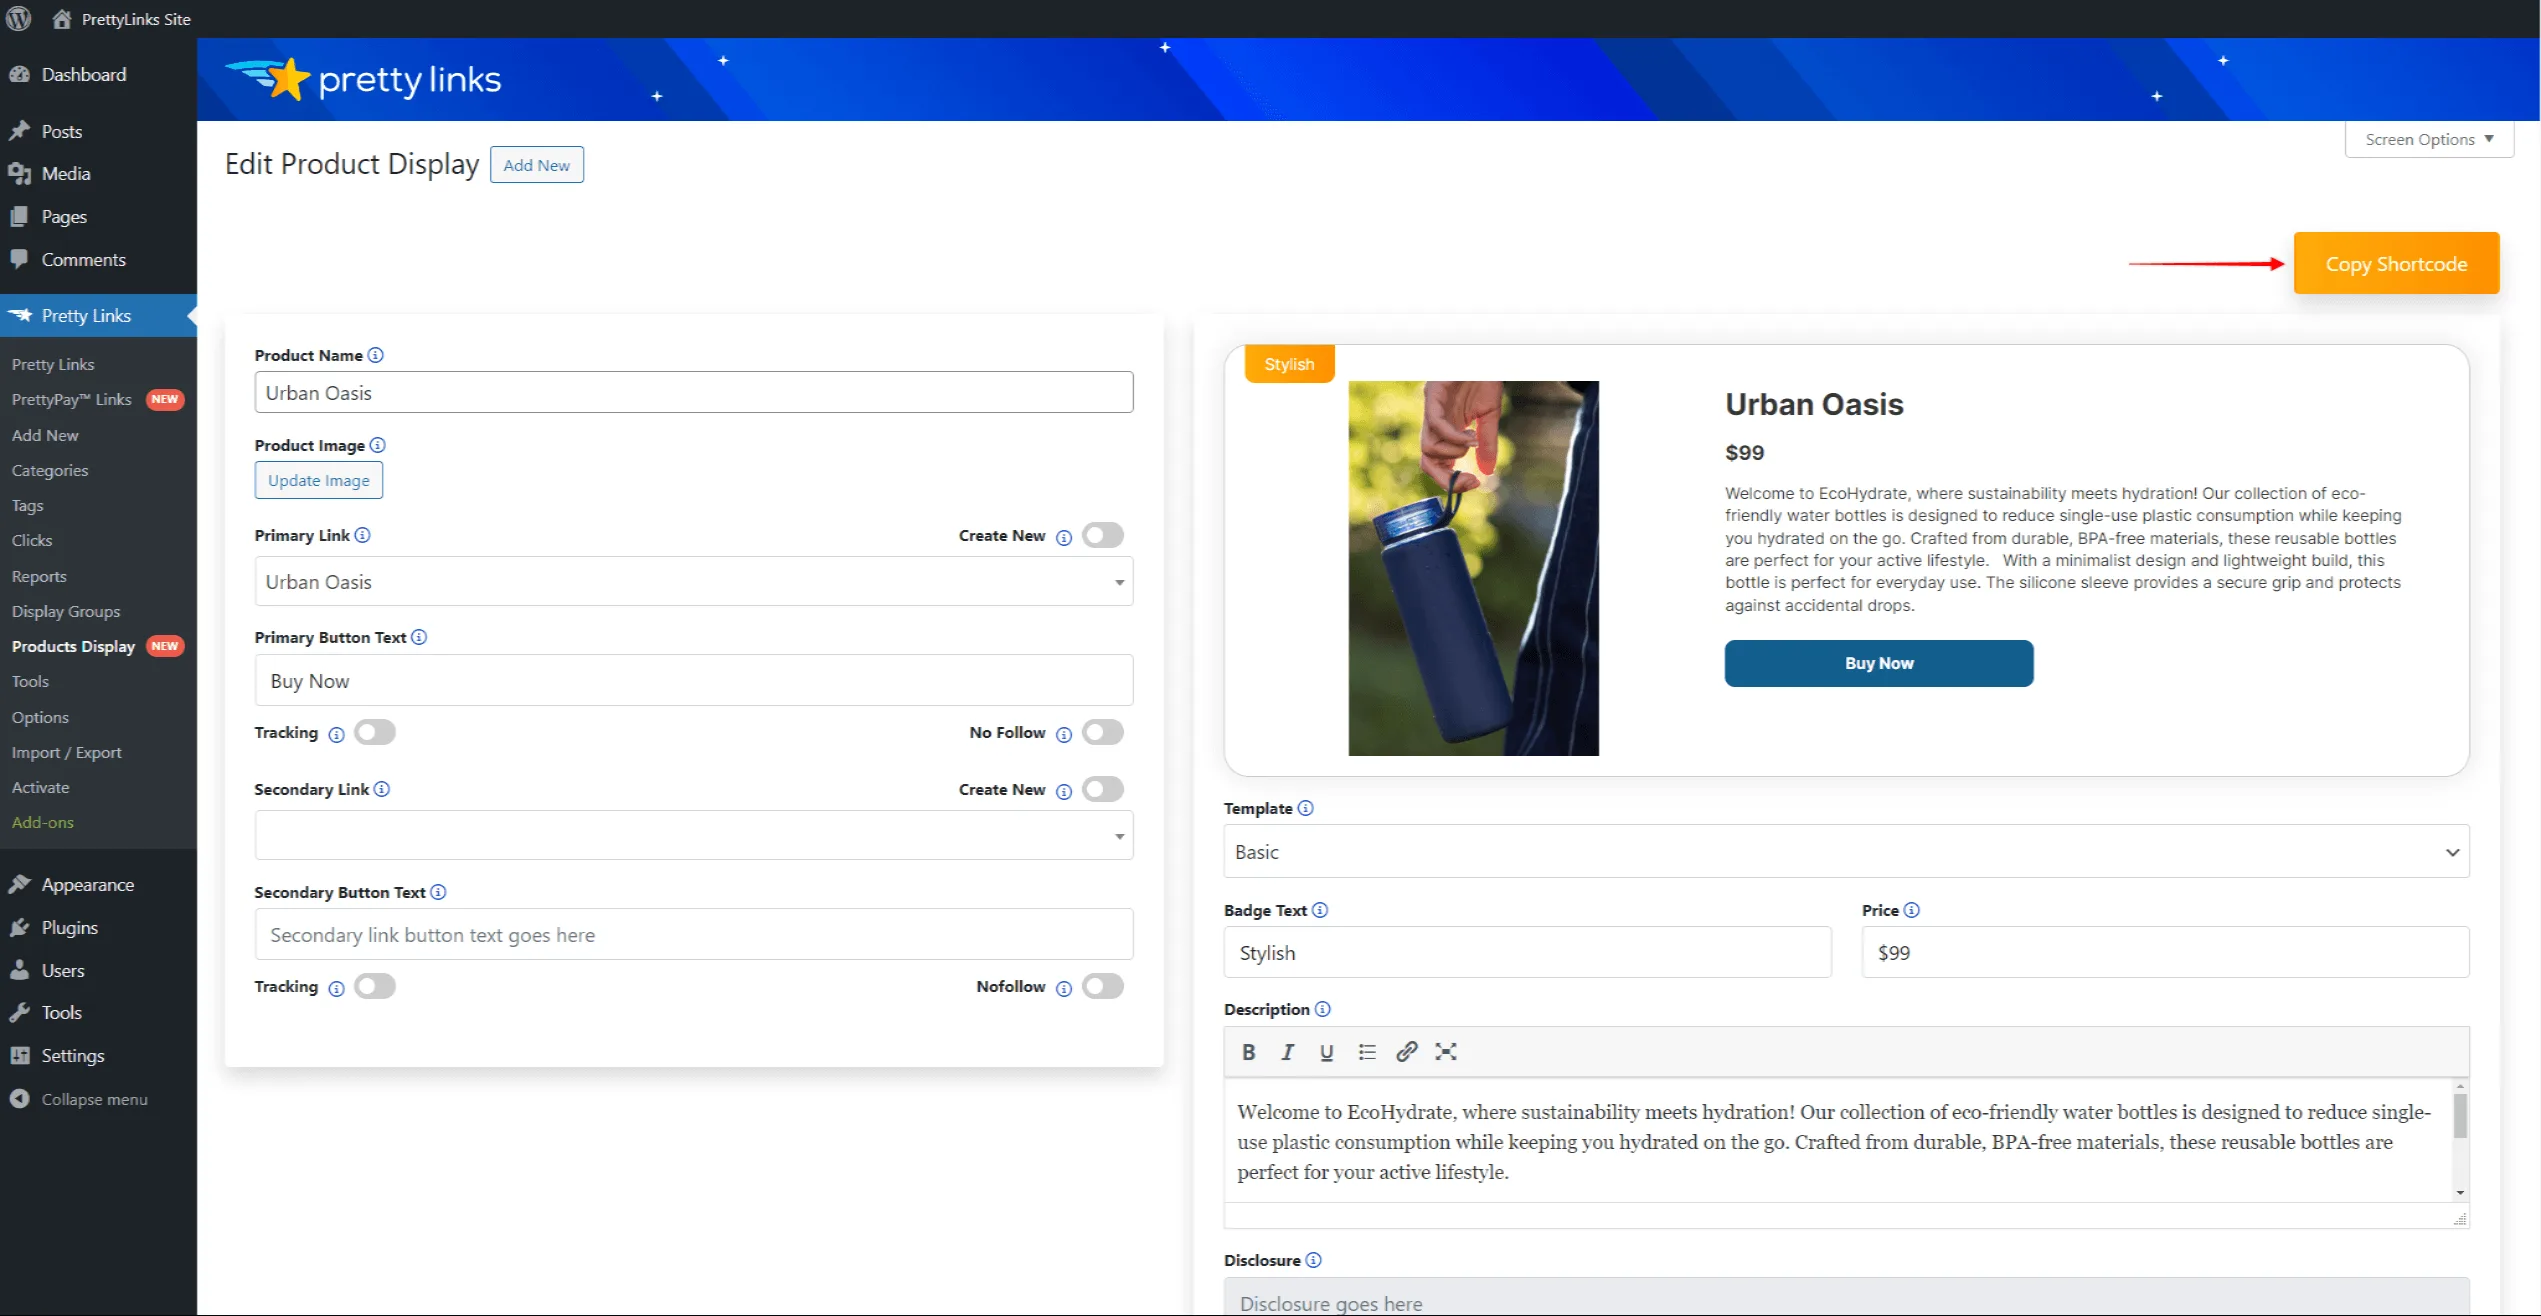
- A new product display will be automatically created and saved as a draft. Next, apply your product display data:
- Product Name – add the product name. By default, the product display will be created with the same product name as your Pretty Link;
- Product Image – add the product image. This will open a popup where you can upload an image or select one from your media library. Click Use this image to add it as your product image;
- Primary Link – link a product display to a pretty link. By default, your pretty link will be automatically added to this field. Otherwise, you can click on the link field and search for existing pretty links;
- Create New – toggling on this option will allow you to link the Primary button to a custom URL;
- Primary Button Text – edit the label of the primary button. The default label is “Buy Now”;
- Primary Button Tracking – toggling on the Tracking option will enable the Pretty Link click tracking;
- Primary Button No Follow: toggling this on will add the nofollow and index to the redirection header of the primary button link;
- Secondary Link and Button Options: You can also add an additional secondary button with a link to another pretty link or the custom URL. The secondary button comes with the same options as the Primary button;
- Template: select your desired product display template from the available options: Basic, Sirius, Pollux, Vega, Epsilon or Zuben.
- Badge Text: add a custom badge to your Product Display;
- Price: you can also add the price of a product;
- Description: Type in the product description in the field. This description will appear next to the product image;
- Disclosure: add your custom disclosure message for this product;
- Show Disclosure: choose whether the Disclosure should be visible on this product display or not;
- Default Disclosure: use the default disclosure message for this product;
- New Tab: toggle on this option to open this product display links in the new tab.
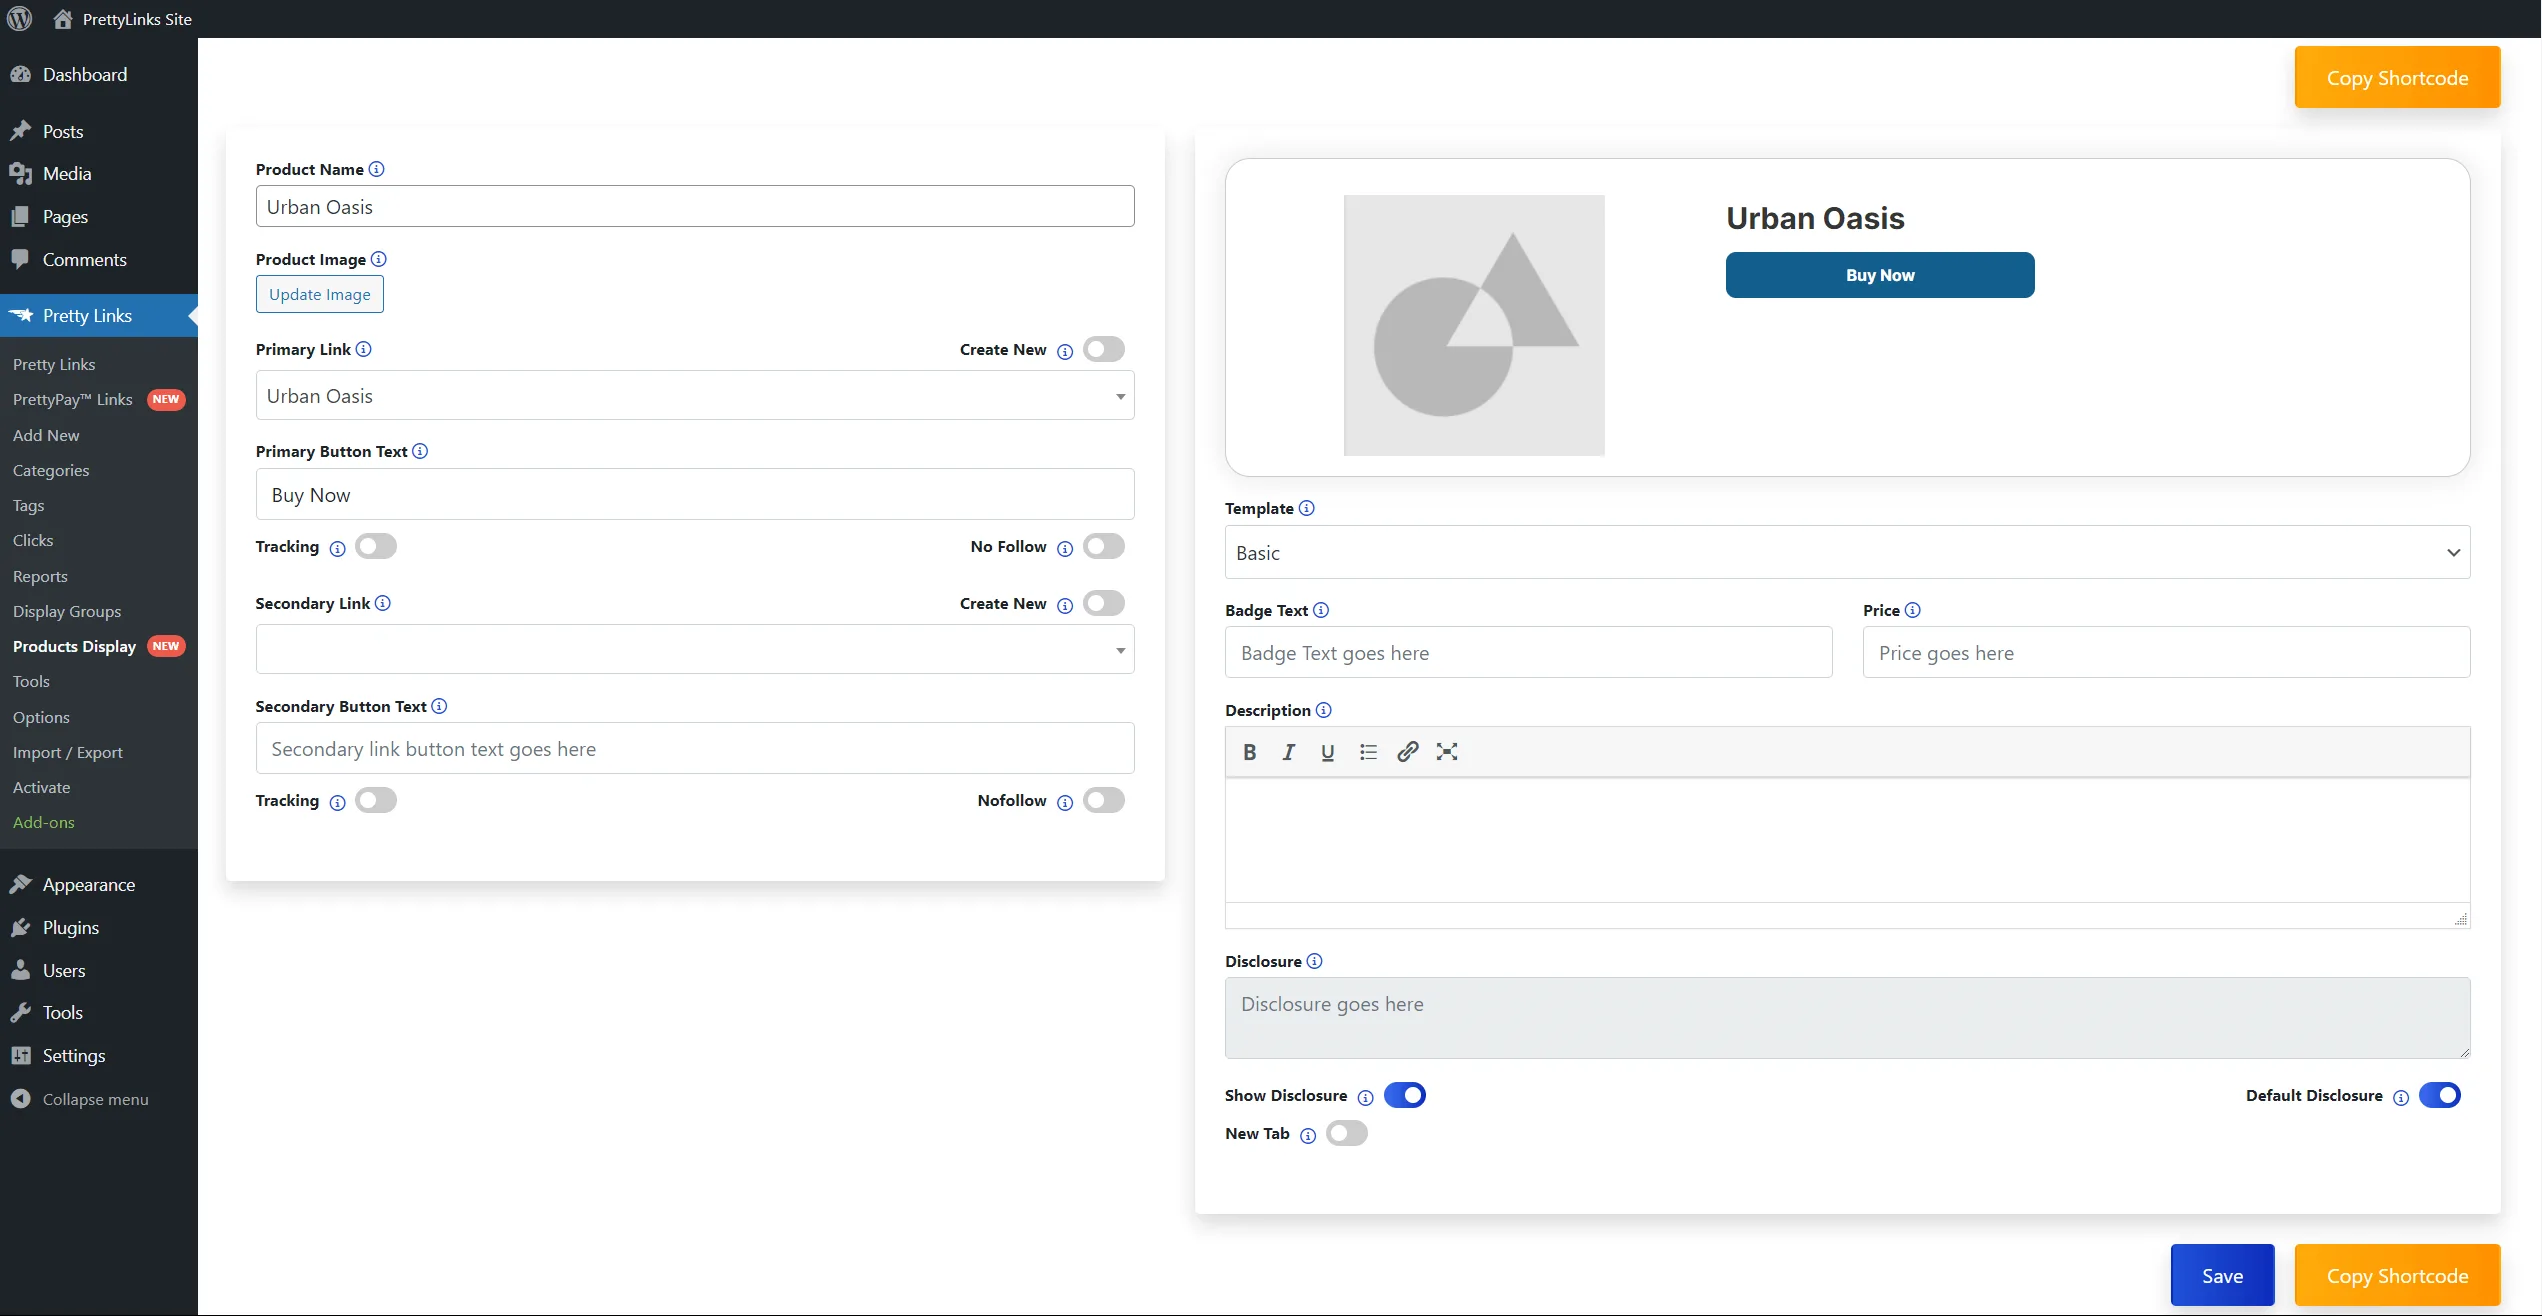
- Click the Save button to save the product display.
Assigning Existing Pretty Links To Product Displays
Instead of creating product displays with new pretty links, you can create product displays independently and assign the links afterward:
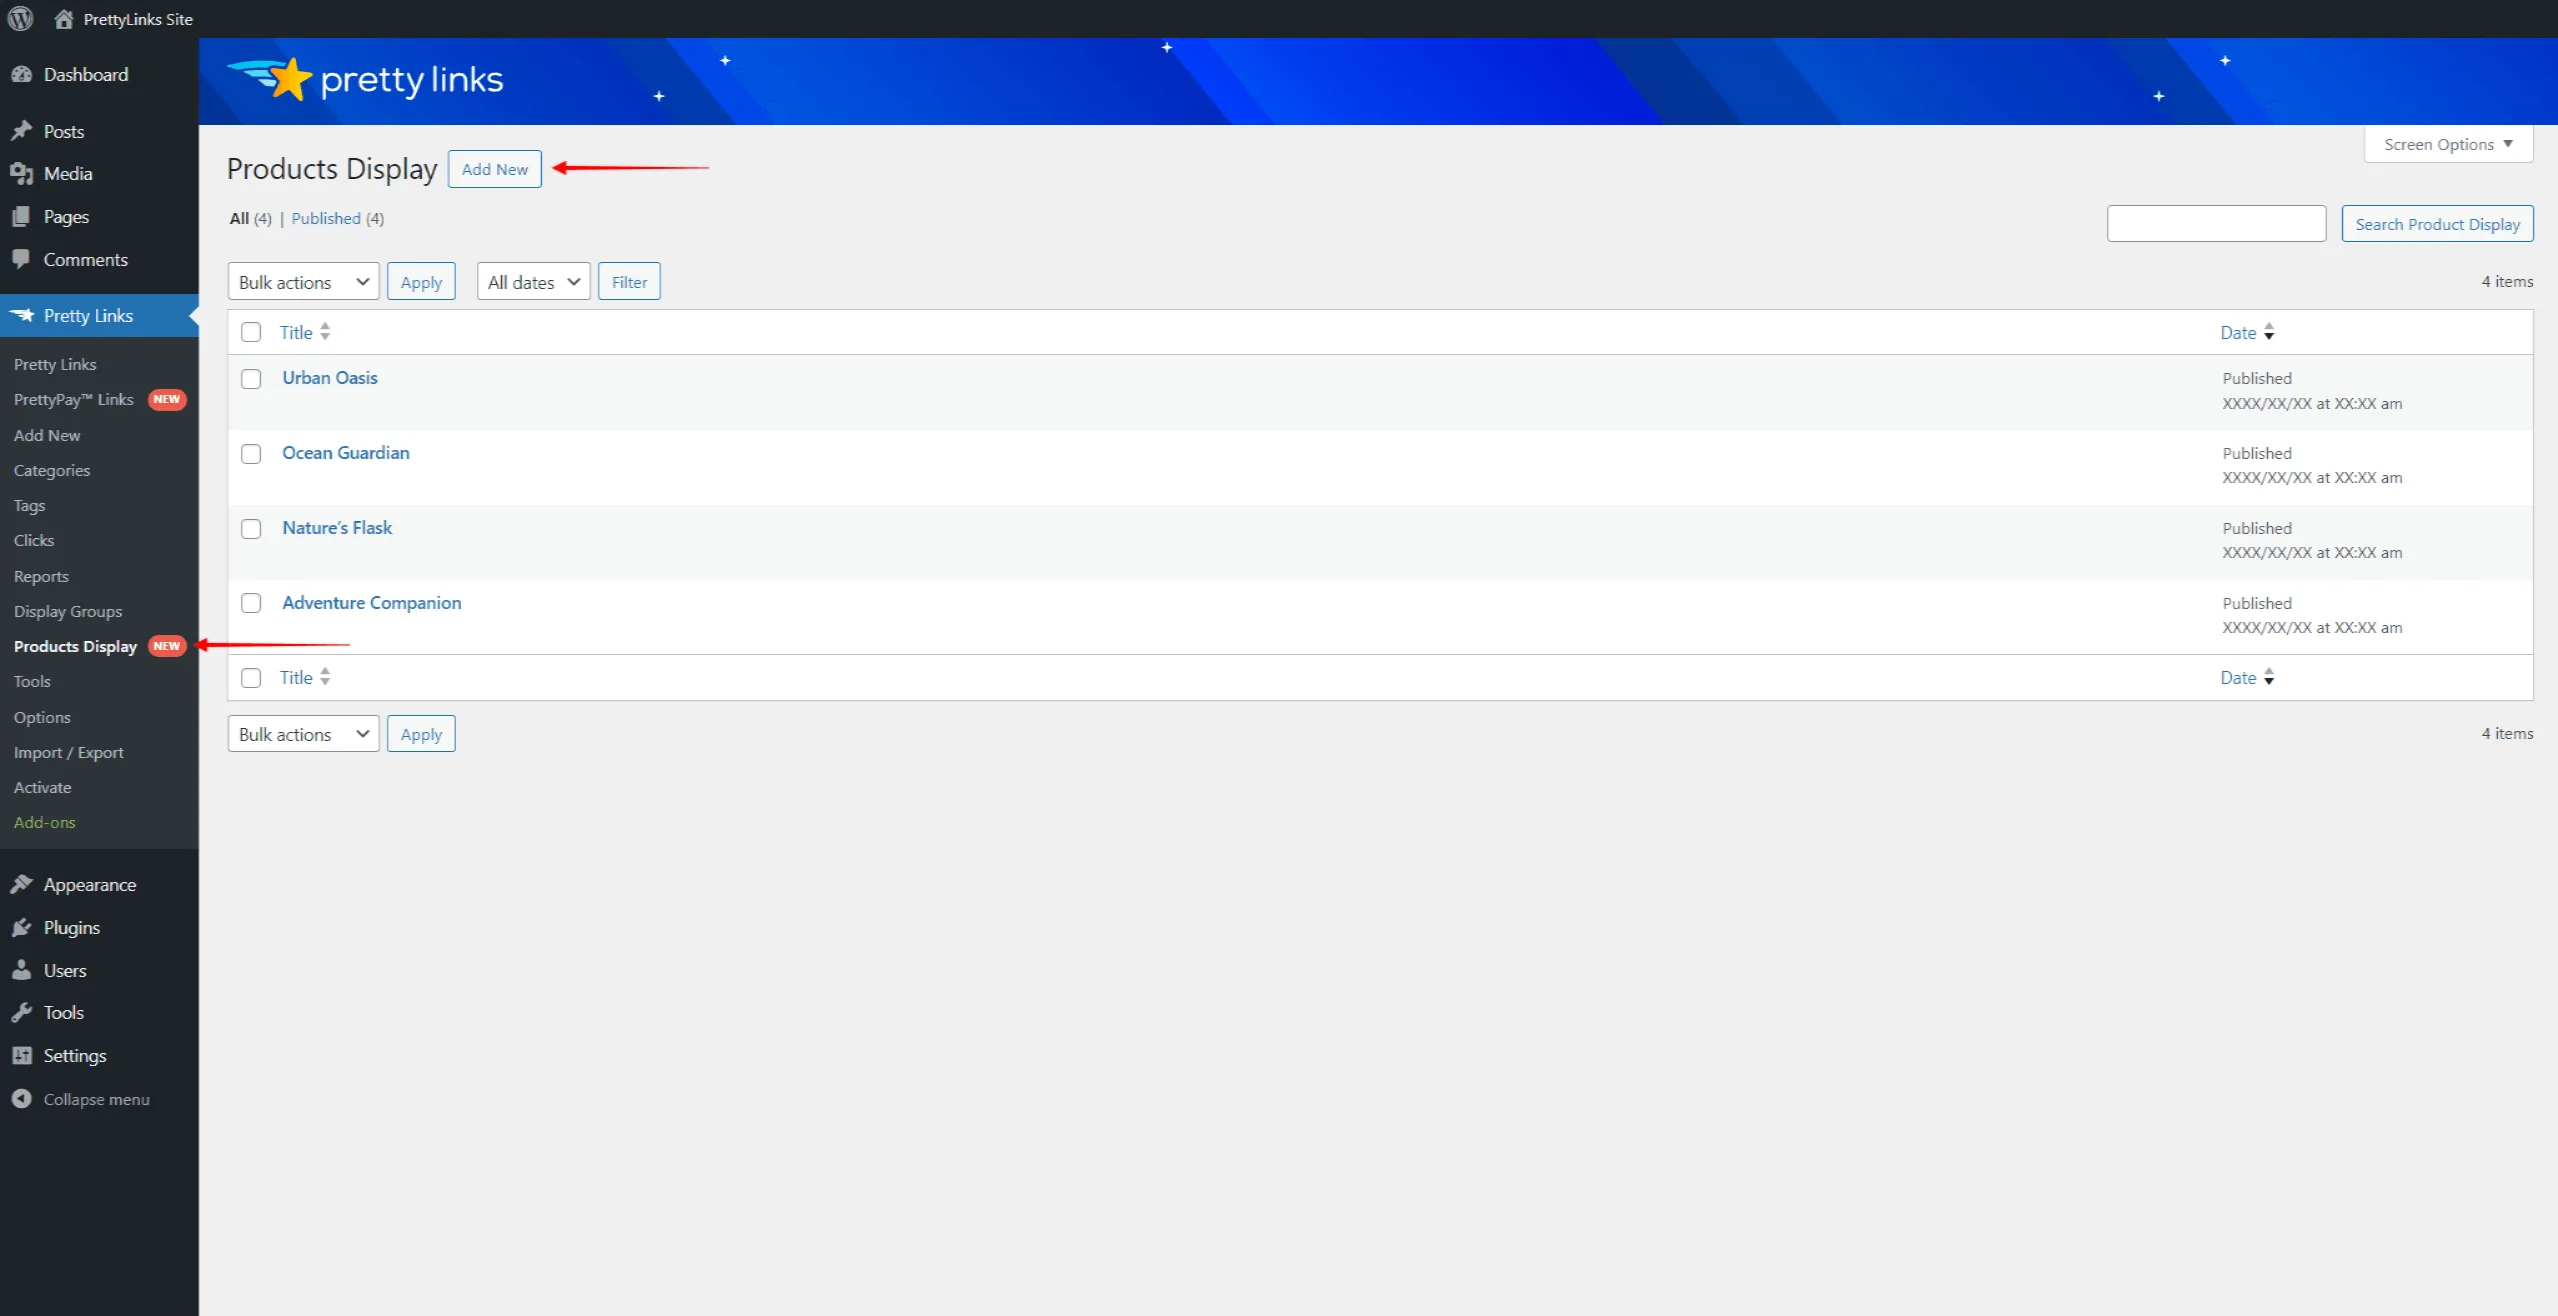
- Navigate to Dashboard > Pretty Links > Products Display.
- Click the Add New button.
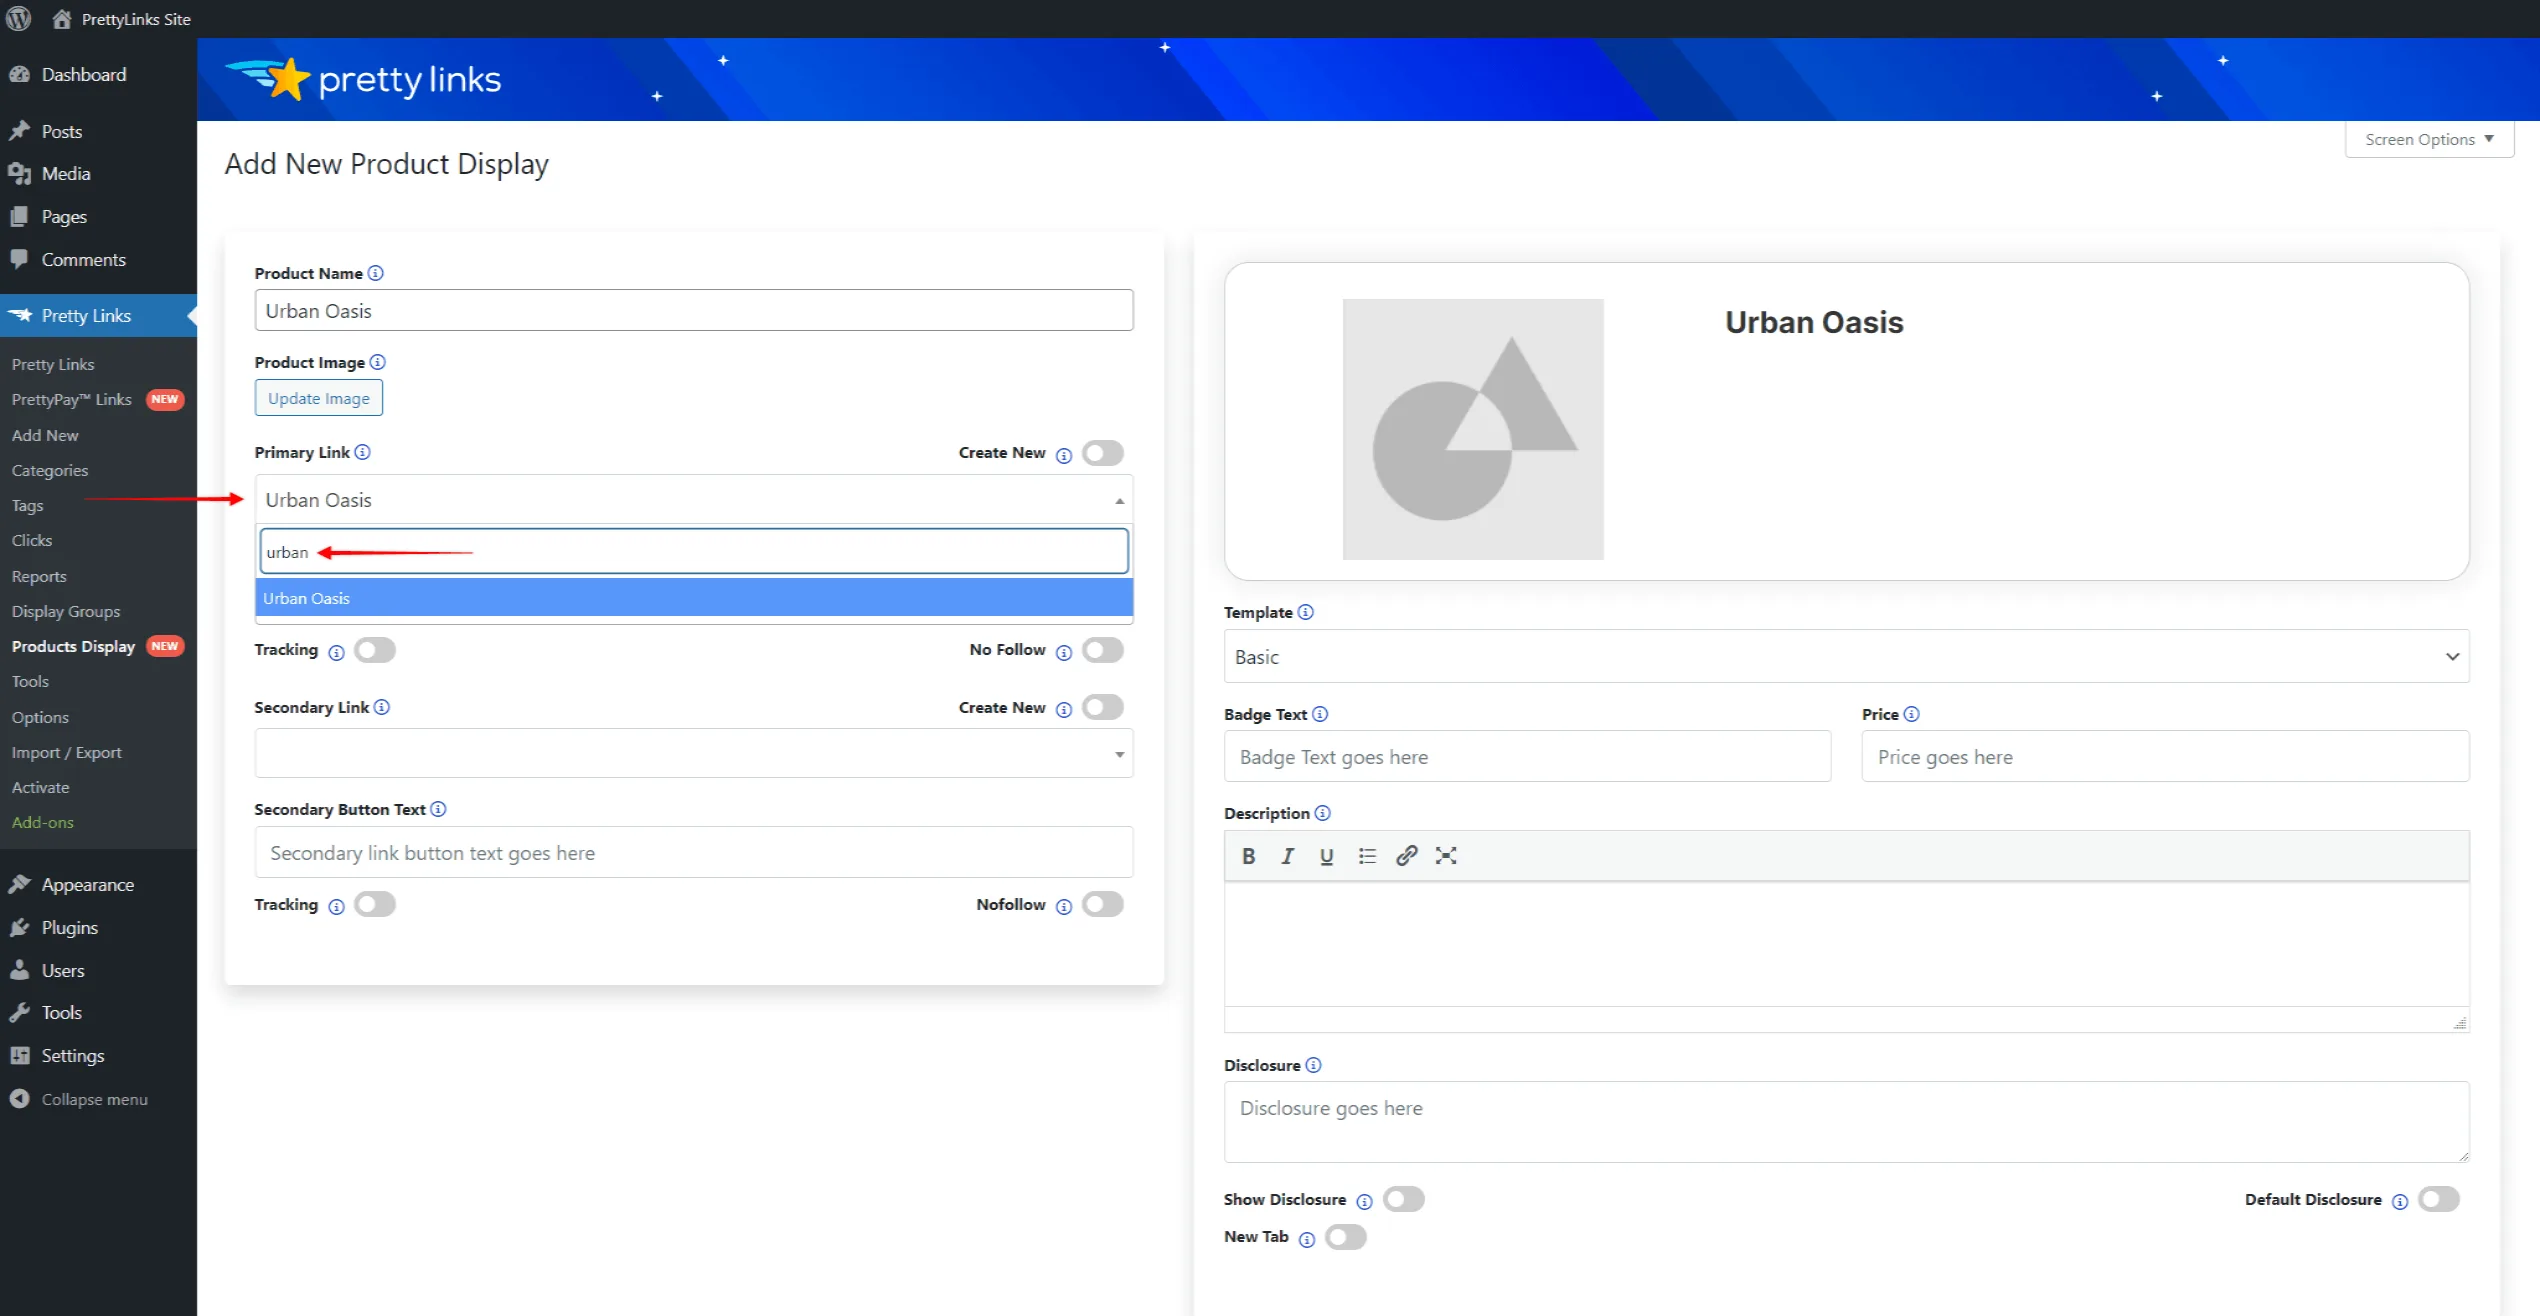
- Add your product display data as previously described. When setting Primary and Secondary links, you can create the product display without adding links. You can add these links whenever you want.
- Click the Save button to save the product display.
To assign an existing pretty link to this product display, follow these steps:
- Navigate back to Dashboard > Pretty Links > Products Display.
- Find your product display, hover over it, and click on Edit.
- Click on the Primary link field and start typing the name of the pretty link you wish to add.
Creating a Display Group
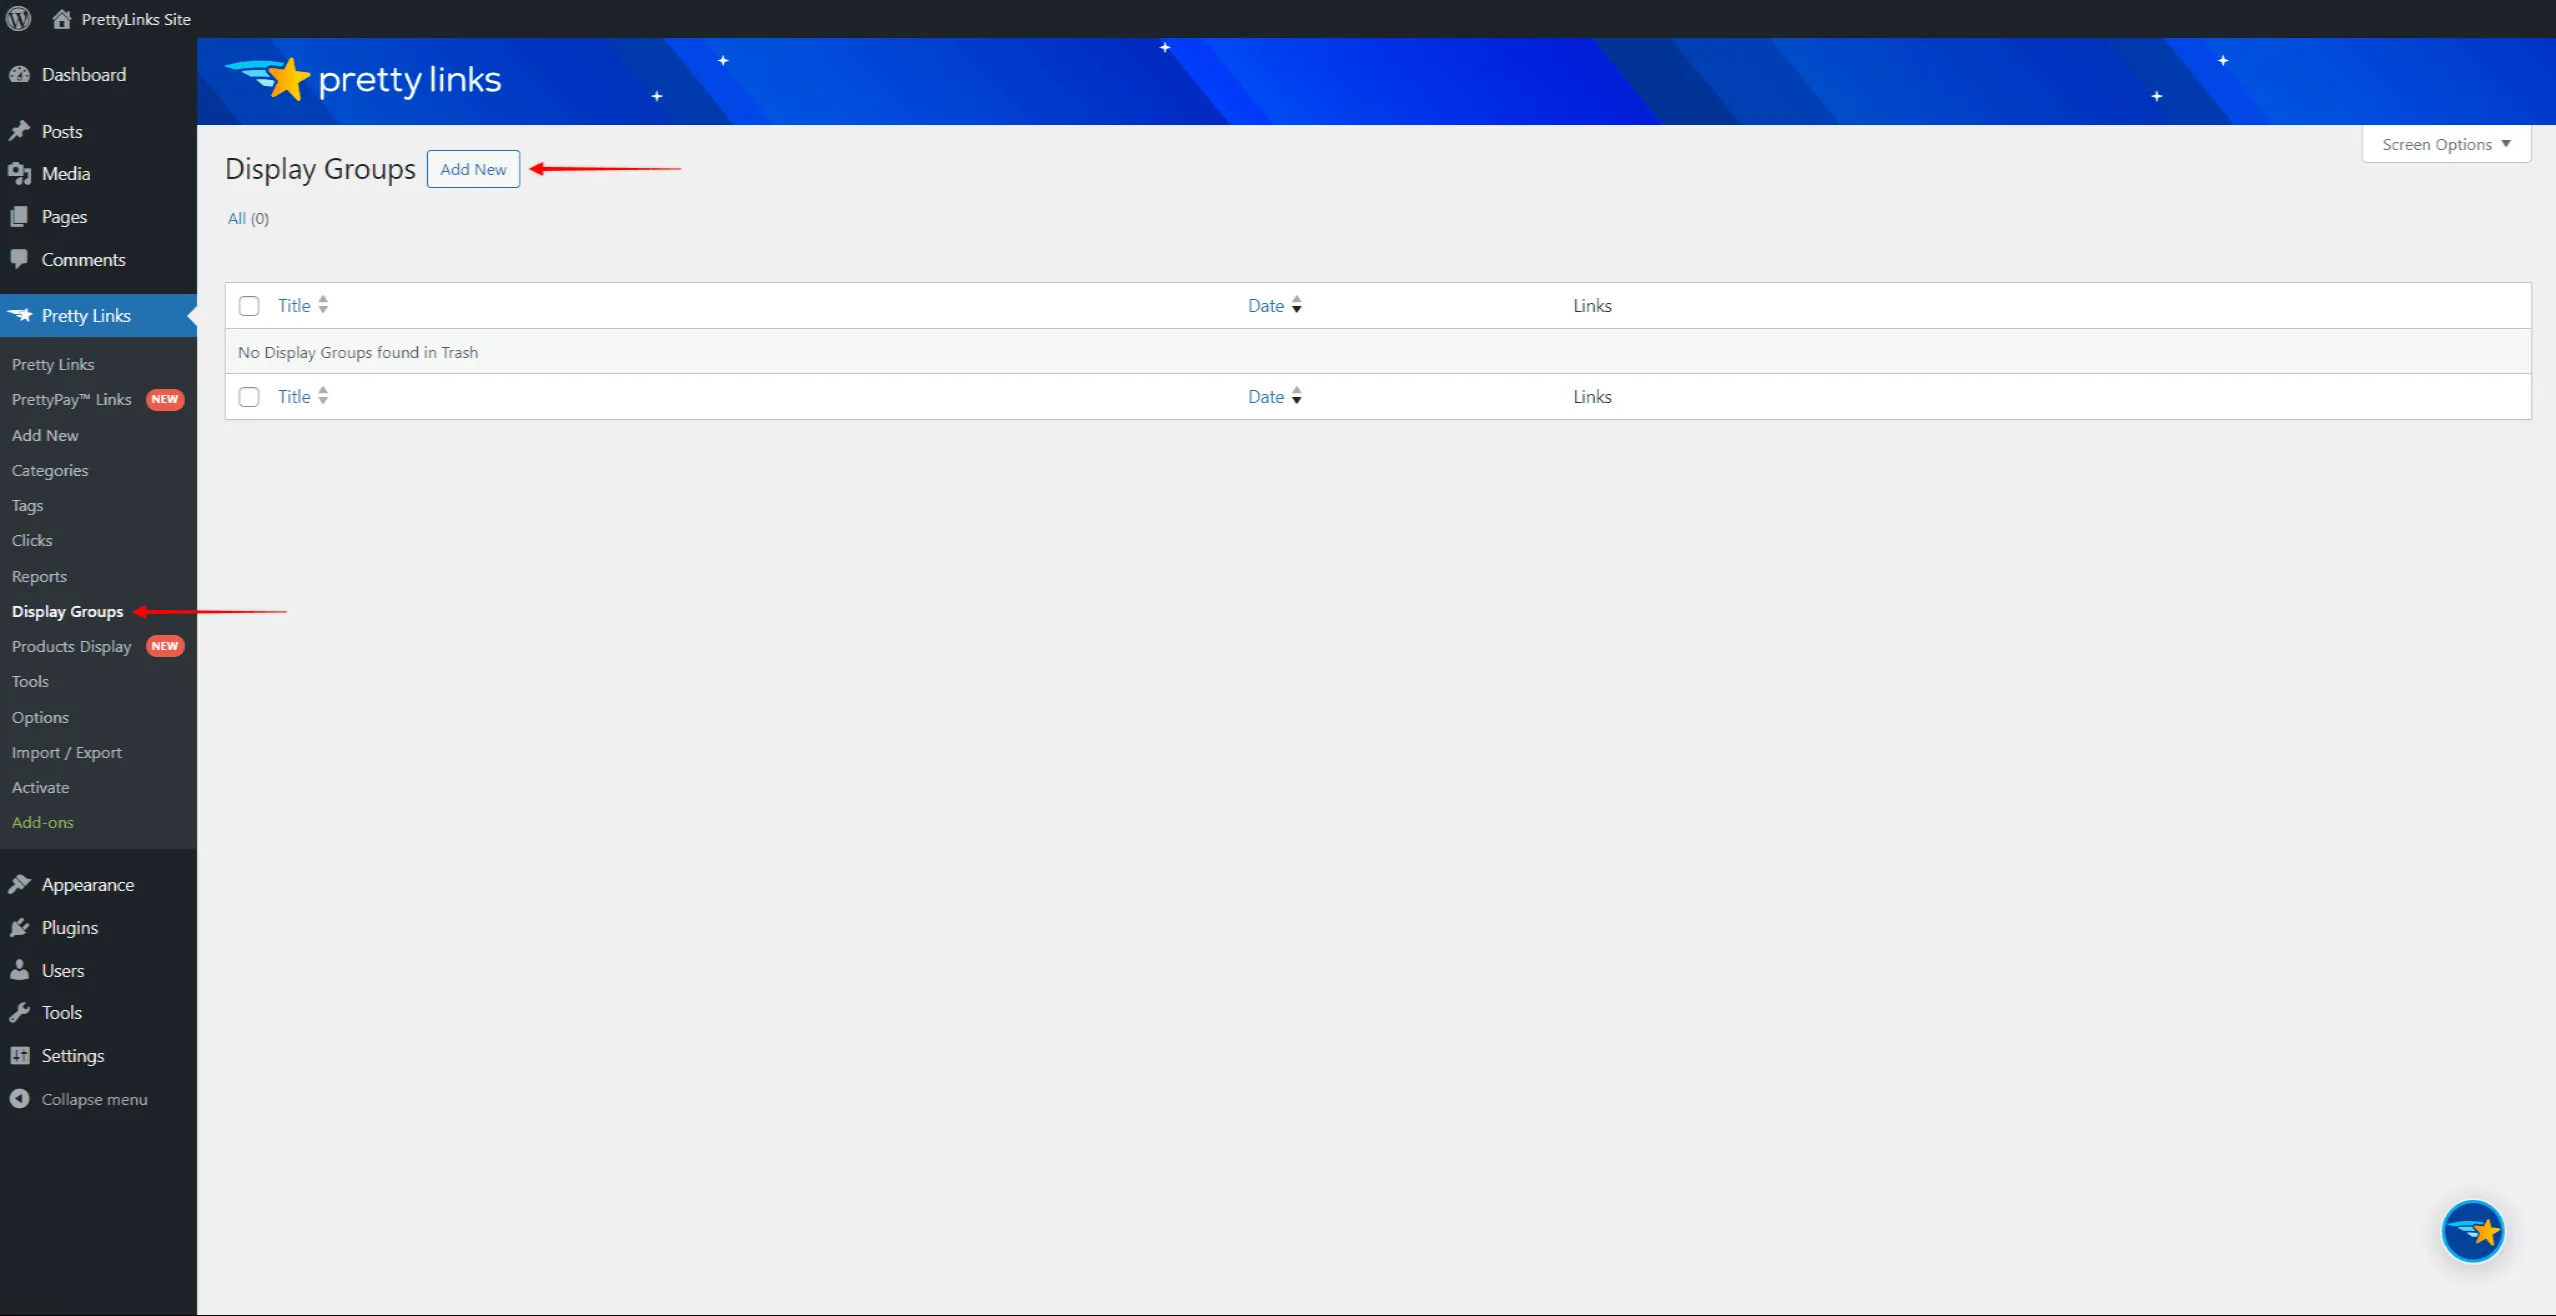
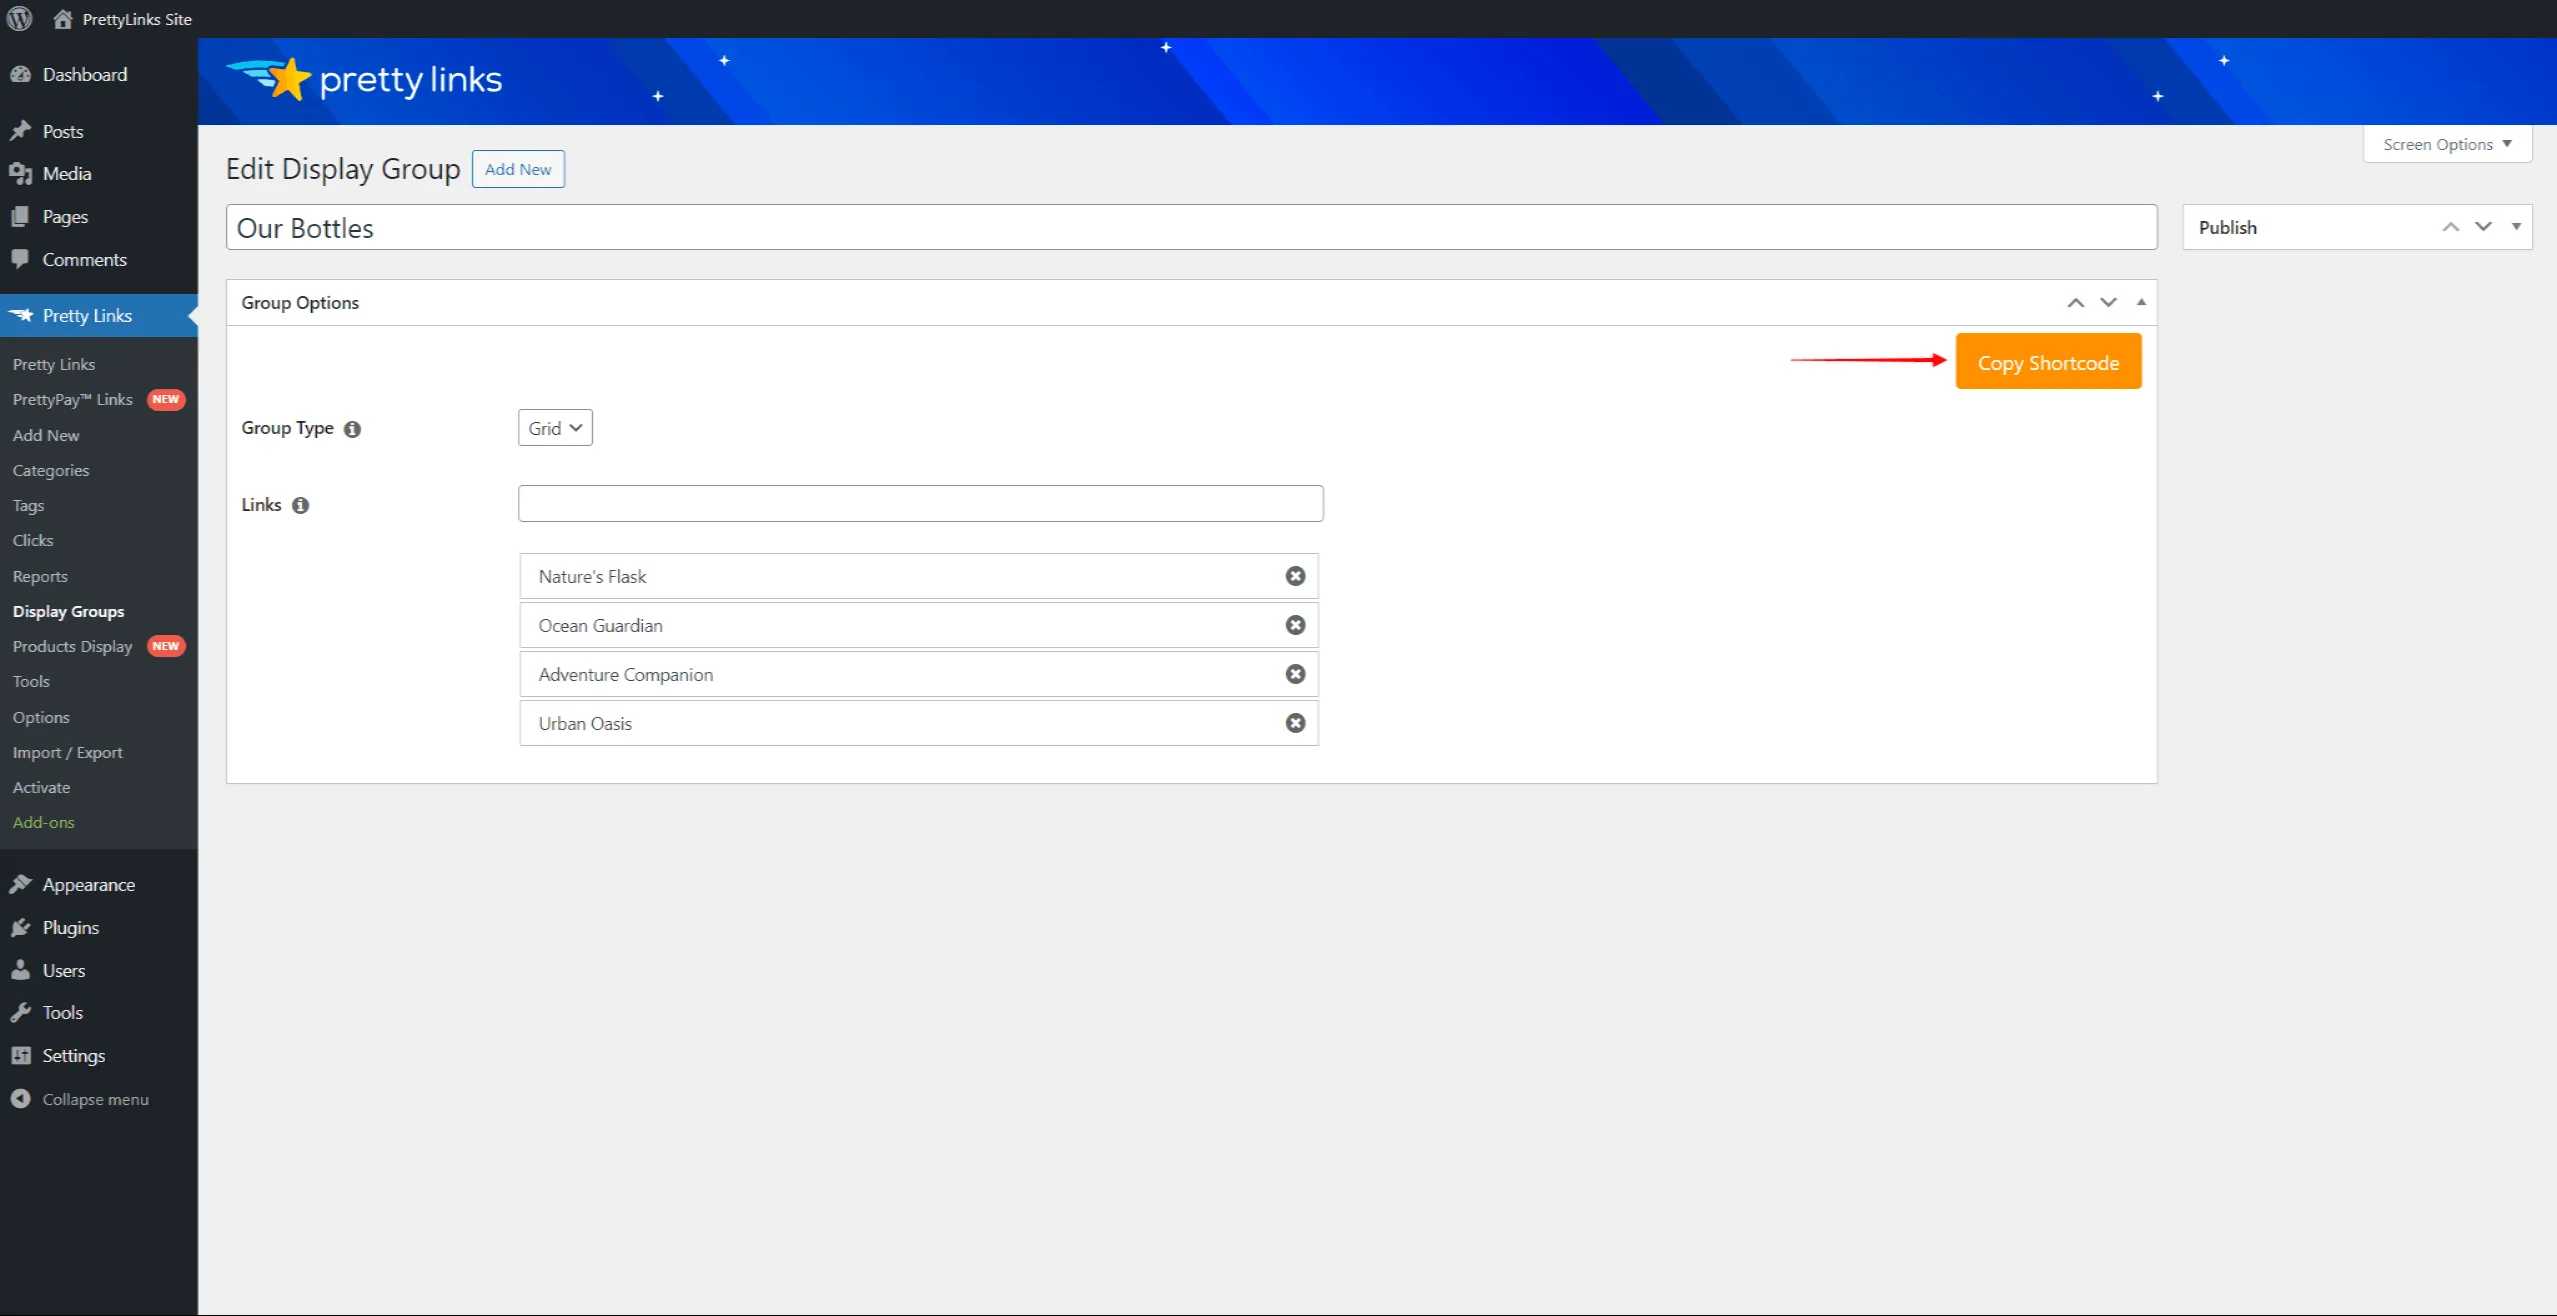
With the Product Displays add-on, you can use Display Groups to group one or more links. To create a Display Group, you’ll want to navigate to the Display Groups page (Dashboard > Pretty Links > Display Groups) and click the Add New button.
To create a display group, apply the following settings:
- Name the display group.
- Select the Group Type, to choose how the links should be displayed when the group is inserted into your content. You can display product displays as a List (the default option) or a Grid.
- Add Links to your Display Group. In the search field, type the name of the pretty link and choose the one you need from the results.
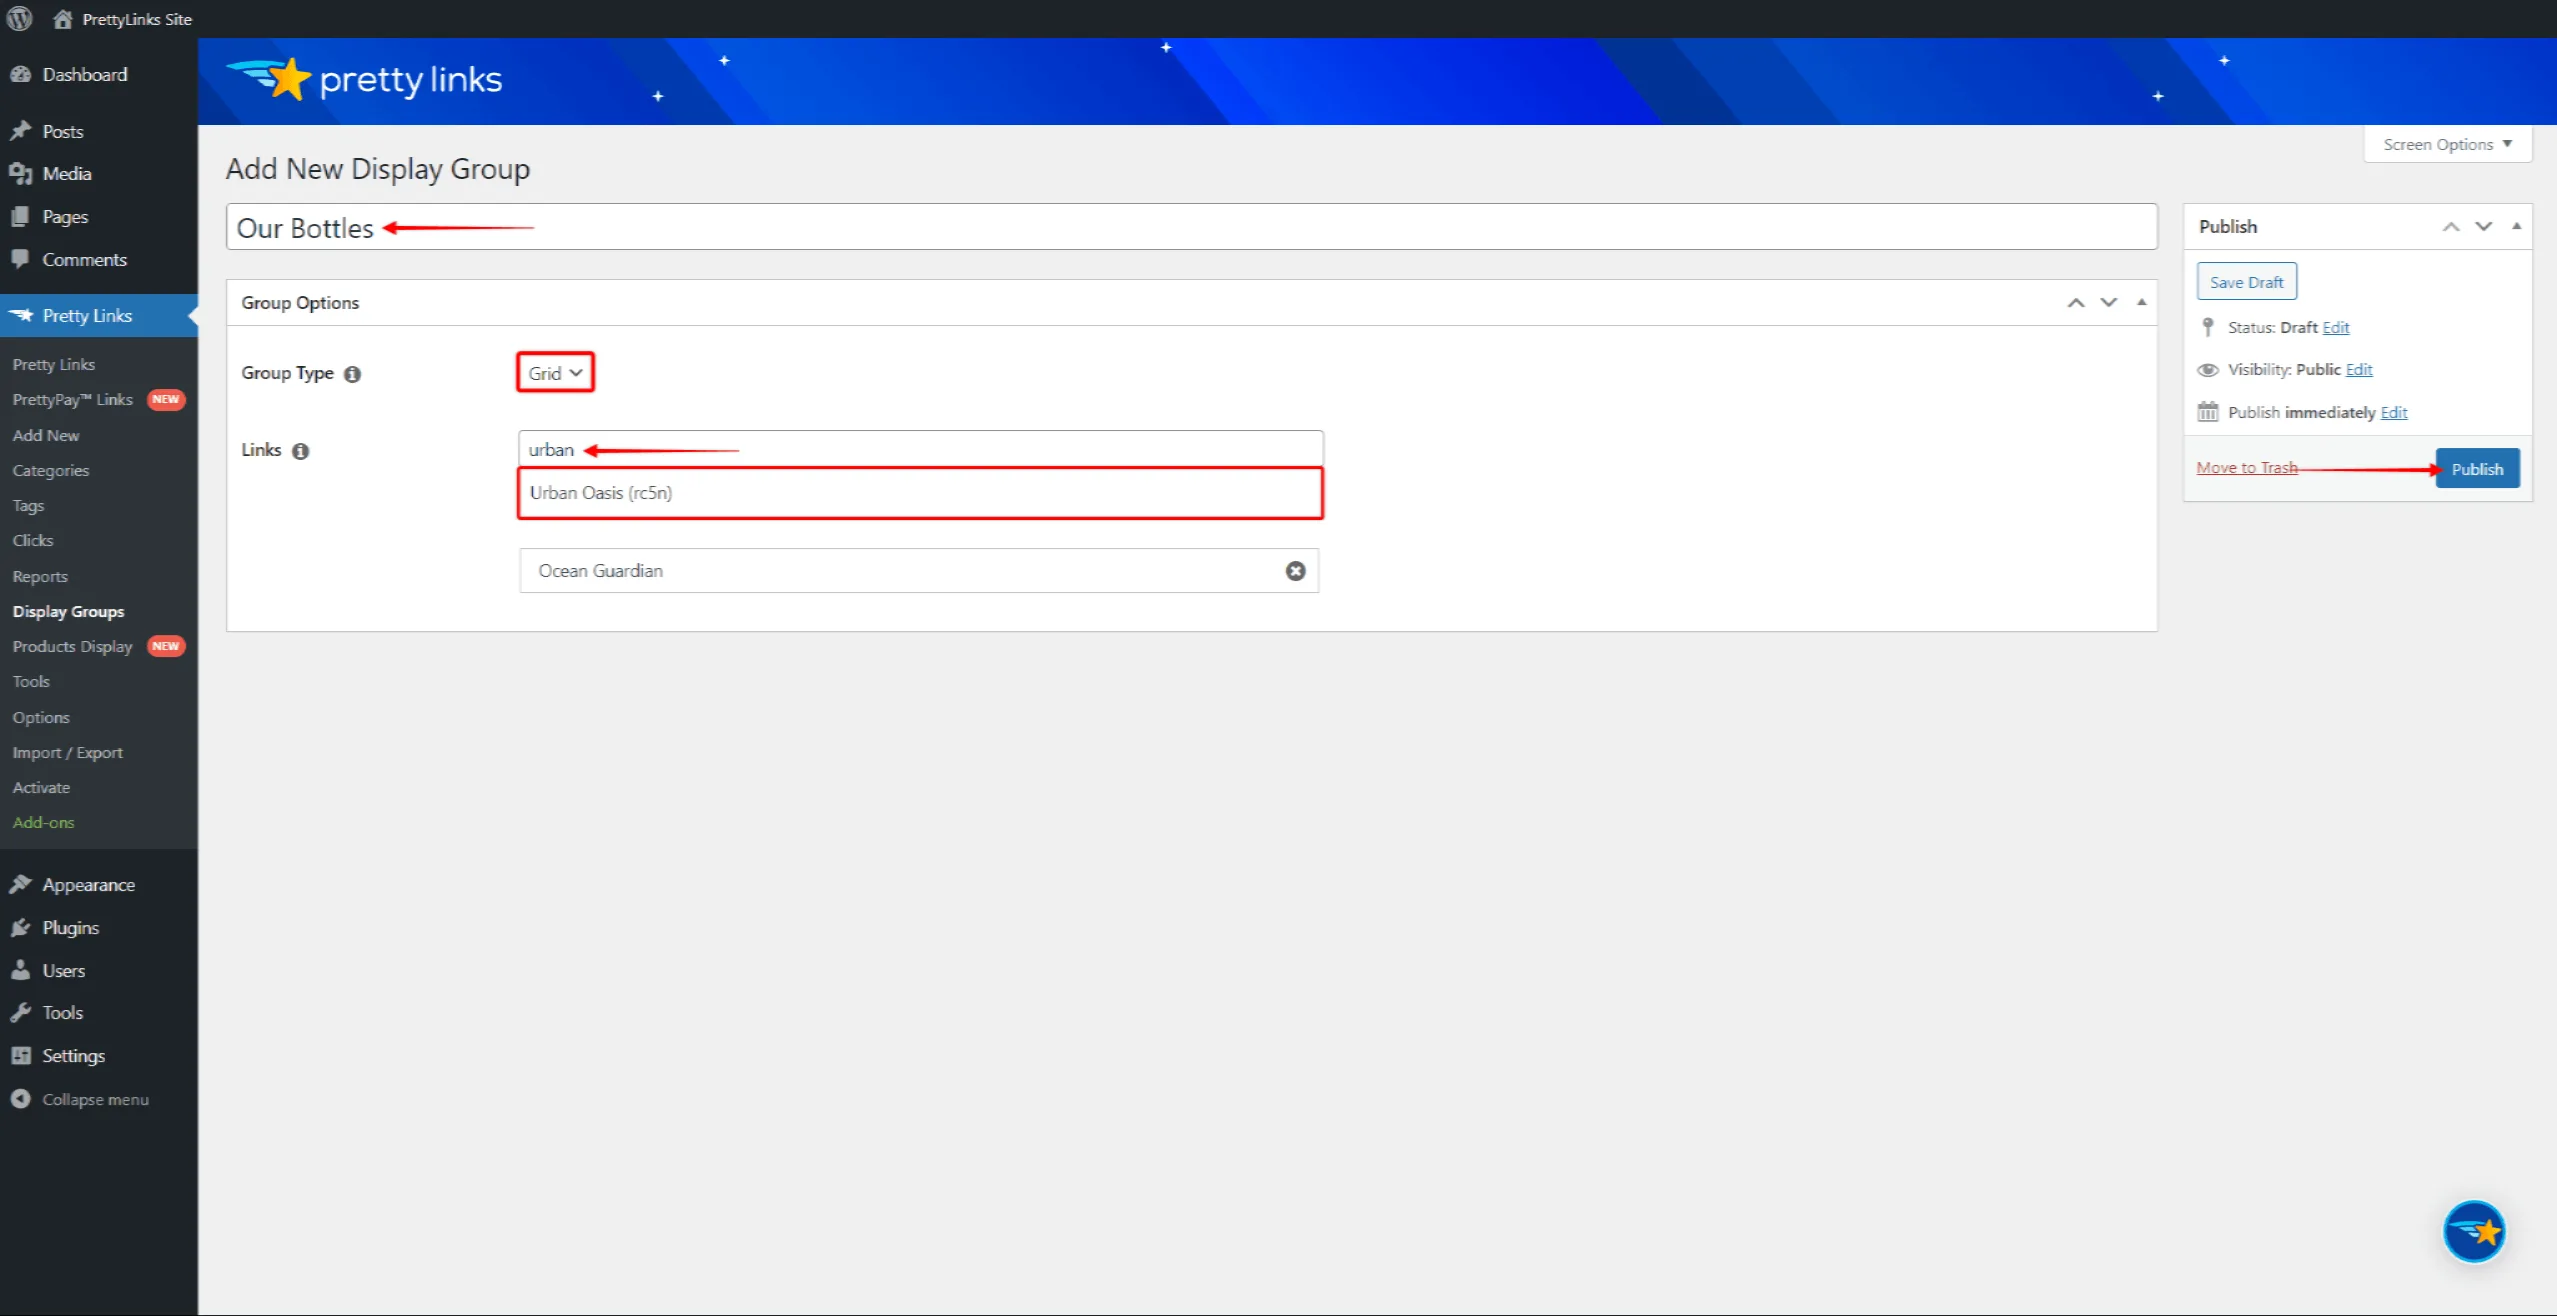
- Click the Publish button to save the display group.
Inserting a Display
There are two ways to insert your display(s) onto your site, and we’ll cover both methods below.
Shortcodes
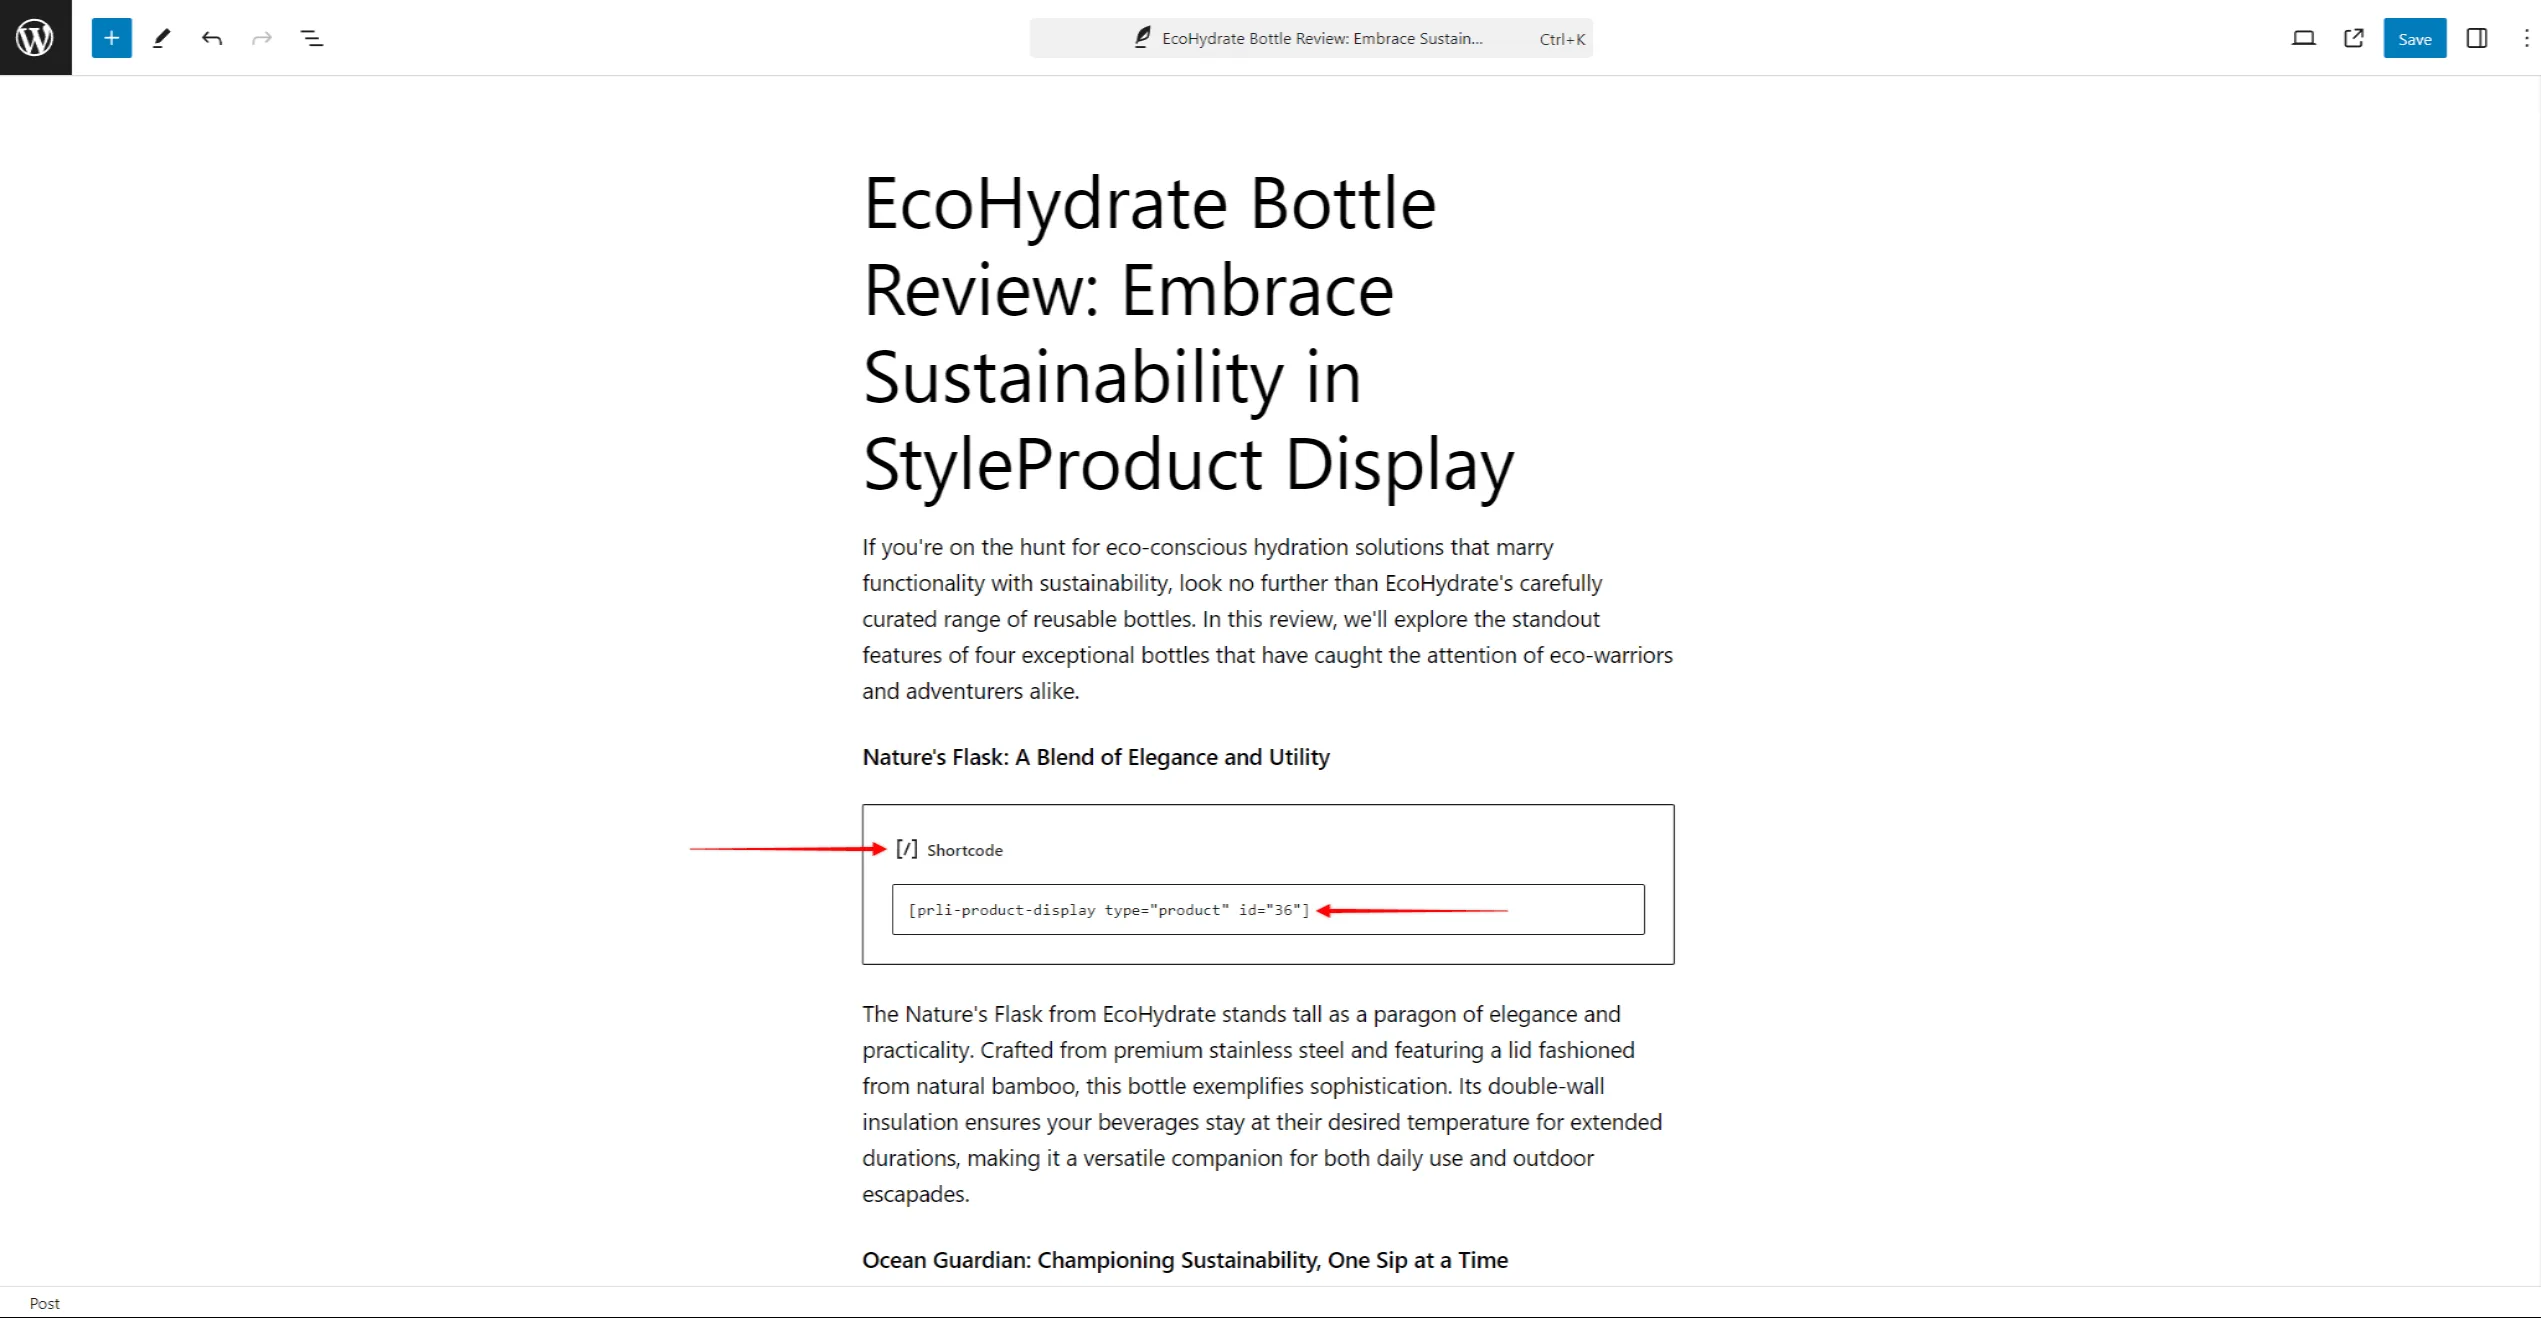
The first way to insert a display is by using shortcodes. If you want to insert a single display, you’ll want to copy the Product Display shortcode first:
- Navigate to Dashboard > Pretty Links > Products Display.
- Find the product display you need, hover over it, and click the Edit link.
- Click the Copy Shortcode button.
Once you’ve copied the shortcode, you can add it to a page or post to display your products.
If you want to insert multiple displays through the Display Group, you’ll need to get the Display Group shortcode (Dashboard > Pretty Links > Display Groups). To get the shortcode, navigate to the display group and click the Copy Shortcode button under the Group Options tab.
Blocks
The PL Product Display block is the second way to insert product displays. You can use this block with the WordPress default Block Editor (Gutenberg).
You can add this block by clicking the + icon anywhere within your post content or the block inserter icon. Once added, you need to choose the content for this block:
- 1. Click the Update Display button within the block. This will open a popup.
- Click the dropdown and select the type of content you wish to add. Select either Single Link, Display Group, or Display Group option.
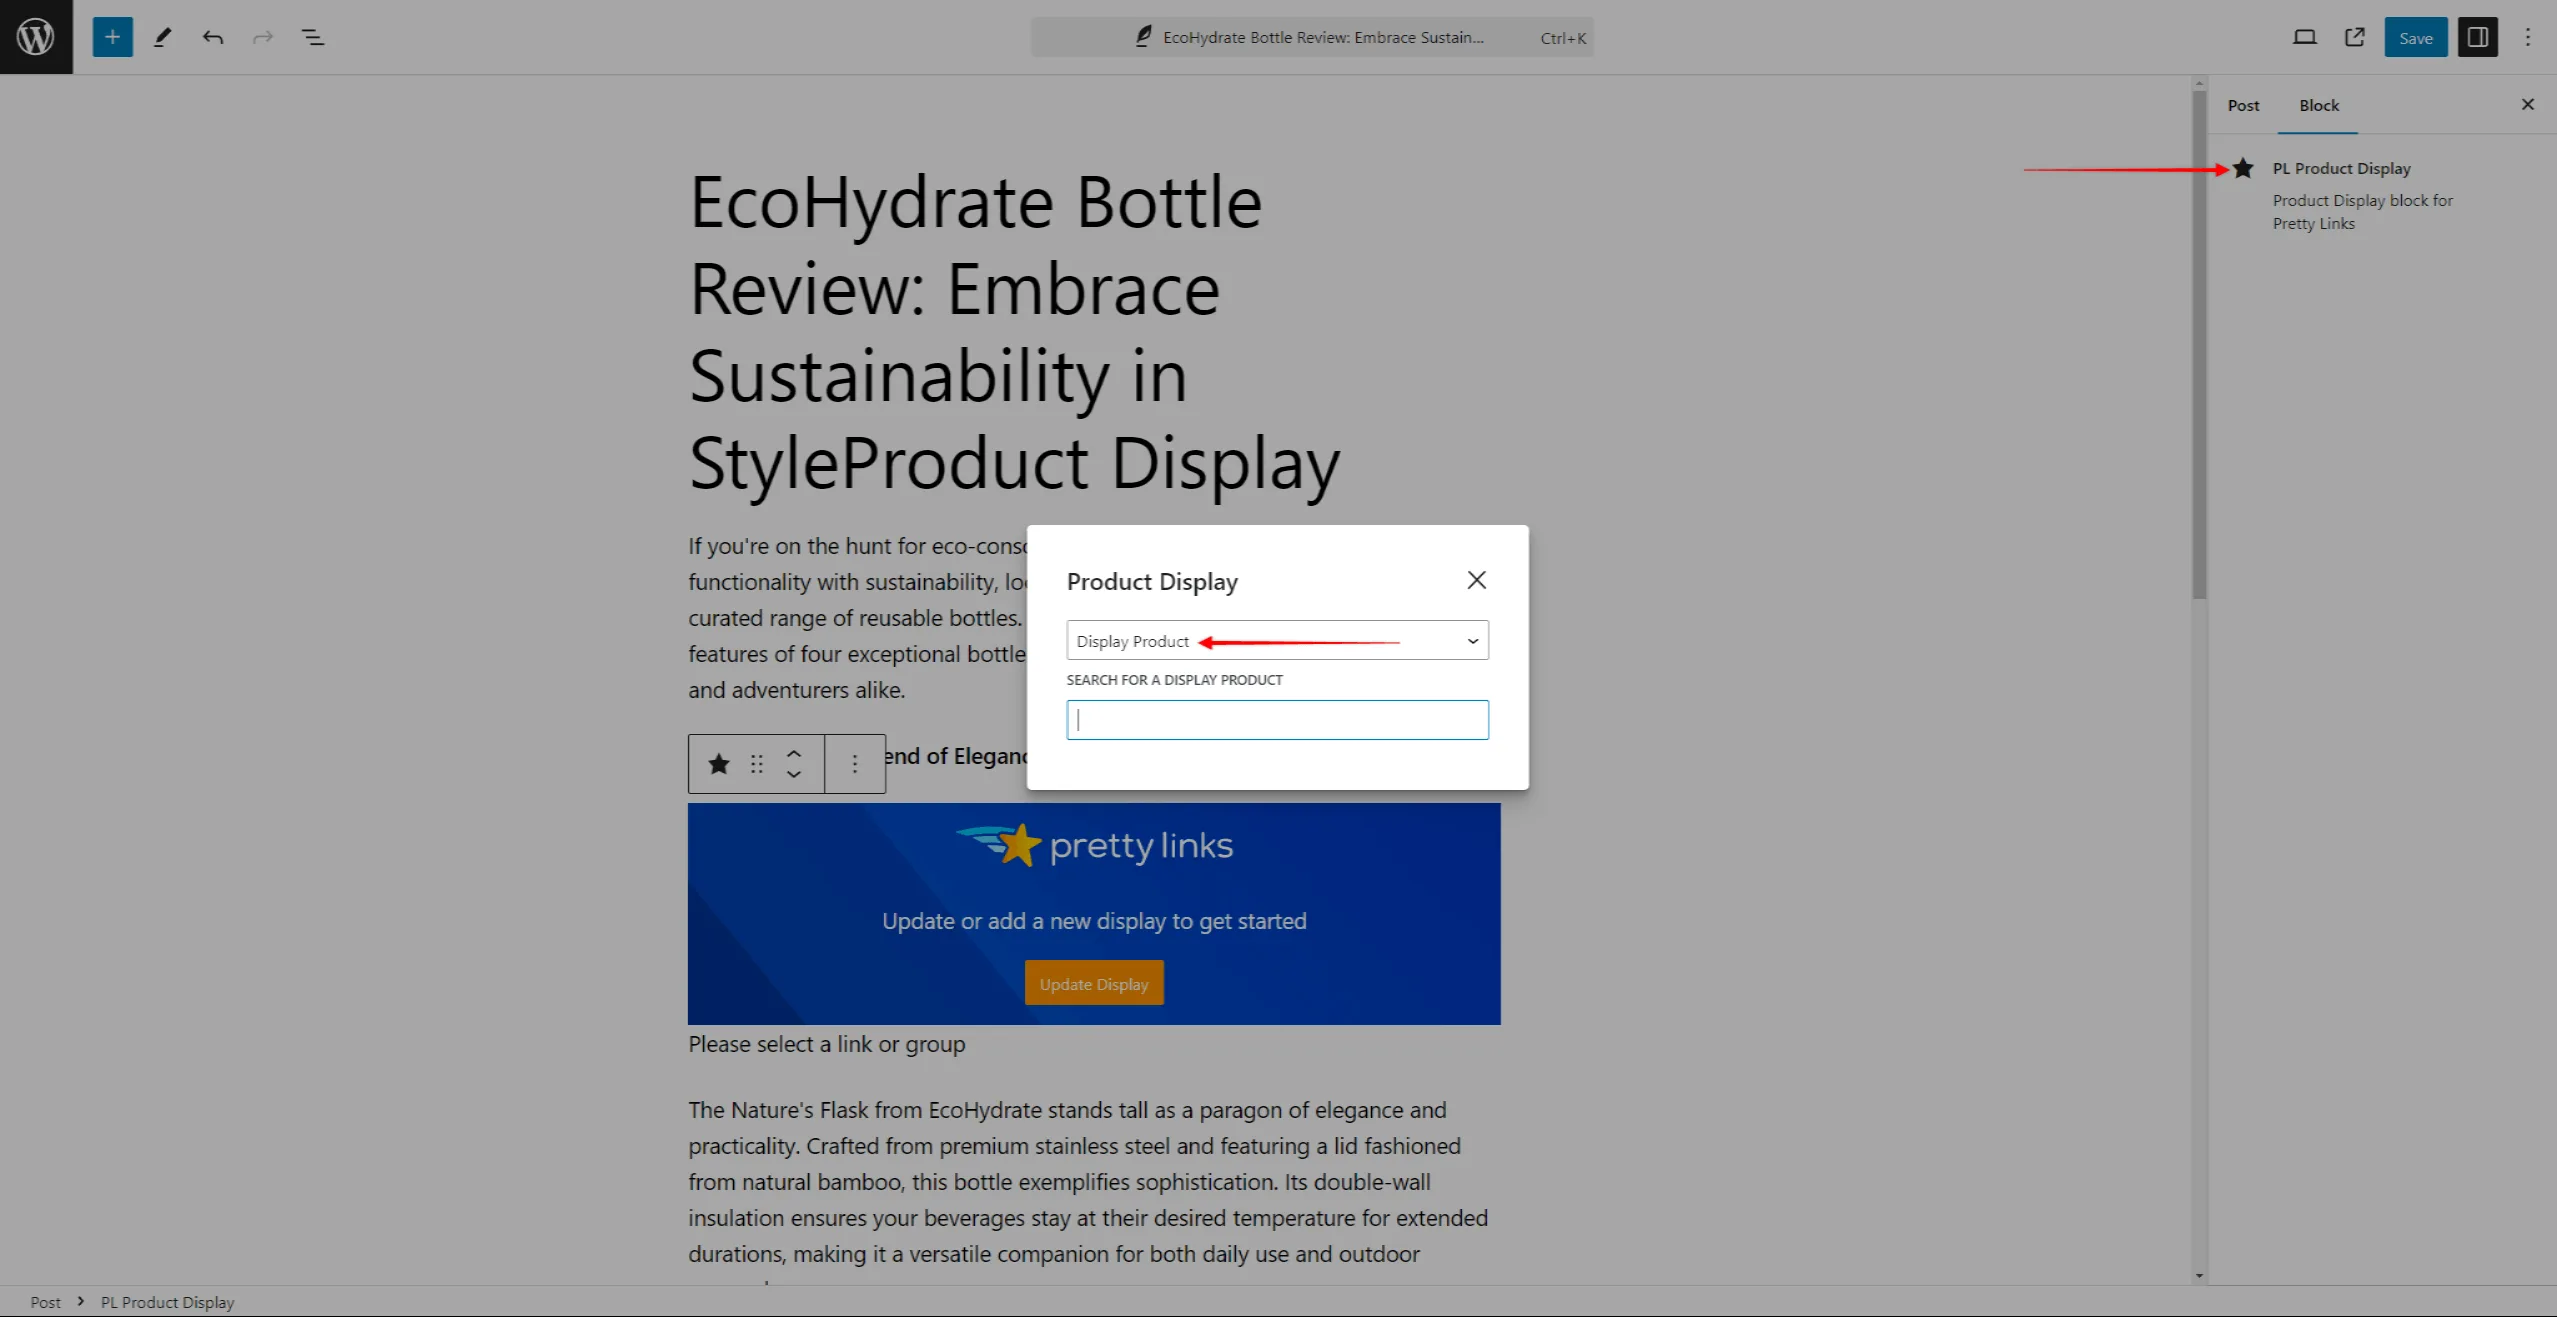
- After you select the type of content, an additional search field will appear. Type in the name of the content you need, and then click on the desired content from the search results.
- Click the Update button to save the post content.