PrettyPay™ Links, integrated with Stripe, allows you to create customized payment links to share across various online platforms.
This document will guide you through the process of setting up and effectively using PrettyPay™ Links on your website.
Integration of Stripe Products and Prices with PrettyPay™ Links
Note: PrettyPay™ Links is deeply integrated with Stripe; therefore you will need to connect it with your Stripe merchant account. Please make sure Stripe is available for merchants in your country.
Every PrettyPay™ link redirects users to a Stripe product saved in your Stripe account. A single Stripe Product can have multiple prices (Stripe Price). When you create a PrettyPay™ link, you create the purchase link to the specific price of the related Stripe Product.
With each PrettyPay™ link, you can use an existing Stripe Product and Price, or create a new one. You can create a new Stripe product and a new Stripe Price using PrettyPay™ or directly in your Stripe Account.
Stripe documentation provides more details about creating Stripe Products and Prices through your Stripe Dashboard.
It’s important to mention that no user or payment data is saved by PrettyPay™ Links on your site. All data will be processed and saved by Stripe. You can preview and manage all payments and subscriptions in your Stripe account.
Video Tutorial:
How to Set Up PrettyPay™
Before creating your PrettyPay™ links, you need to go through a few simple steps:
- Connect your Stripe account
- Configure your Payment Settings
- Set up your Thank You page
- Configure the Customer Portal
Connect Your Stripe Account
The first time you navigate to Dashboard > Pretty Links > PrettyPay™ Links on your site, you will be prompted to connect your Stripe account.
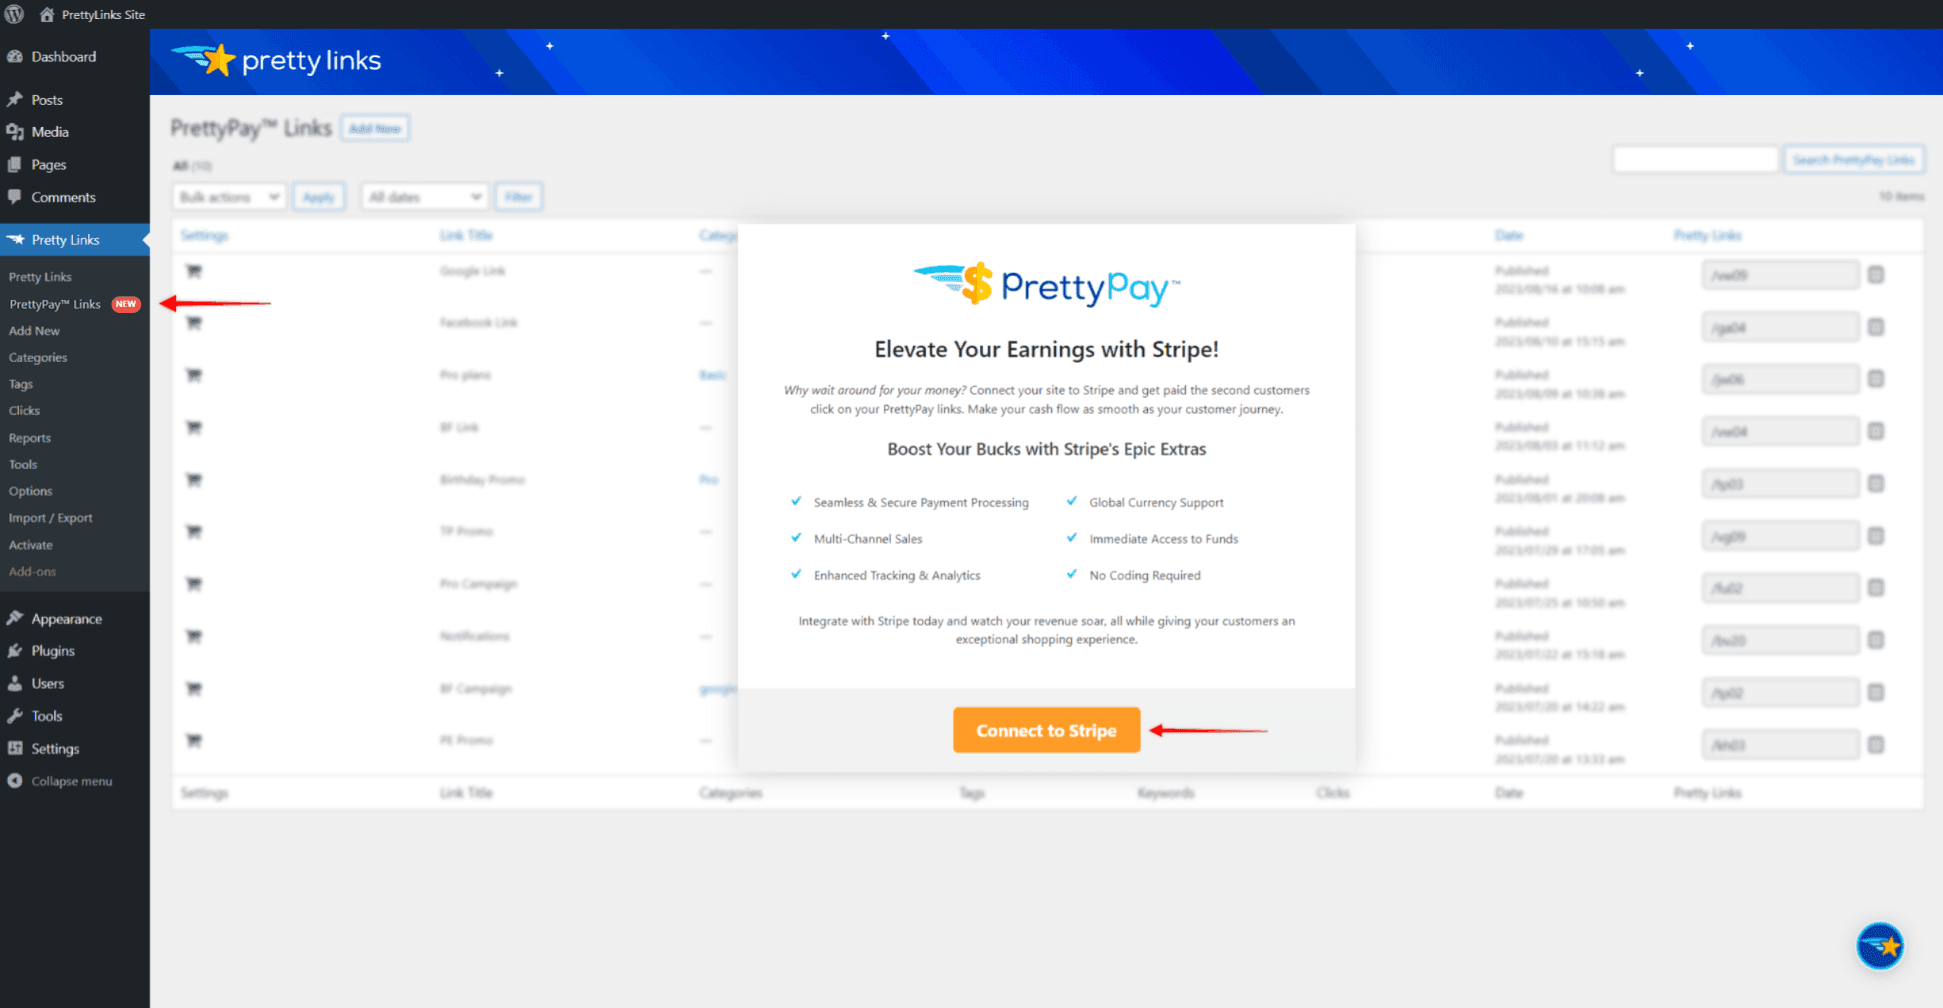
Click the “Connect to Stripe” button to start the connection wizard and connect your Stripe account:
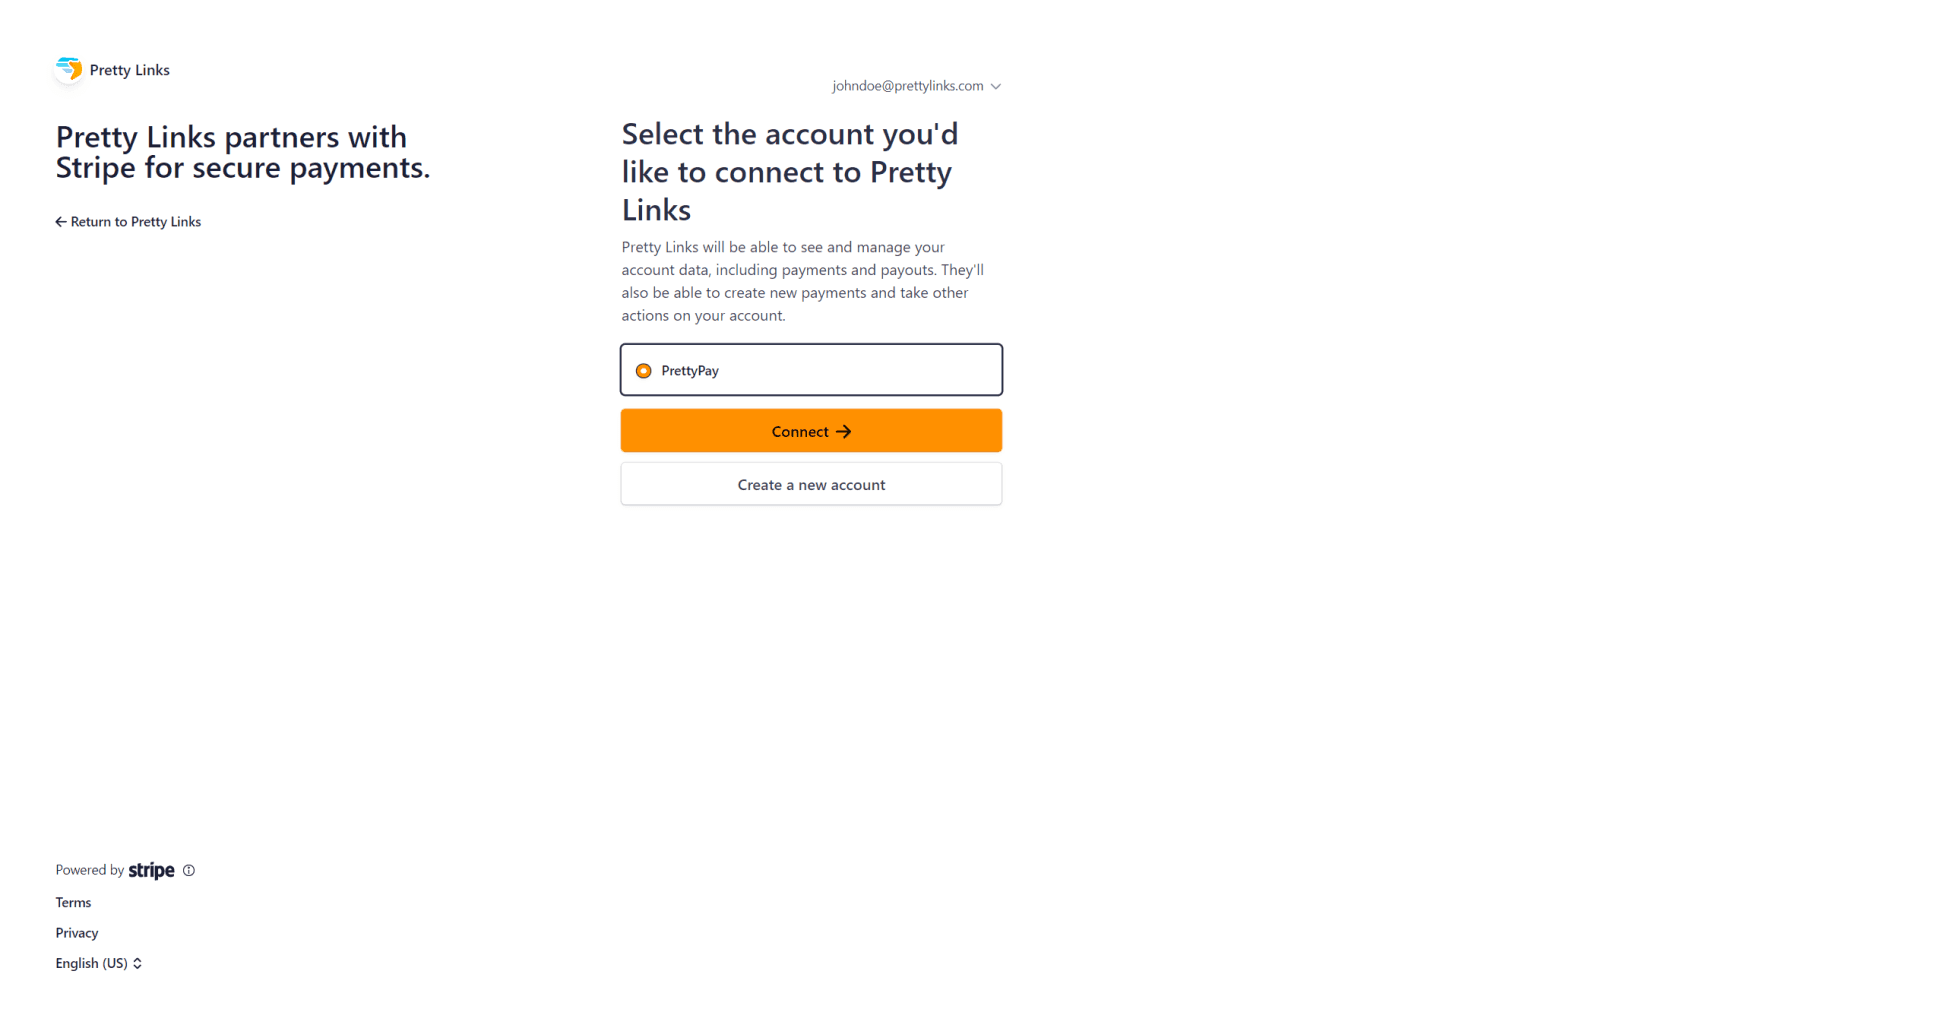
- First, the wizard will require you to fill in your Stripe account credentials.
- Next, you’ll need to select the Business account within your Stripe account you wish to use with PrettyPay™ Links. If you don’t have one, you’ll be prompted to create one.
- If you’re creating a new Business account or you haven’t activated the existing one, you will be required to fill in your business details in the next step.
- Once your Business account is activated, the wizard will complete the process and connect PrettyPay™ with your Stripe account.
Configure Your Payments Settings
Go to Dashboard > Pretty Links > Options > Payments to access your payment settings.
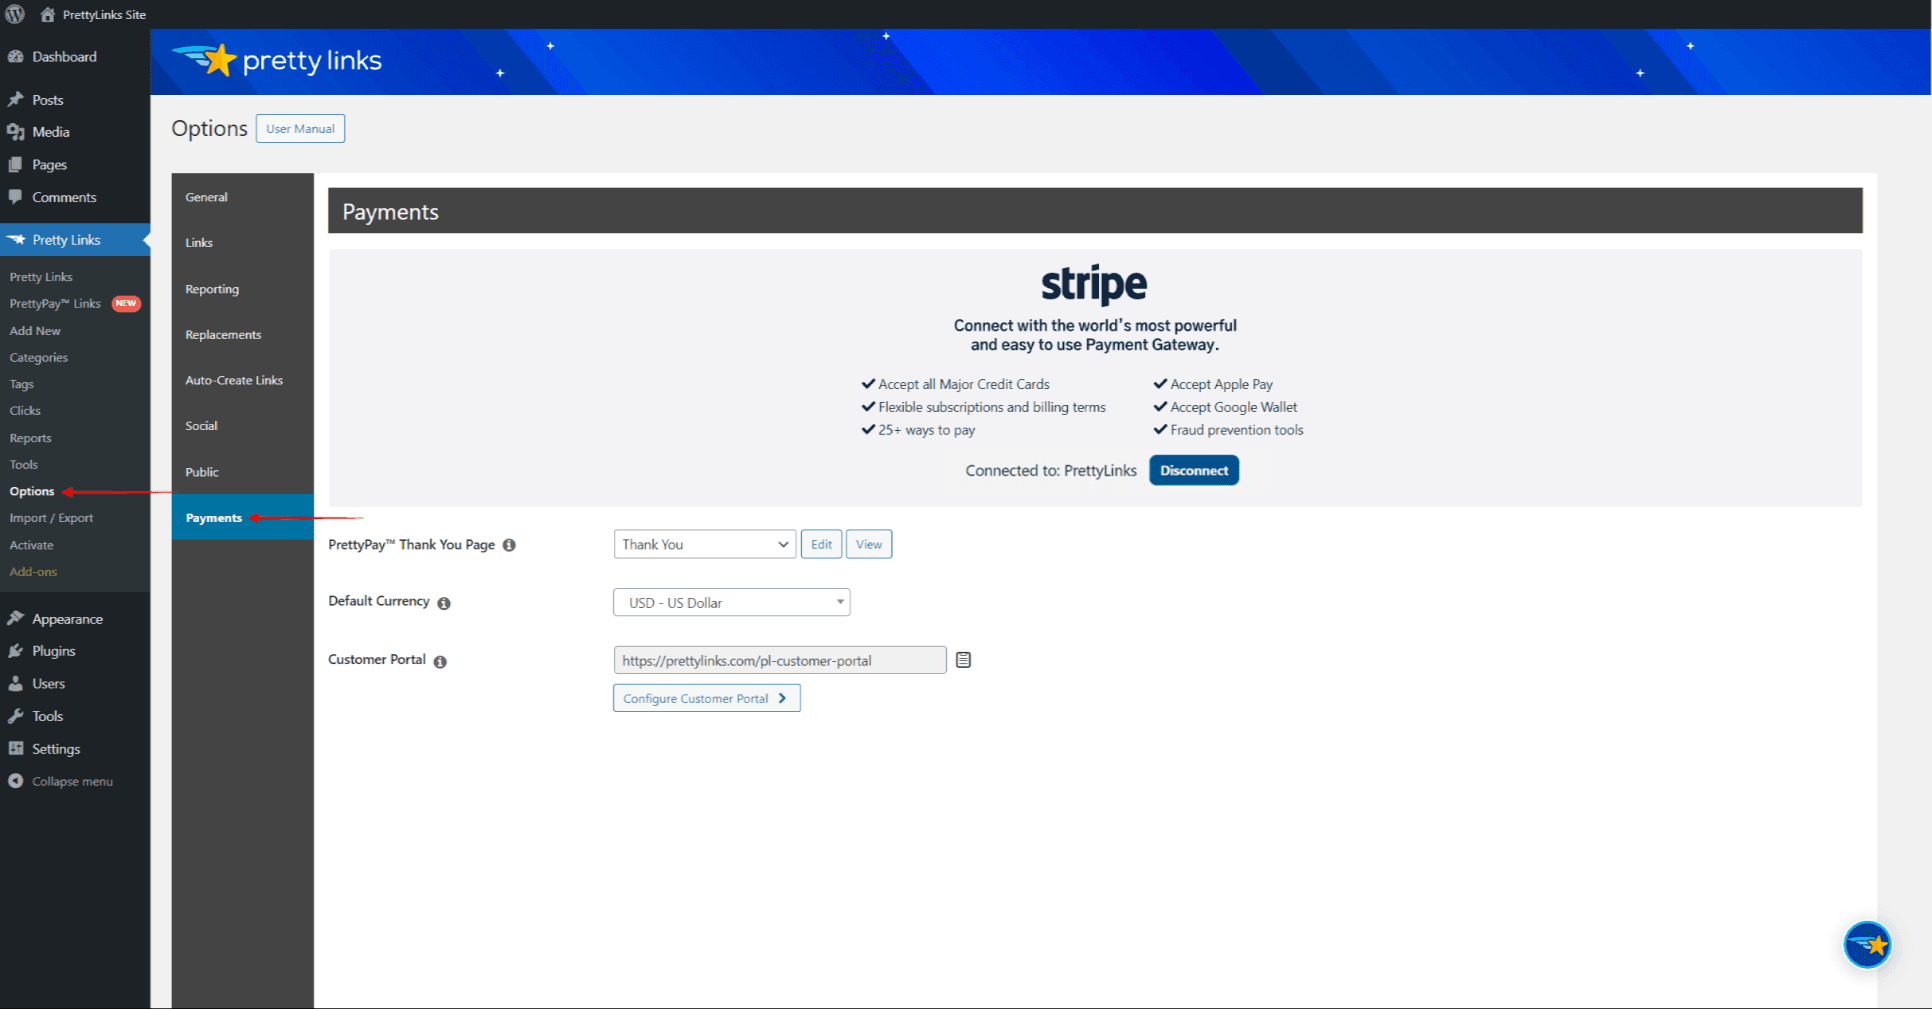
Here you can configure the general settings applied to all PrettyPay™ links:
- Under the “PrettyPay™ Thank You Page” dropdown, you can select any existing page on your site to serve as a Thank You page. Also, you can choose the “Auto Create New Page“ option to generate the default Thank You page automatically with the /thank-you slug.
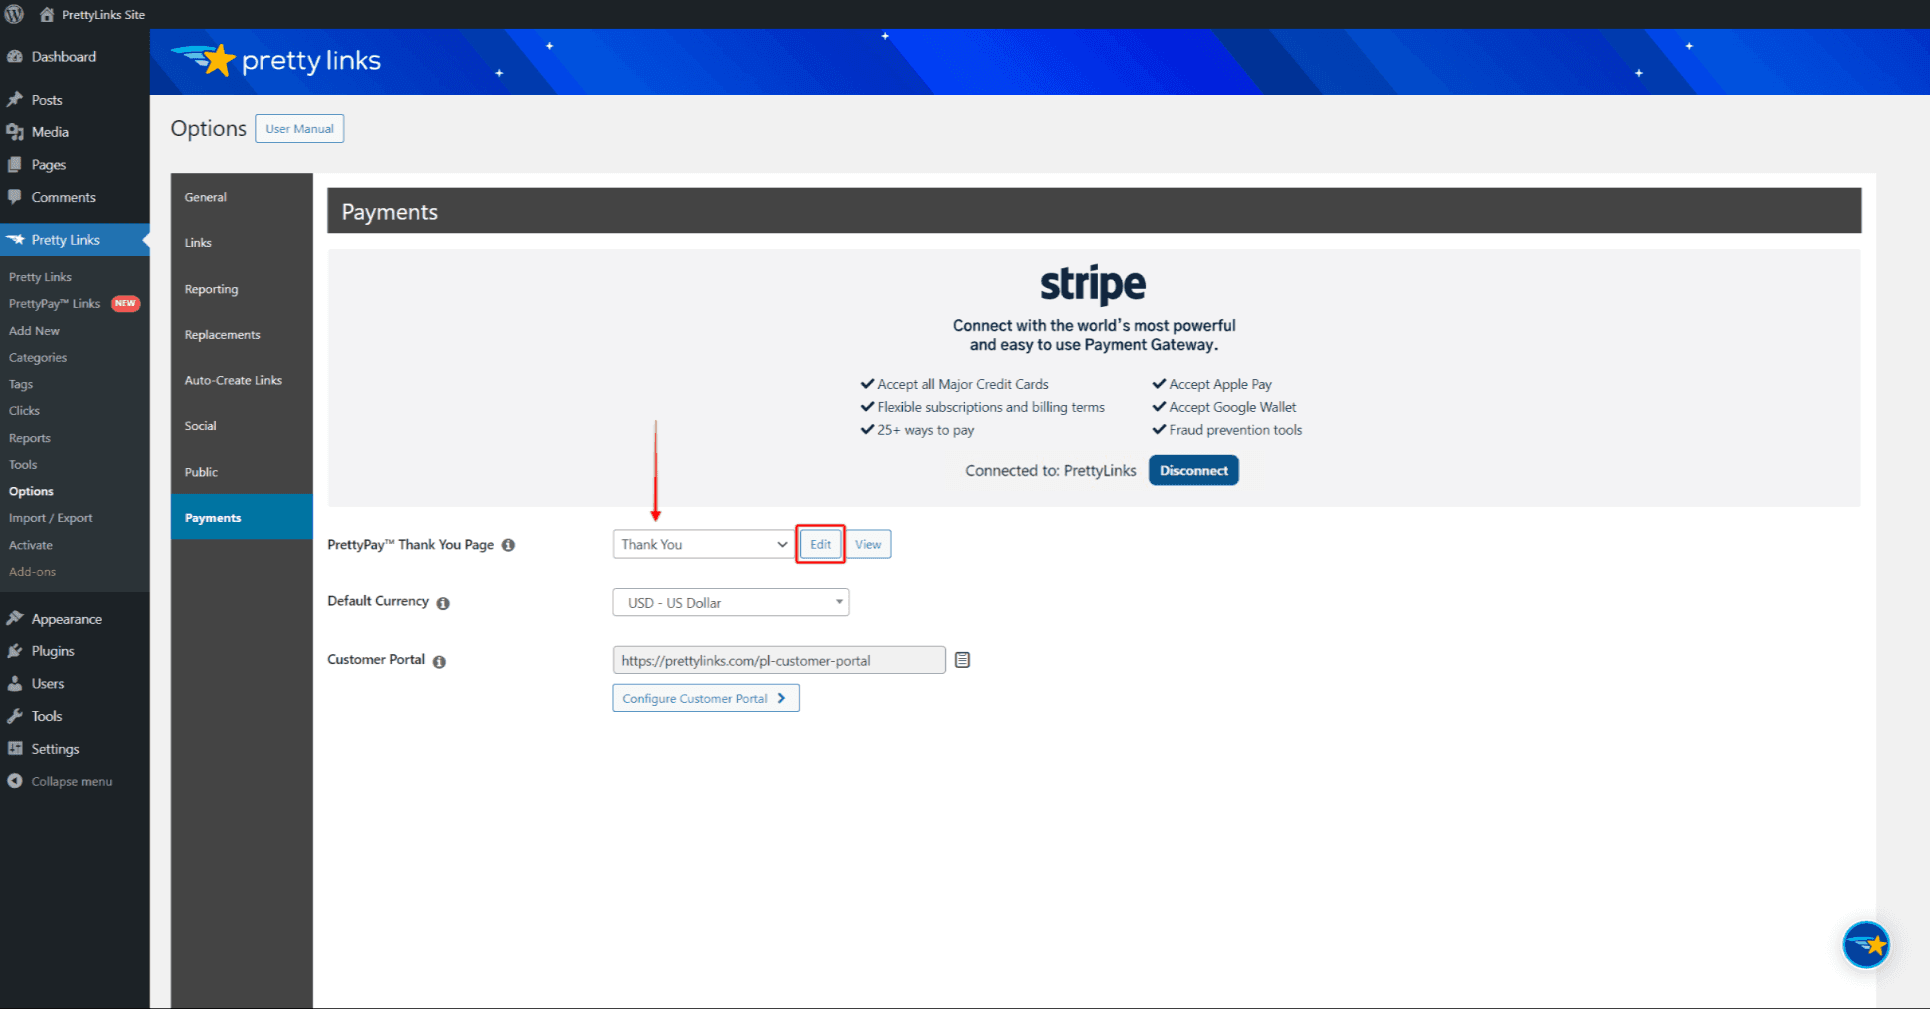
PrettyPay™ requires a Thank You page, as users will be redirected to this page after each purchase. In addition, the PrettyPay™ Thank You page can be edited by clicking the “Edit” link next to the dropdown.
- Next, you should select the Default Currency that will be used for all your PrettyPay™ transactions;
- Finally, you can click on Configure Customer Portal to make adjustments to the Stripe-hosted Customer Portal. Your users will be able to view and manage all their transactions and subscriptions using the Customer Portal.
Note: The Customer Portal is a page hosted by Stripe. Thus, next to the default customization options provided by PrettyPay™, no additional customizations are possible.
- Click the “Update” button to save your settings.
Also, if needed, you can disconnect and reconnect your Stripe account (or connect to a different Stripe account) on the Payments page. You could do this if you need to switch to another Stripe account or troubleshoot your Stripe connection.
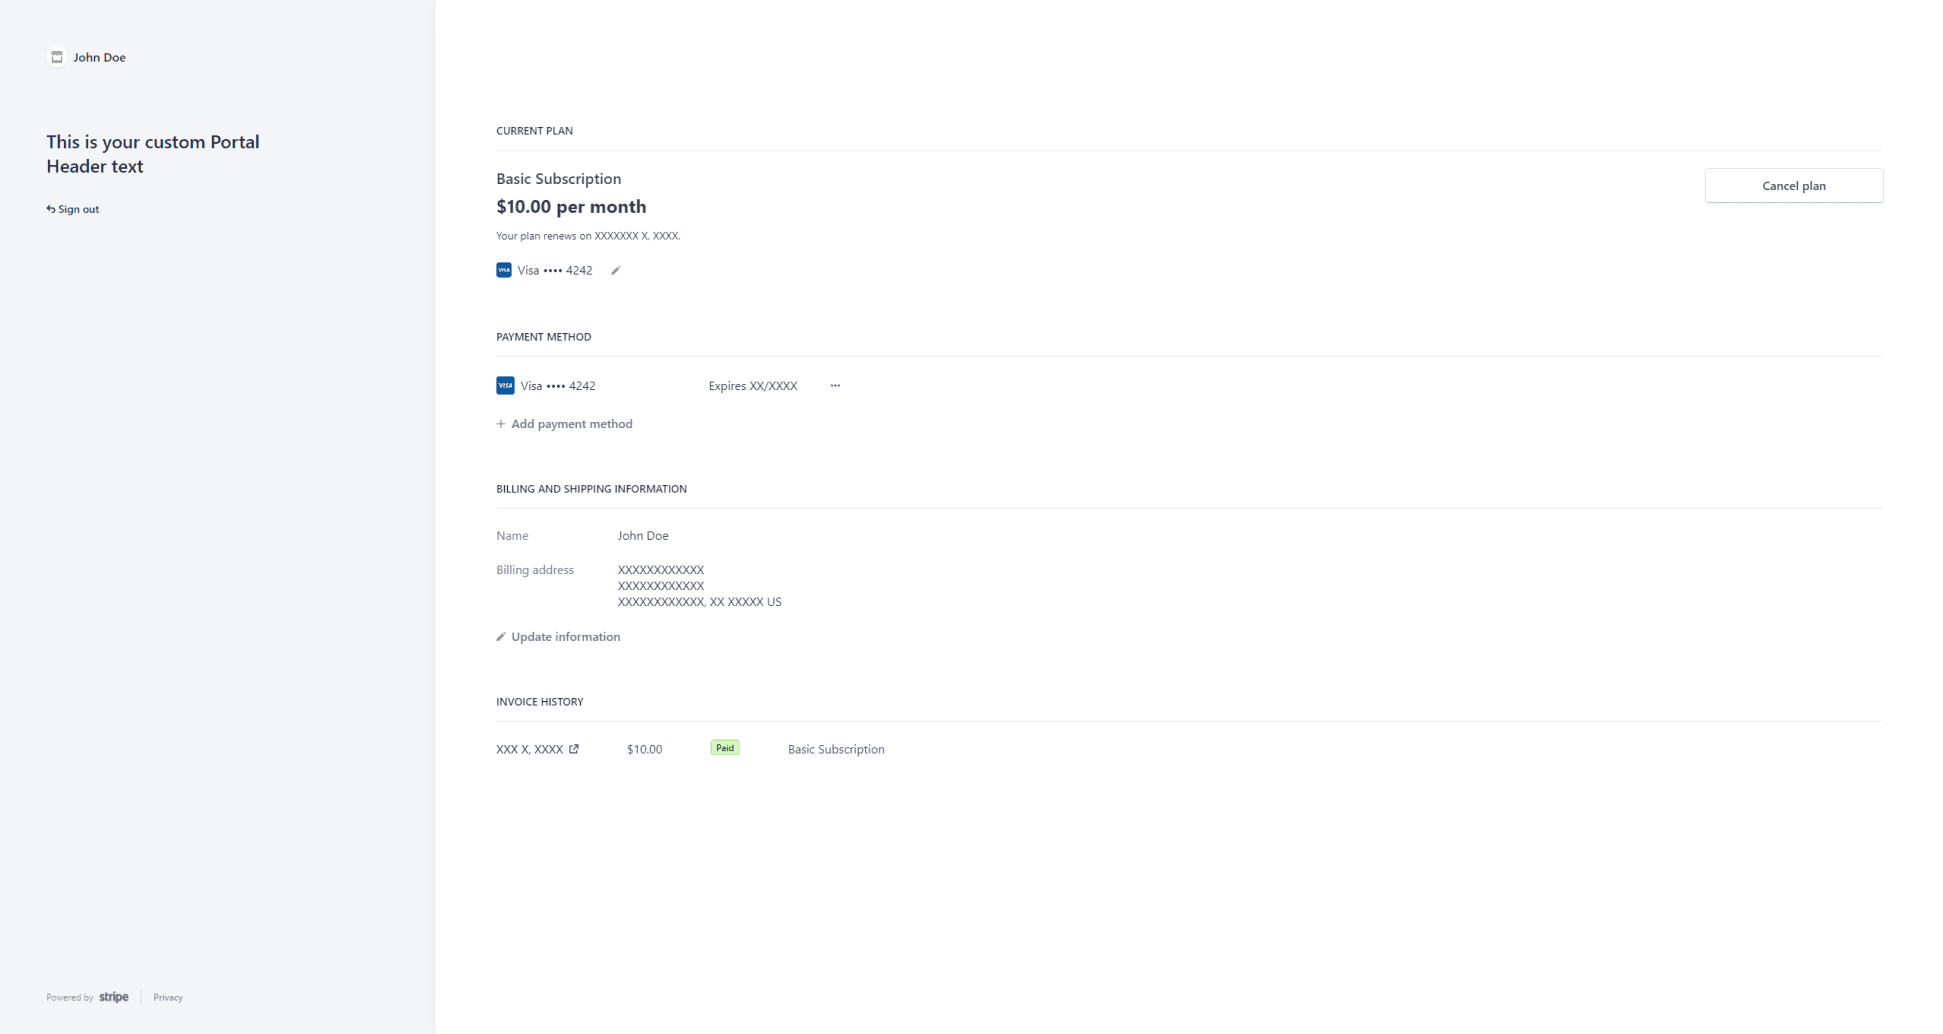
Configuring Customer Portal
The Customer Portal is provided by Stripe and allows your customers to review and update their payment details, invoices, and subscriptions.

PrettyPay™ offers several customization features for the Customer Portal:
- Portal Header – here you can add any text. This text will be displayed on all user’s Customer Portal pages;
- Privacy Policy URL – add your Privacy Policy URL to display the link on the Customer Portal;
- Terms of Service URL – add your Terms of Service URL to display the link on the Customer Portal;
- Customer Update – check the “Allow customers to update their data” to enable users to update their data on the Customer Portal. You can also select which data should be editable;
- Payment Method Update – checking the “Allow customers to update their payment method” will allow users to update their payment details.
- Subscription Cancel – check the “Allow subscriptions to be canceled” to allow your users to cancel subscriptions themselves on the Customer Portal. Here, you can choose what happens once a user cancels a subscription:
- Cancel at end of billing period (customer can renew until then)
- Cancel subscriptions immediately
- Subscription Pause – check the “Allow subscriptions to be paused” to allow your users to pause subscriptions themselves on the Customer Portal;
- Invoice History – enable or disable the section showing the user’s history of paid invoices
Your users can access the Customer Portal using the default /pl-customer-portal slug (e.g. https://yourdomain.com/pl-customer-portal).
How to Create a PrettyPay™ Link
After configuring your PrettyPay™ settings, you’re ready to create your own PrettyPay™ Links:
- Navigate to Dashboard > Pretty Links > PrettyPay™ Links, and click on “Add New”.
- Start by naming the Pretty Link. This name is only used for you to distinguish different links.
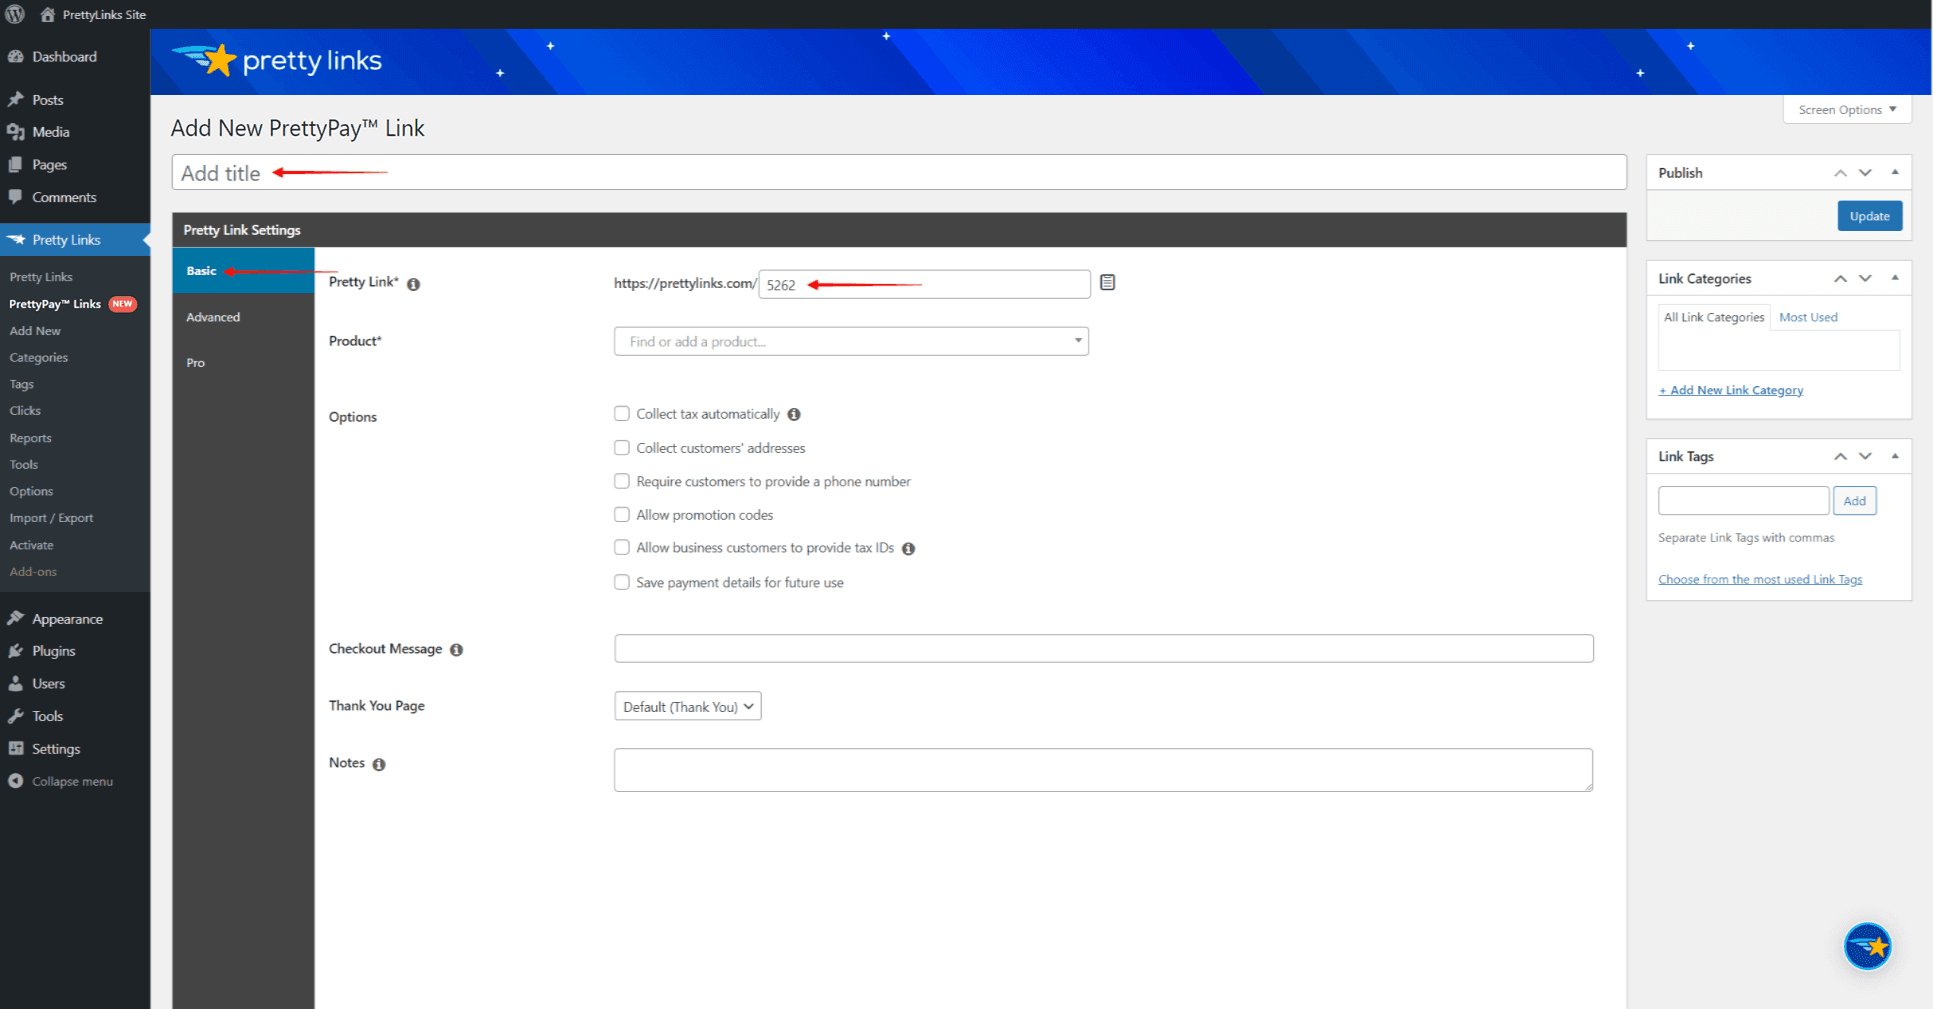
- Under the “Basic” group of options, you can set the Pretty Link slug. It will be automatically generated, but you can modify the slug any way you want.
- Next, you need to select the Stripe product and the price (the “Product” dropdown) that should be added to this PrettyPay™ link.
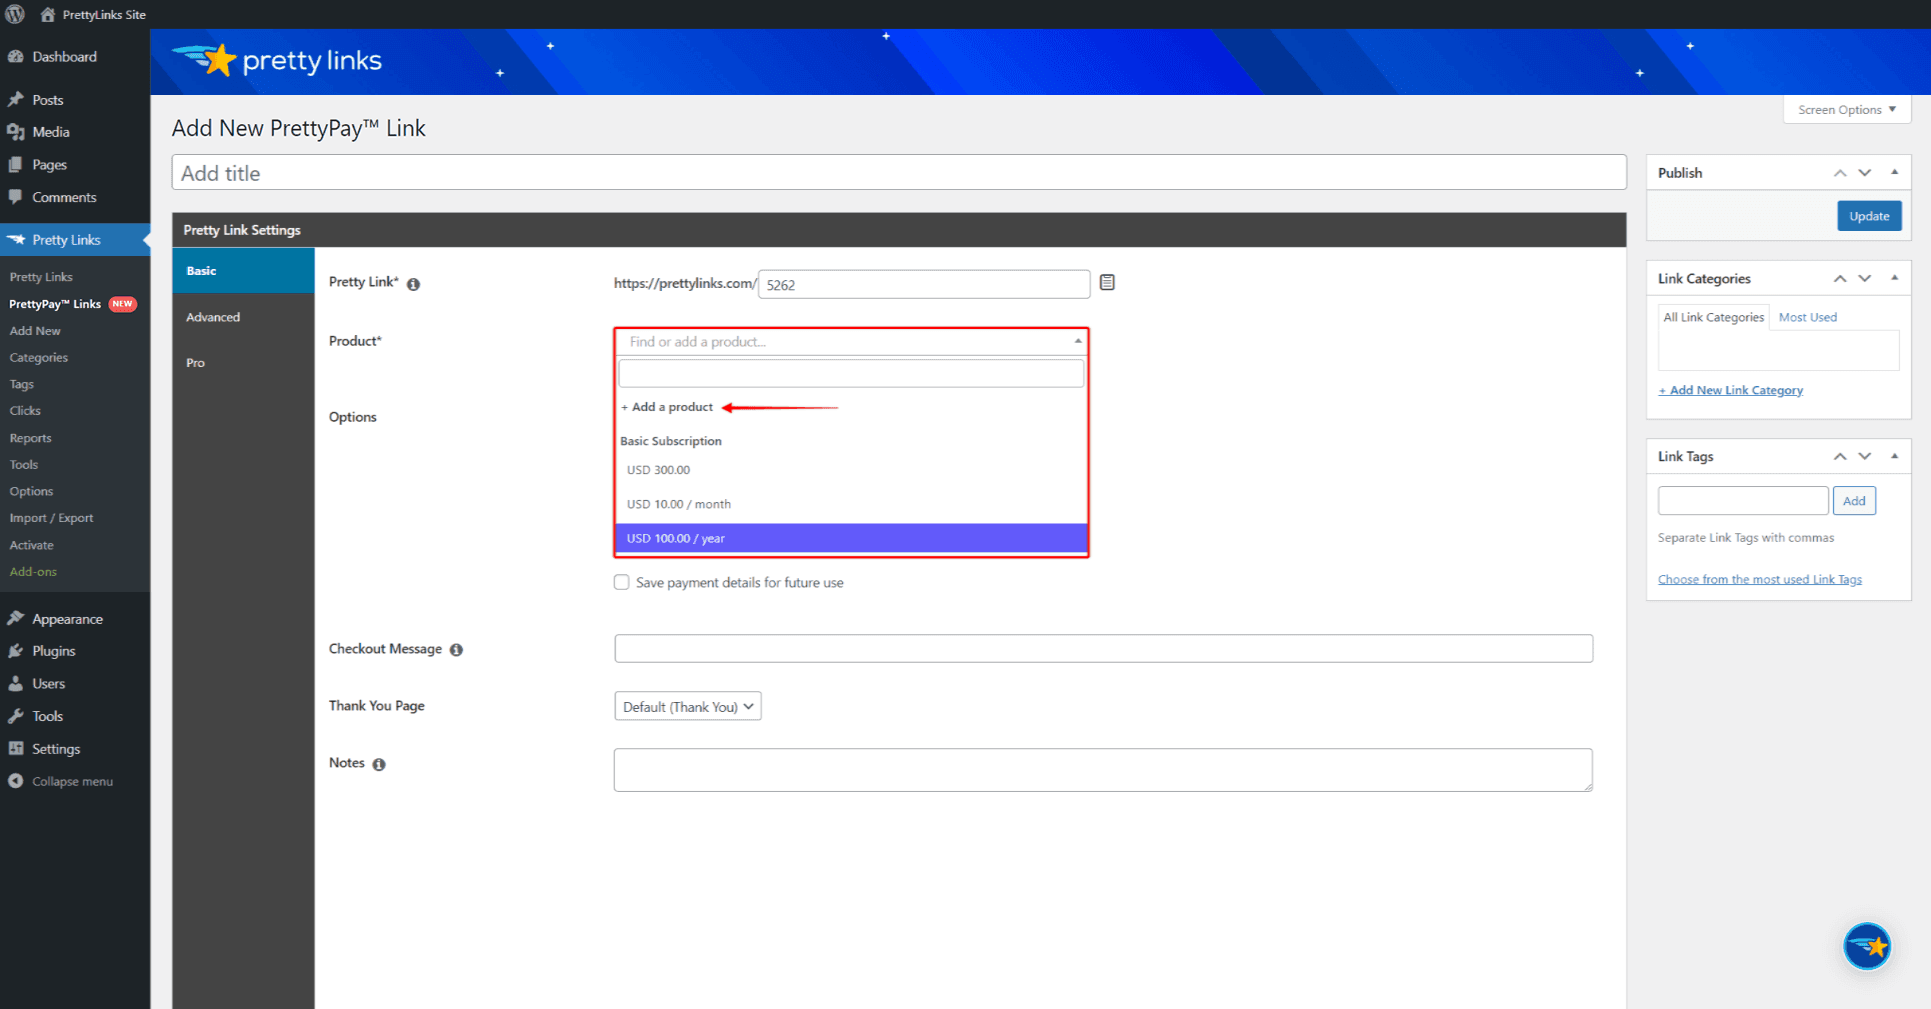
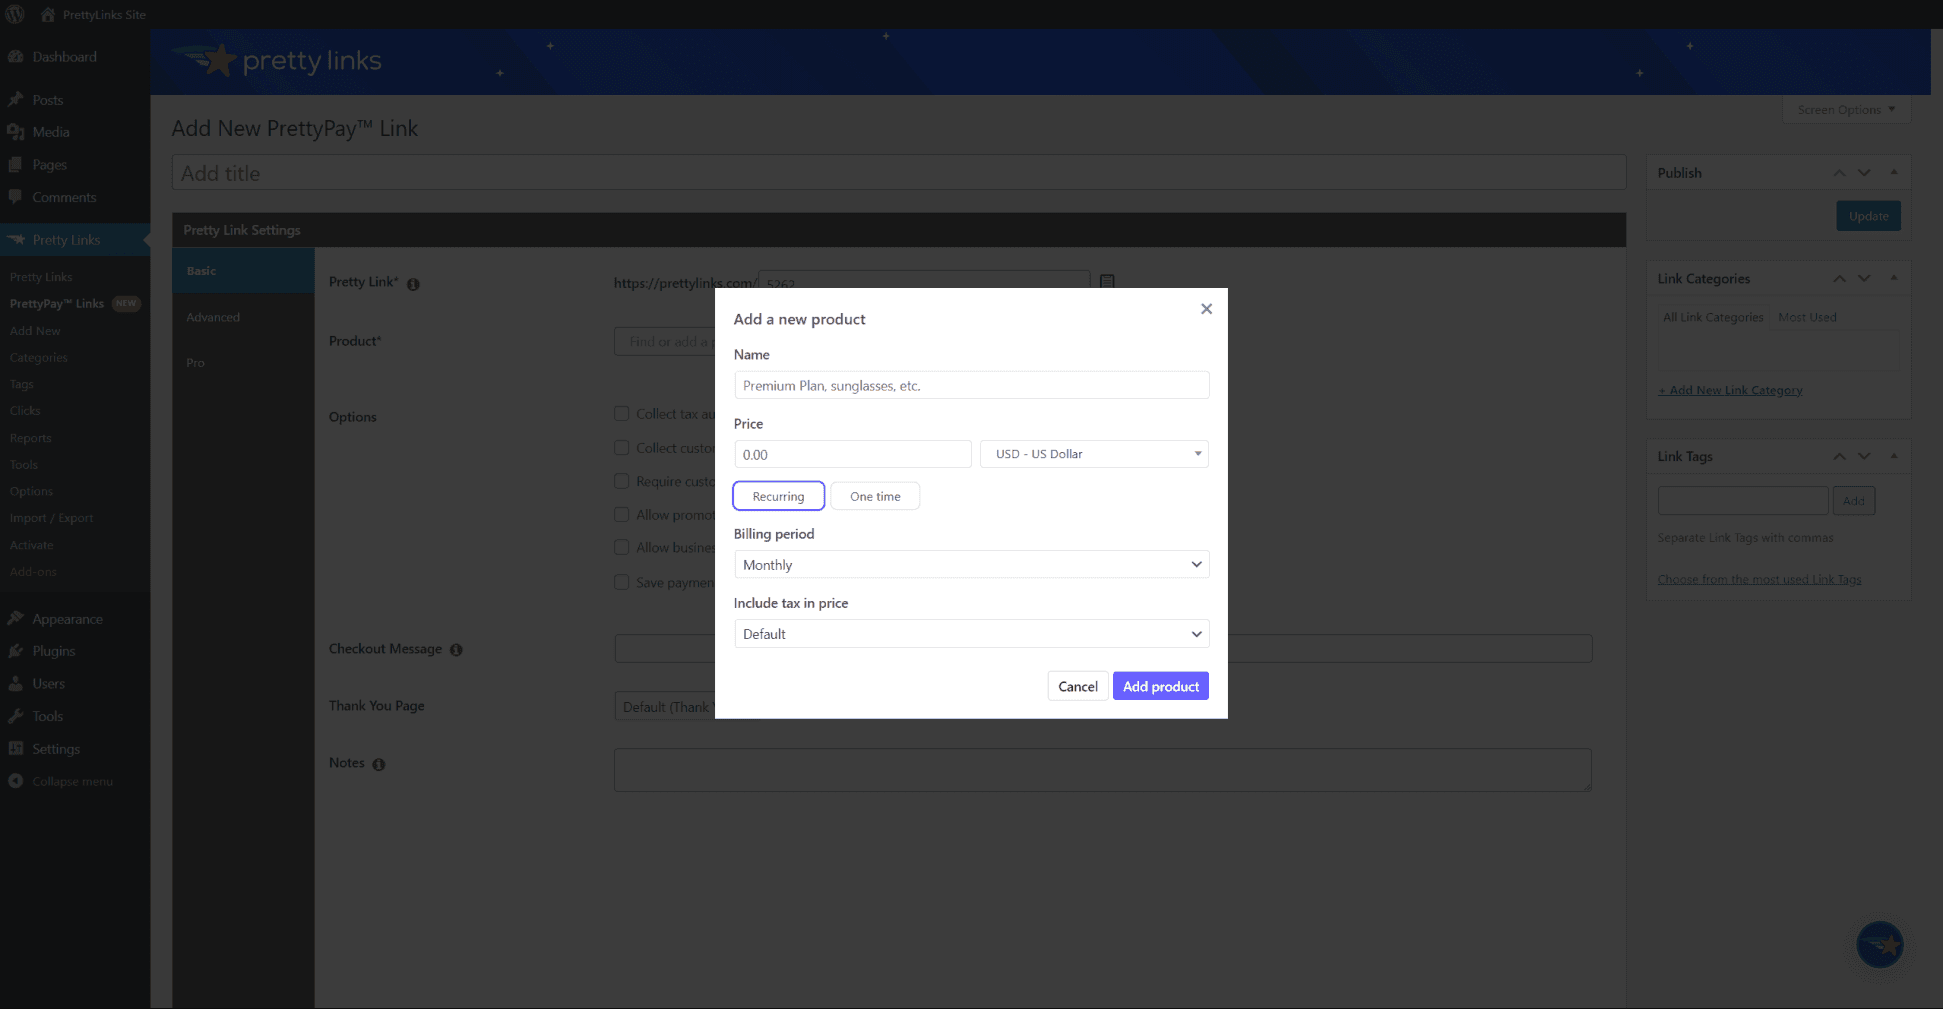
- Alternatively, you can create a new product, by clicking + Add a Product. This will open a popup for creating a new Stripe product and its price.
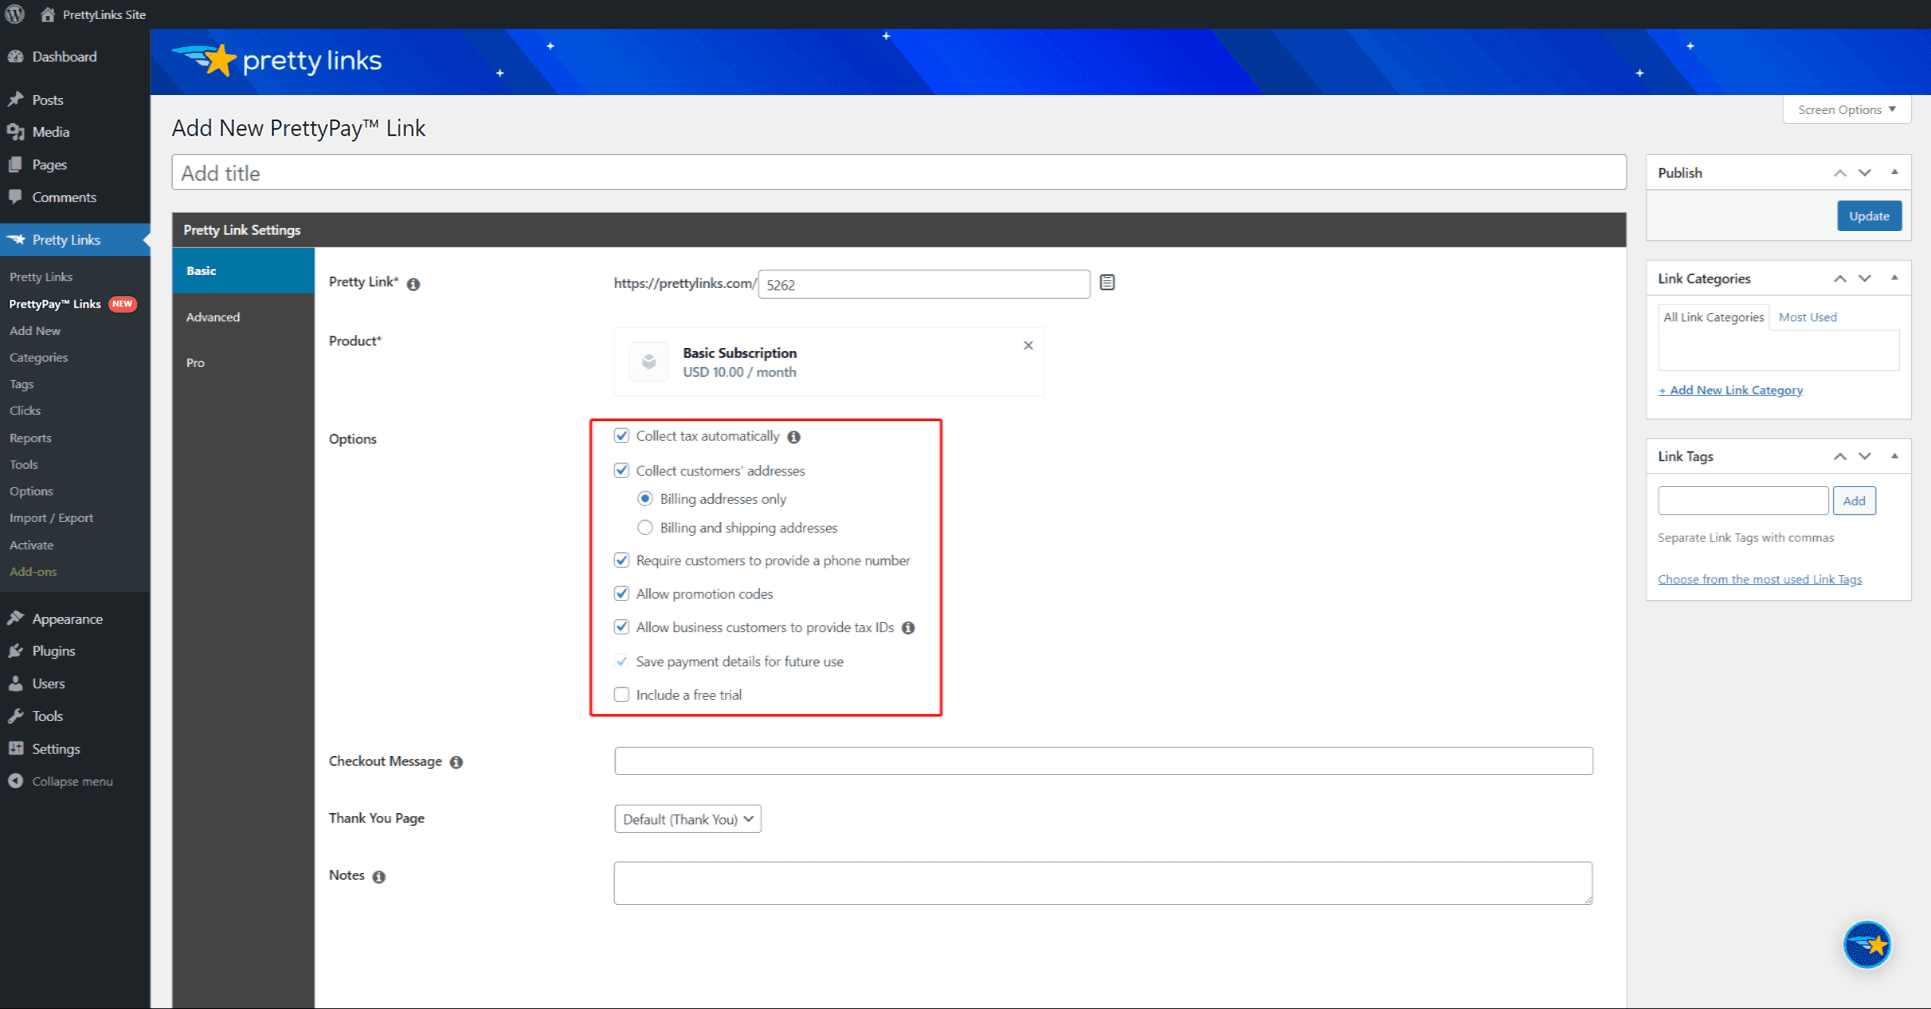
- Under the Options, you can customize the purchasing options:
- Collect tax automatically – if you use the Stripe Tax feature to collect taxes, you can enable this option to collect taxes with this PrettyPay™ link;
- Collect customers’ addresses – this feature should be enabled if you want to collect the customers’ addresses. Here, you can select whether you would like to collect the billing addresses only, or both billing and shipping addresses;
- Require customers to provide a phone number – when this option is enabled, users will need to provide a phone number to finalize the purchase;
- Allow promotion codes – this option allows users to apply your Stripe promotion codes to this PrettyPay™ link;
- Allow business customers to provide tax IDs – this option will add the tax ID filed to your payment form;
- Save payment details for future use – when this option is enabled, Stripe will create a Customer in your Stripe dashboard for the purchase. This option is required for all recurring products and will be automatically enabled. For one-time payments, this option is not mandatory. If left unchecked, user payments will be recorded as guest payments;
- Include a free trial – here you can add a trial to your products. Enabling this option will show an additional field where you can specify the length of the trial in days.
- Add an optional Checkout Message. This text will be displayed alongside the payment confirmation button.
- Under the Thank You Page option, the Thank You page you previously set will be selected by default. If needed, you can choose an alternative Thank You page specifically for this PrettyPay™ link.
- The last option here is Notes, where you can add additional information for your administrators and colleagues. These notes will not be visible on the front end.
In addition to these required settings, there are a few options in the Advanced and Pro menus.
Under the Advanced menu, you will find the following options:
- No Follow – this will add a nofollow and noindex to the PrettyPay™ link’s http redirect header. This will suggest search engines not to index this link.
- Sponsored – this will add a sponsored attribute to the PrettyPay™ link’s http redirect header. The option is recommended for affiliate links.
- Tracking – this will enable the Pretty Link’s built-in hit (click) tracking feature for this PrettyPay™ link.

Under the Pro menu, you will find this option:
- URL Replacements: Enter a comma-separated list of URLs that will be automatically replaced with your PrettyPay™ Link in posts and pages.

Once your users access the PrettyPay™ link, they will see the Stripe Checkout payment form for the related Stripe product. Here, they can fill in their data and complete the payment.

PrettyPay™ Links Pricing Details
All users have access to create PrettyPay™ Links. If you’re on the Free plan, there’s a 3% transaction fee applied to every PrettyPay™ Link transaction.
For those on any of the Pretty Links paid plans, PrettyPay™ Links are available with no extra transaction fees (0% fee).
Free plan users have the option to upgrade to any paid Pretty Links plan at any time to remove the 3% transaction fee.