
Contents
As your site grows, so will the number of links it contains. This can make it more difficult to find and optimize all your links, not to mention track their performance. For example, the more links you have, the harder it becomes to test how well links from different landing pages perform.
One solution to this issue is to create link groups. By grouping related links together, you make it easier to keep track of them. Plus, you can also get information about how certain groups are performing collectively. This information will help you to optimize both the individual links and the groups themselves.
In this article, we’re going to look at how you can use the PrettyLinks plugin to create and use link groups in WordPress. Let’s get started!
What Link Groups Are (And Why You Should Consider Using Them)
Simply put, link groups are a way to sort your links and keep the related ones together. Using a group to collect links not only helps you keep better track of individual performance, but also enables you to see how well the links are performing collectively.
There are plenty of reasons you might want to create these types of groups. For example, you could set up a group for links that appear on a particular post or page, or for all links that lead to the same website. This can give you an idea of which external sites get the most traffic from yours, or how well the links on one of your landing pages are performing.
It’s important to note that each link can only be added to one group at a time. For this reason, you’ll need to consider how to best structure your groups. Bear in mind that you also don’t need to add a link to a group in order to track its individual performance. Instead, a group is best used when you want collective data on several links at once.
How to Use Link Groups to Organize Your PrettyLinks (In 3 Steps)
Link groups is a feature offered by the PrettyLinks plugin, which we’ll be using in the following walkthrough. PrettyLinks enables you to create shortened links, and track how many times they’re clicked on and how many conversions they produce. The first thing you’ll want to do is install the plugin if you haven’t already. Then, you’re ready to start working with link groups.
Step 1: Create a New Link Group
To create and manage your link groups, navigate to PrettyLinks > Groups in your admin dashboard:
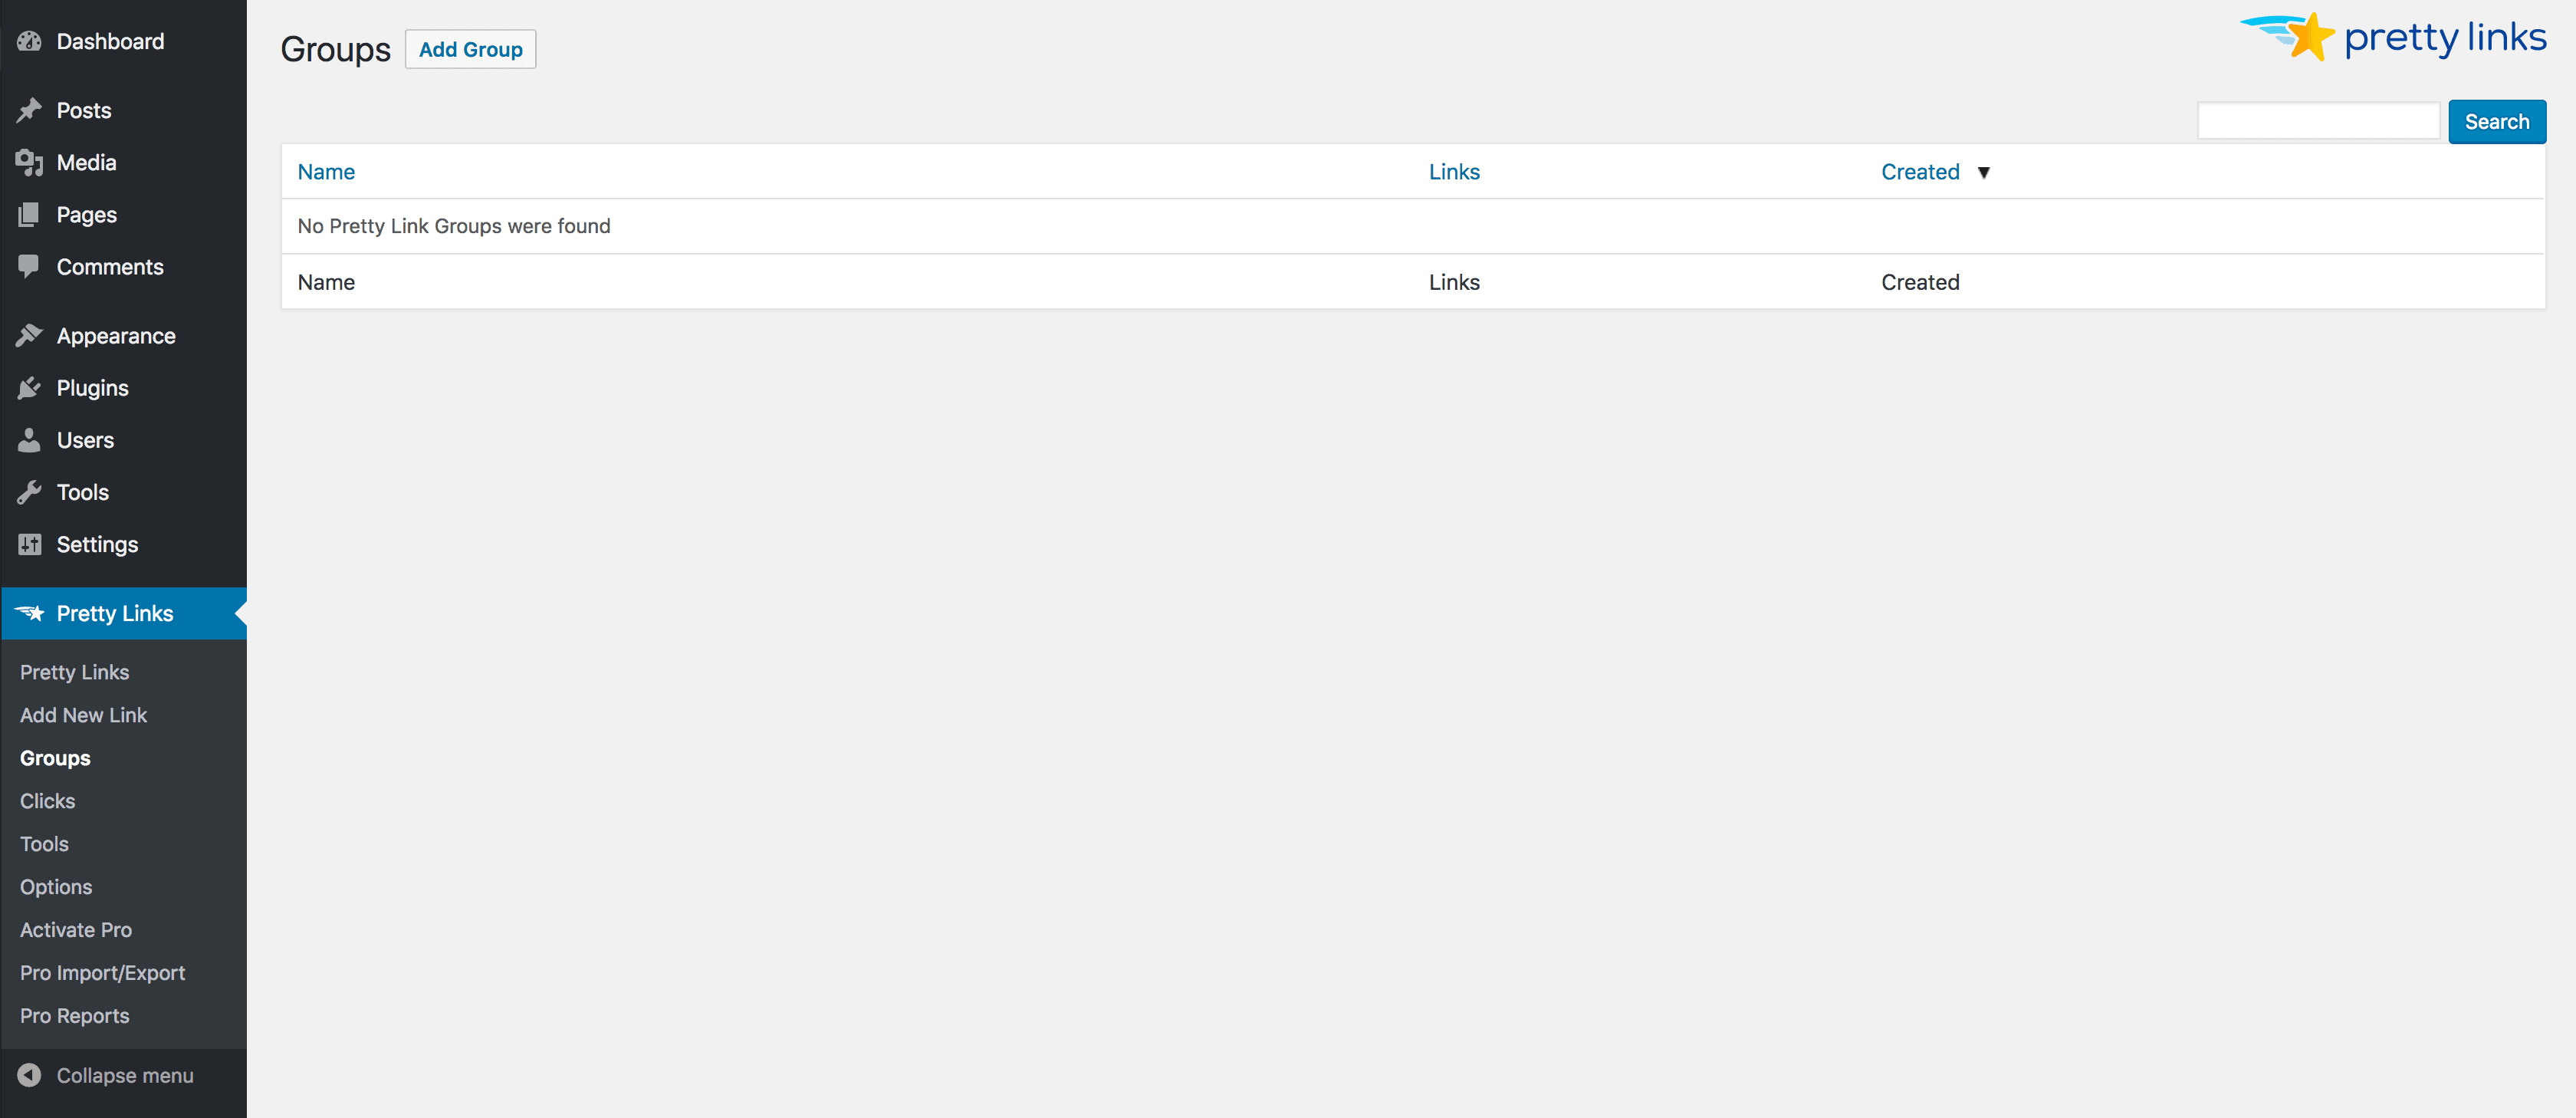
You can create a new group by clicking on the Add Group button. This will open the New Group page:
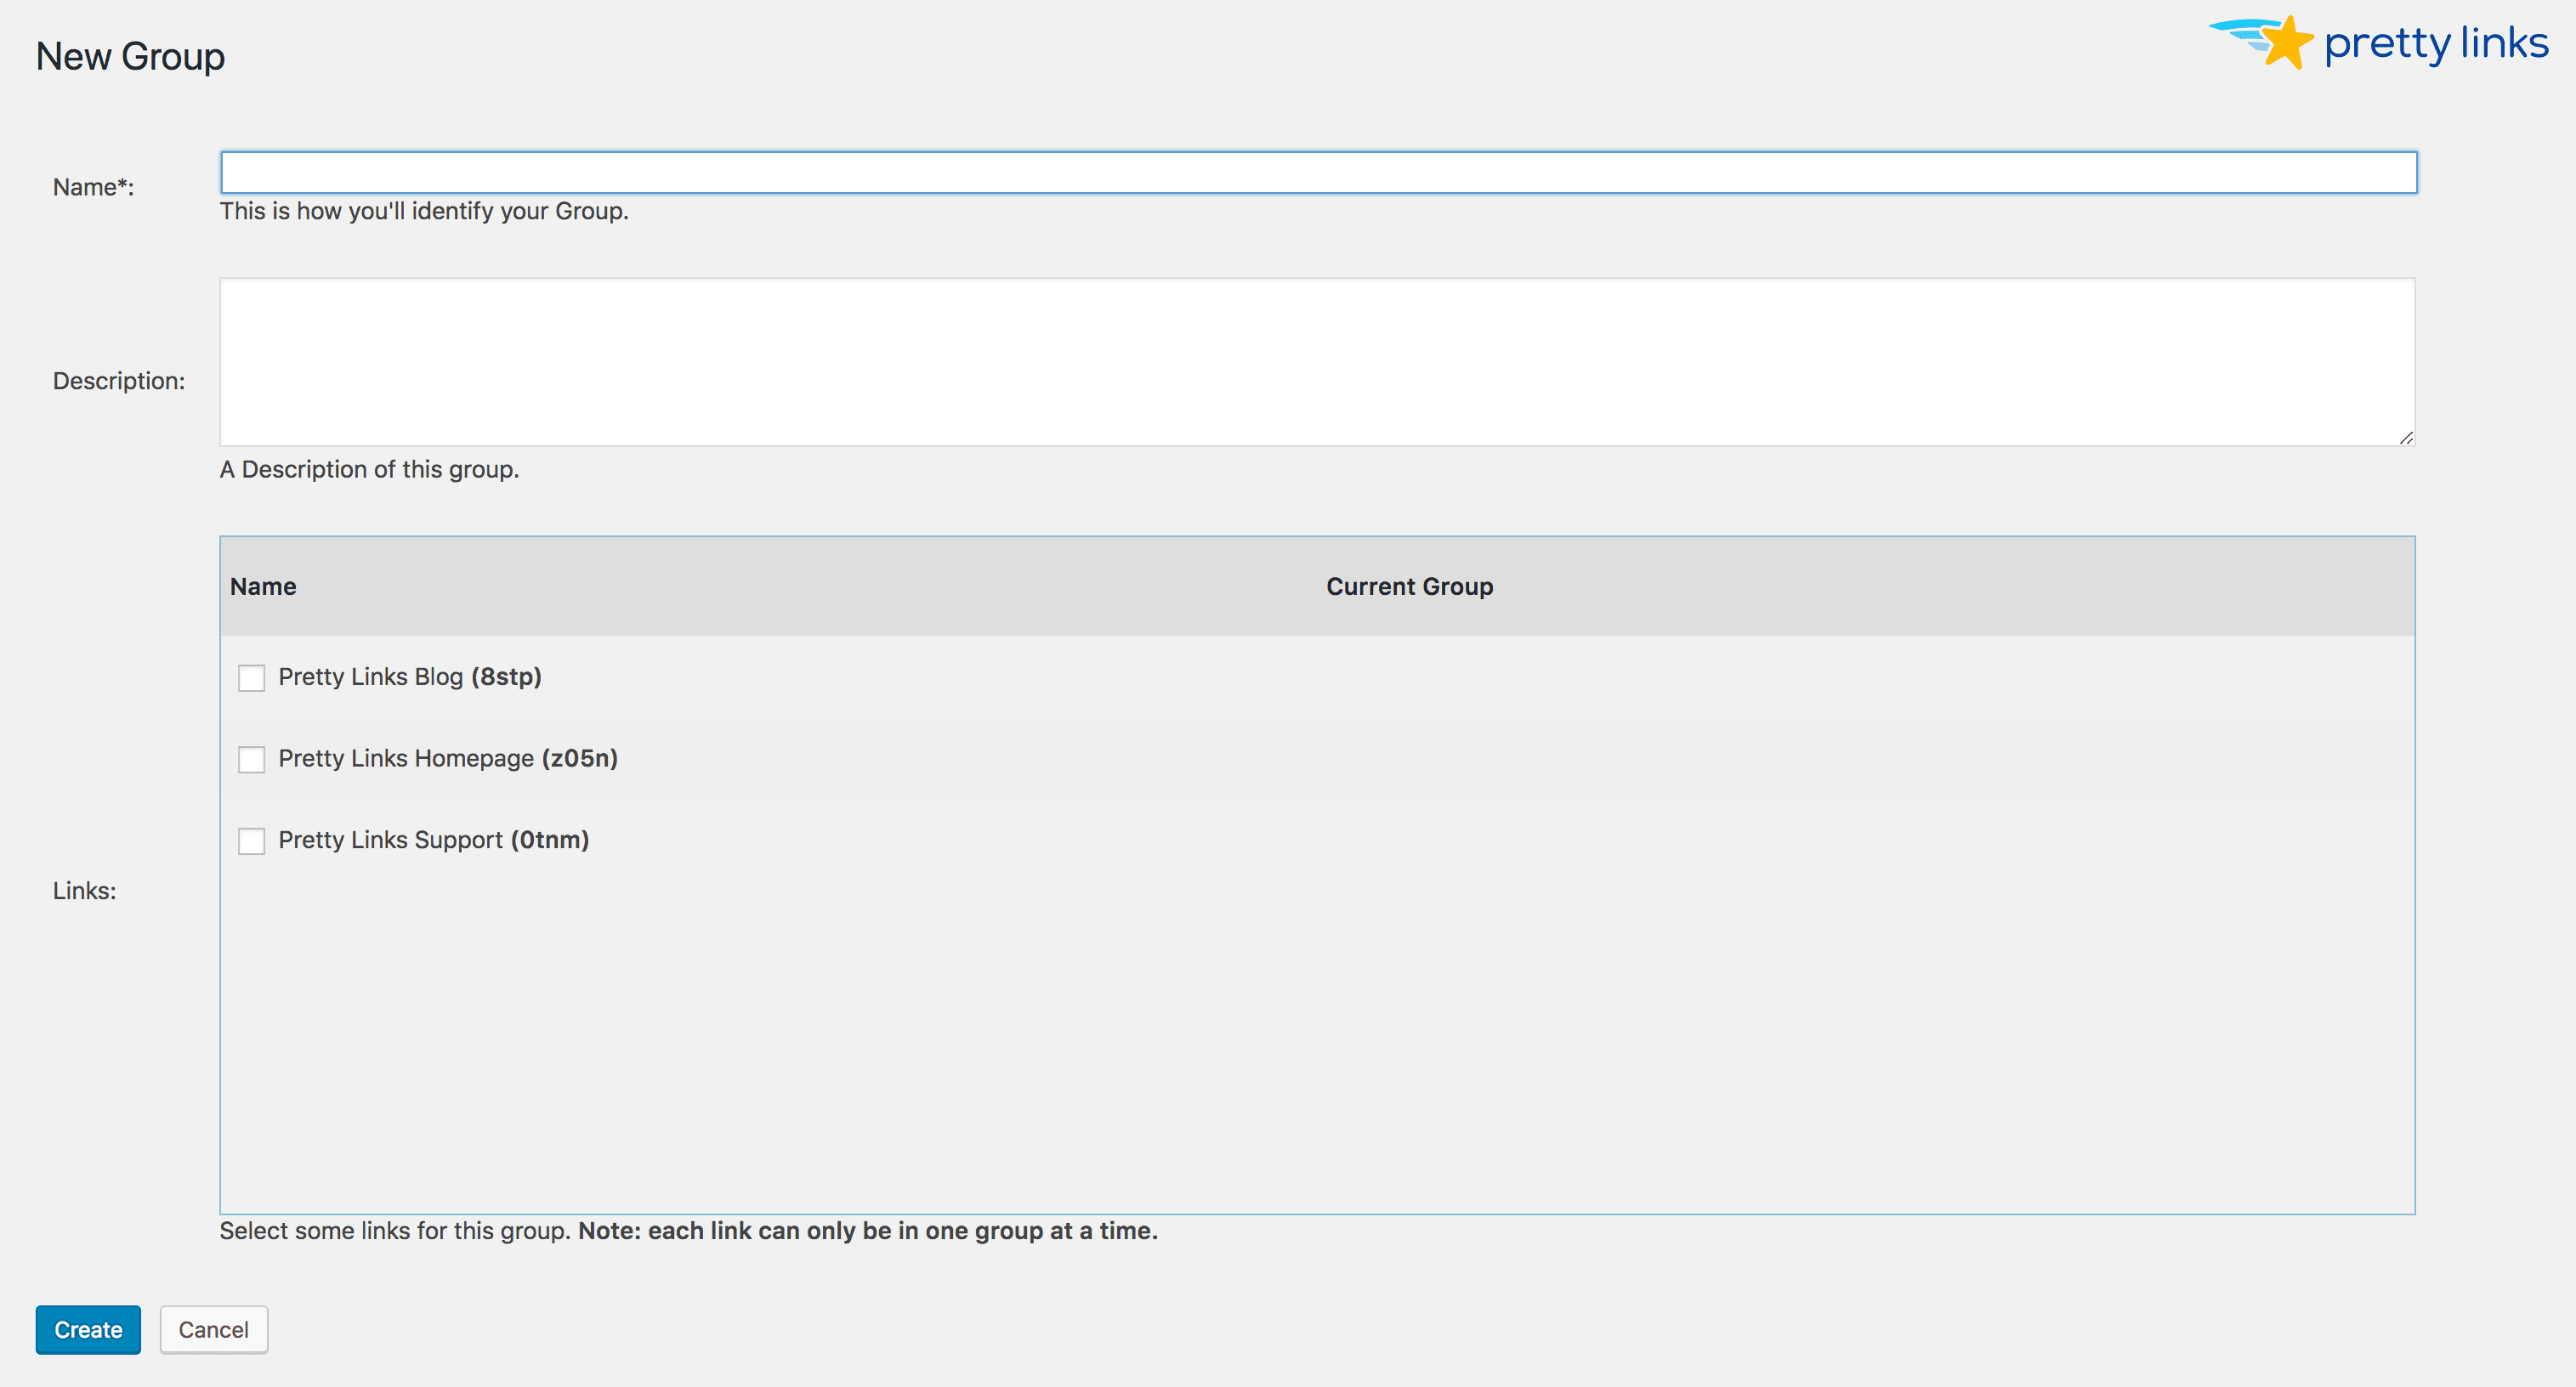
Here, you can give your group a name and a description. All groups must be given a name, but the description is optional. However, we recommend that you include one for future reference.
You’ll also see a list of all the pretty links you’ve already created, enabling you to select the ones you want to include. Even if you don’t choose any links now, you can add new ones to the group at any time.
When you’ve added all the necessary information and selected your links (if relevant), click Create to save the group. You’ll be taken back to the Groups page, where you’ll see your new addition.
Step 2: Add Links to Your Group
As we mentioned in the previous step, you can add links to a group when you create it. However, you can also do this when you create or edit individual links. To see how this works, let’s create a new link and add it to our group. You can also use this process to add existing links to groups.
Navigate to PrettyLinks > PrettyLinks, and click on Add Pretty Link. This will take you to the Add New Link screen, where you can enter the link’s information as usual. If you open up the Advanced Options, however, you’ll see a new menu called Group:
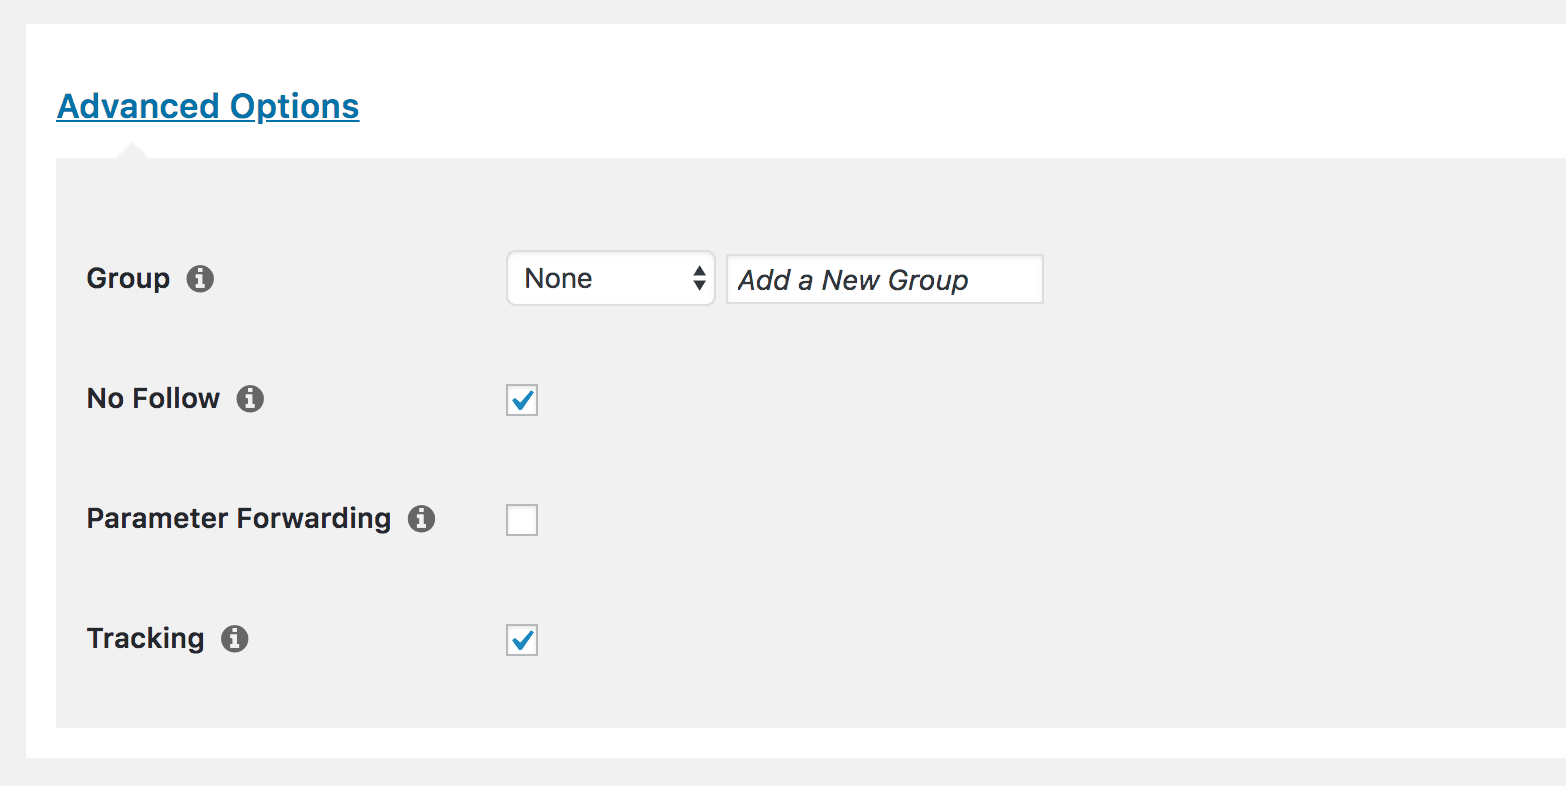
You can use this to select the group you want to add the new link to. Simply choose the group you just created, and then select Create to save it. The new link will now be generated and added to your group. If you want to remove a link from a group, you can use this same process, but select None in the Group menu instead.
Step 3: Track the Group’s Clicks
Once you have a group set up, you can start tracking its performance. While you can still track the individual links, you can also see the total number of times the links in a group have been clicked on. You’ll just need to go back to PrettyLinks > Groups, and hover over the group you want to view:
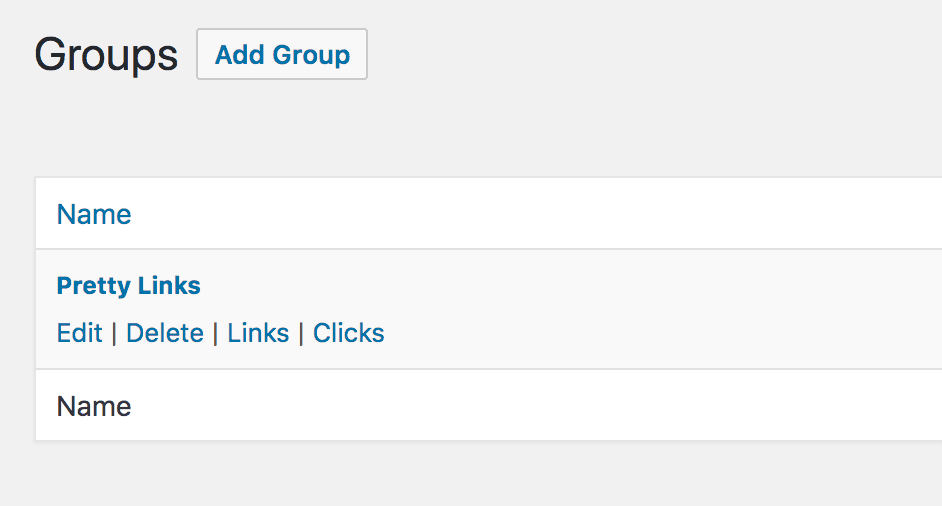
If you select Clicks, you’ll see a report for the group, which will look almost identical to the standard click report for individual links. Here you can see how many clicks the group has gathered over time. You can use this data to see what groups are performing well, and to optimize the links that aren’t doing as well as you’d like.
Conclusion
Tracking your links becomes exponentially harder as your site grows. The more you have, the harder it can be to see how related links perform and how to best optimize them. Using link groups makes it easier to manage your links, and you’ll get information about how the each group performs.
In this article, we’ve looked at how you can use the PrettyLinks plugin to organize your WordPress links. You’ll simply need to:
- Create a new link group.
- Add related links to your group.
- Track the group’s clicks.
Do you have any questions about how to create or manage a link group in PrettyLinks? Let us know in the comments section below!


Leave a Reply