
Contents
There is more to links than just where they direct the user – it also matters how they do so. An important part of creating an effective linking campaign is considering how your links are set up. Failing to configure them appropriately can have a negative impact on your website, including through search engine penalties.
By setting up some default link options, you make it possible to automate the link creation process. For example, you can configure the default Redirect Type for your links, to ensure that all of them redirect effectively. This – and the other default options – helps you get the most from your linking campaigns.
In this post, we’ll introduce PrettyLinks’ default link options, explain what they are, and discuss why you might want to use them. We’ll also show you how to set them up effectively using the PrettyLinks plugin. Let’s get started!
What Default Link Options Are (And When You Should Use Them)
Default link options are settings that apply universally to all newly-created pretty links. Some of these options include specifying default Redirection Types and enabling ‘nofollow’ links. Of course, you can still alter your settings on a per-link basis, and you can change the default settings at any time.
By using default link options, you effectively put all your new links on autopilot. This makes it easier to create and manage your links, saving you time and effort. However, not every website needs to use default link options. You’ll want to consider using them when:
- The majority of your links are used for one purpose (affiliate marketing, for example).
- Your links all (or mostly) have similar needs, such as 301 redirects or link tracking.
Now that you have a better understanding of why using default link options can be beneficial, let’s discuss how to configure them to best meet your needs.
3 Ways to Use Default Link Options Effectively
Now, we’re going to take a closer look at the default link options offered by PrettyLinks, as well as how to set them up effectively. Let’s start by enabling link tracking.
1. Enable Tracking to Improve Your Linking Campaigns
A linking campaign is a deliberate process used to create and manage your on-site and off-site links. By tracking your links, you can see which are most effective, and tweak the ones that aren’t performing well enough.
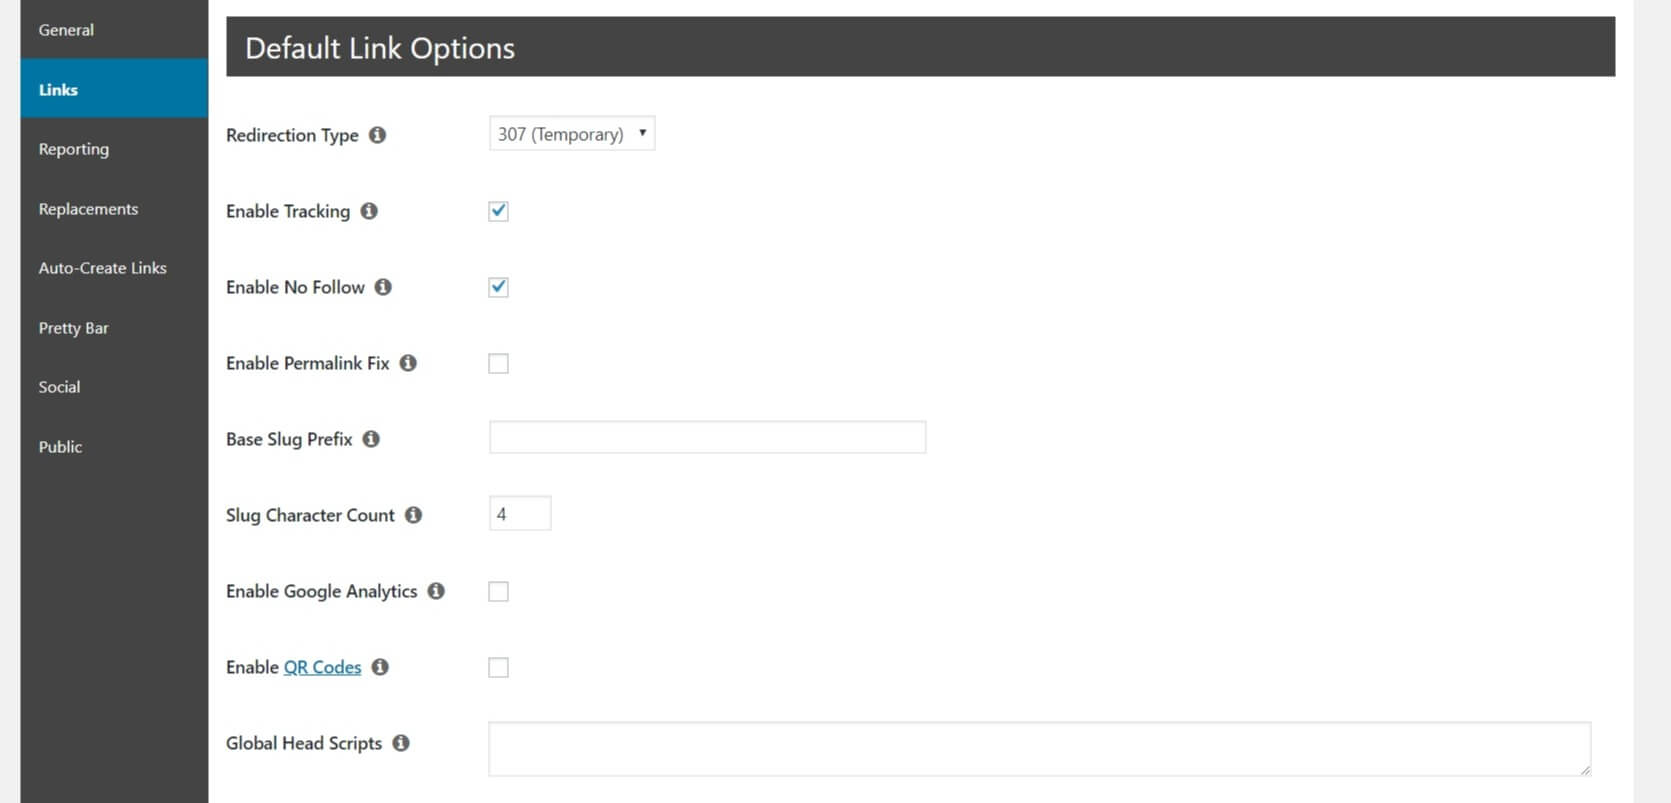
You can enable link tracking on a per-link basis. However, we recommend that you enable it as a default link option, as this helps you keep an eye on all of your links. To enable tracking as a default link option in PrettyLinks, go to PrettyLinks > Options > Links in the WordPress dashboard:
![]()
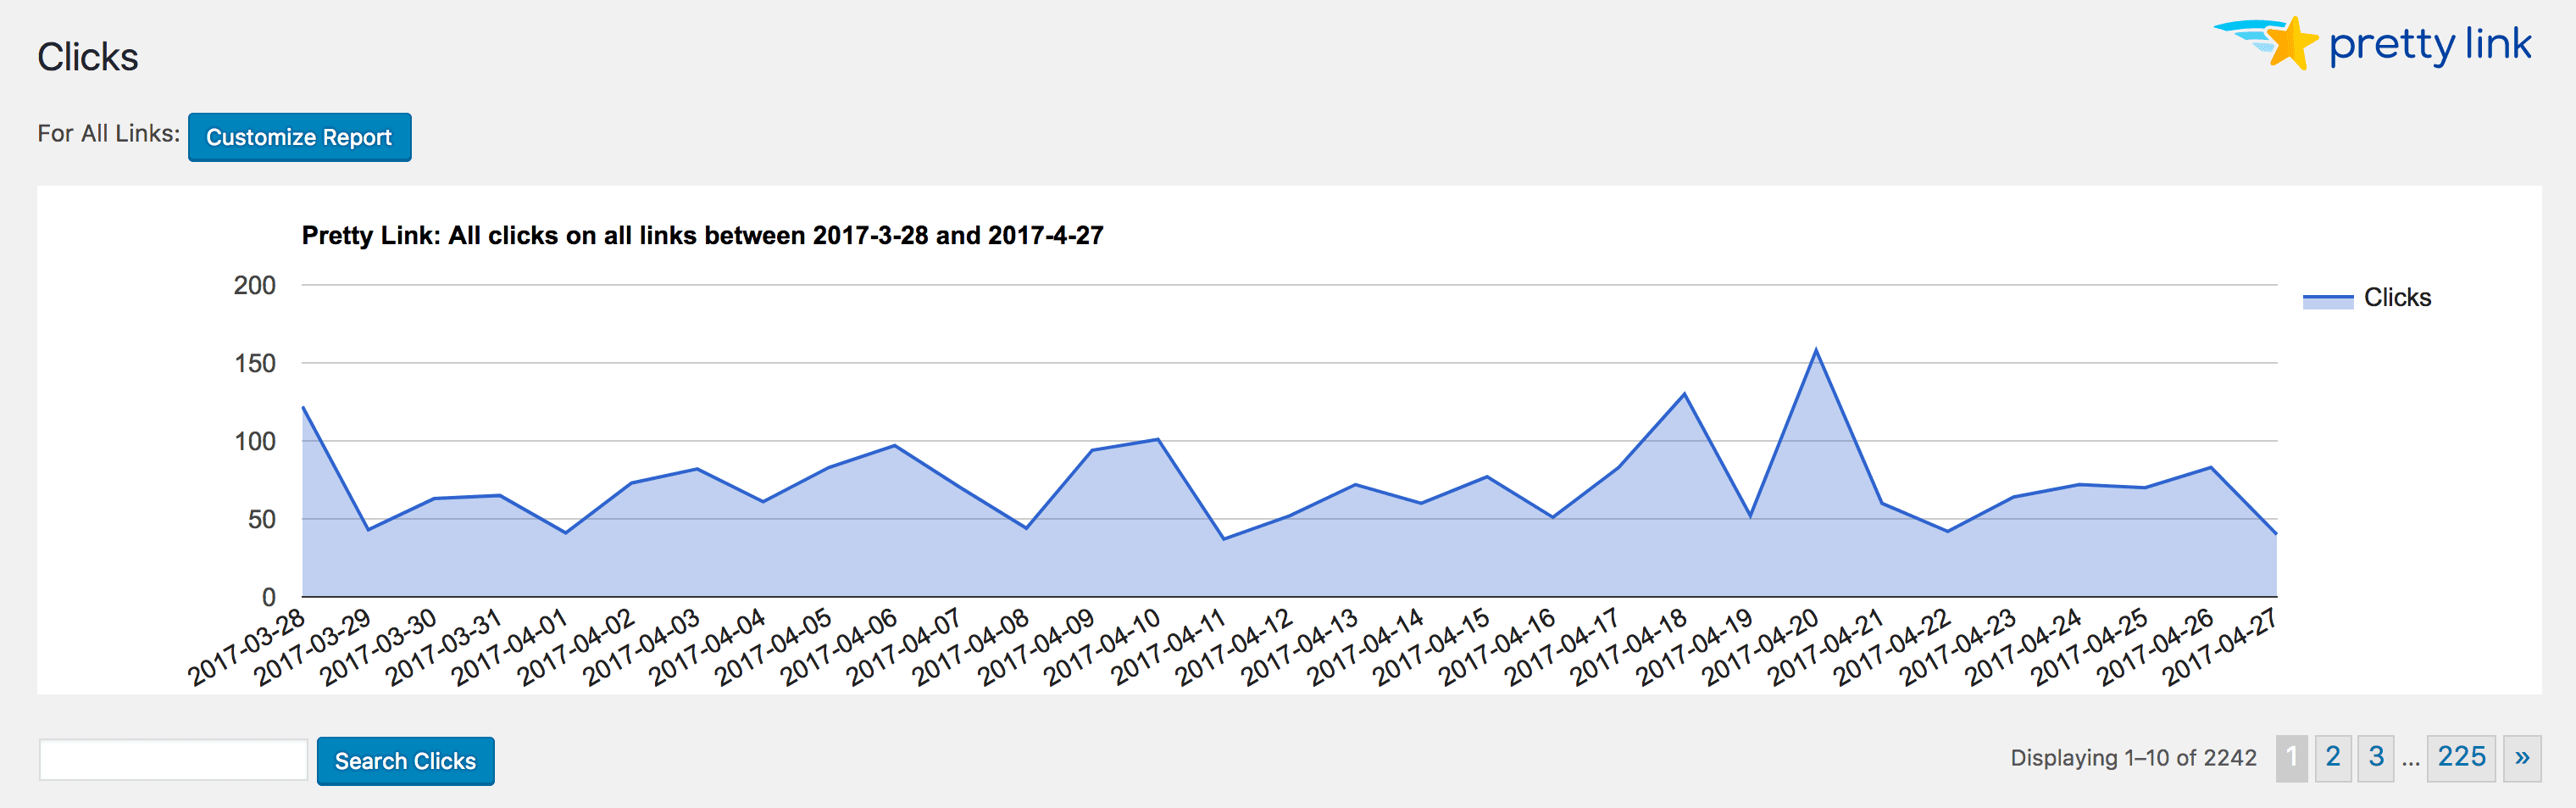
Check the box next to Enable Tracking. Once your links have had time to collect information, you can view the results by navigating to PrettyLinks > Clicks. Alternatively, you can create a Standard Report, which enables you to directly compare links.
2. Enable ‘nofollow’ Links to Prevent Search Engine Penalties
The links you create and use on your website have one of two settings – dofollow or nofollow. A ‘dofollow’ link will share ‘link juice’ with the site it’s pointing to, meaning that search engines will use that external site to better understand your own content. However, this isn’t recommended for affiliate links, and it can even lead to search engine penalties in certain situations.
If the majority of your links are to affiliate products, it’s best to enable ‘nofollow’ on a default basis. To do this in PrettyLinks, return to PrettyLinks > Options > Links. Then, click the box next to Enable No Follow:
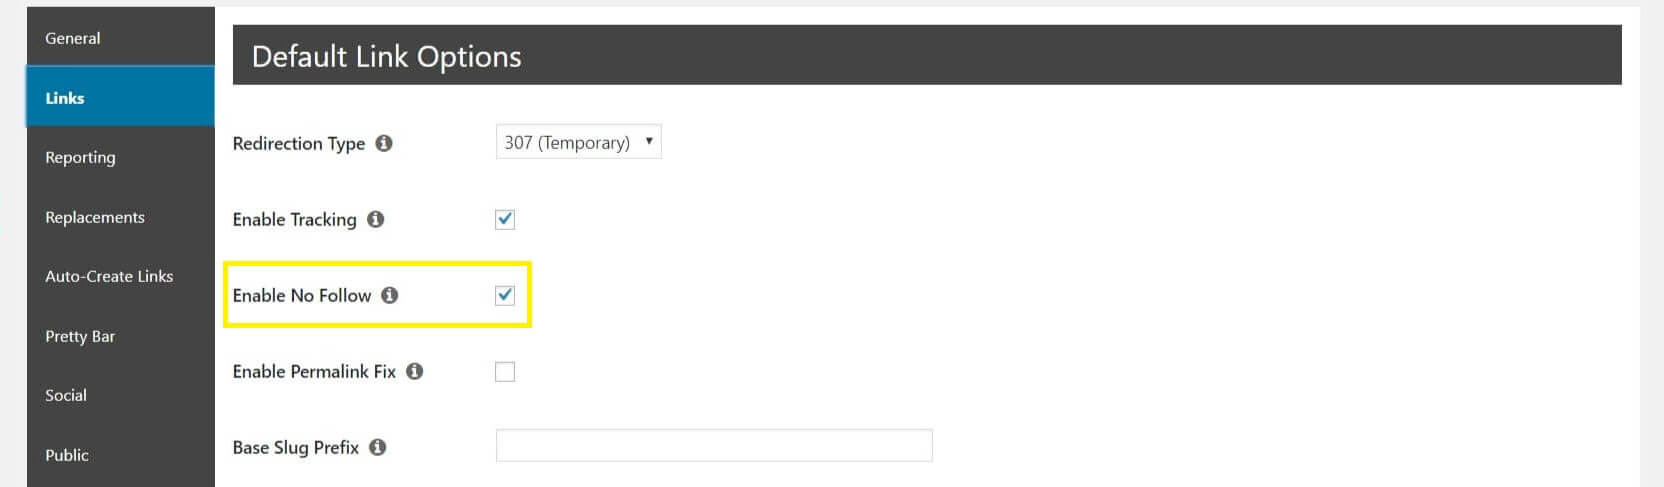
Now, all new links will be automatically set to nofollow. However, this won’t apply to any previously created links, so be sure to enable nofollow on those individually if necessary.
3. Set Open Graph Meta Tags to Control What Social Media Sites Share

In short, open graph meta tags are text snippets that determine what parts of your content will be shared on social media sites like Facebook and Twitter. You can use these tags to make sure that important aspects of your content are incorporated when it’s shared across various social platforms.
To set open graph meta tags, you’ll need to enter the tags into your website’s Global Head Scripts field. You can do this under PrettyLinks > Options > Links once again:

You can add as few or as many tags as you’d like here. When you’re done, remember to save your changes!
Conclusion
Whether you’re a blogger, affiliate marketer, or e-commerce shop owner, links are a crucial part of your marketing campaigns. That means it’s important to set them up properly. Failure to do so can mean missing out on helpful information (such as link tracking), as well as putting your search engine rankings at risk.
In this post, we’ve introduced PrettyLinks’ default link options. We’ve also shown you how to use them most effectively. For example, you can:
- Enable tracking to improve your linking campaigns.
- Set links to nofollow to prevent search engine penalties.
- Set open graph meta tags to control what social media sites share.
Do you have any questions about the default link options offered by PrettyLinks? Let us know in the comments section below!


Leave a Reply