
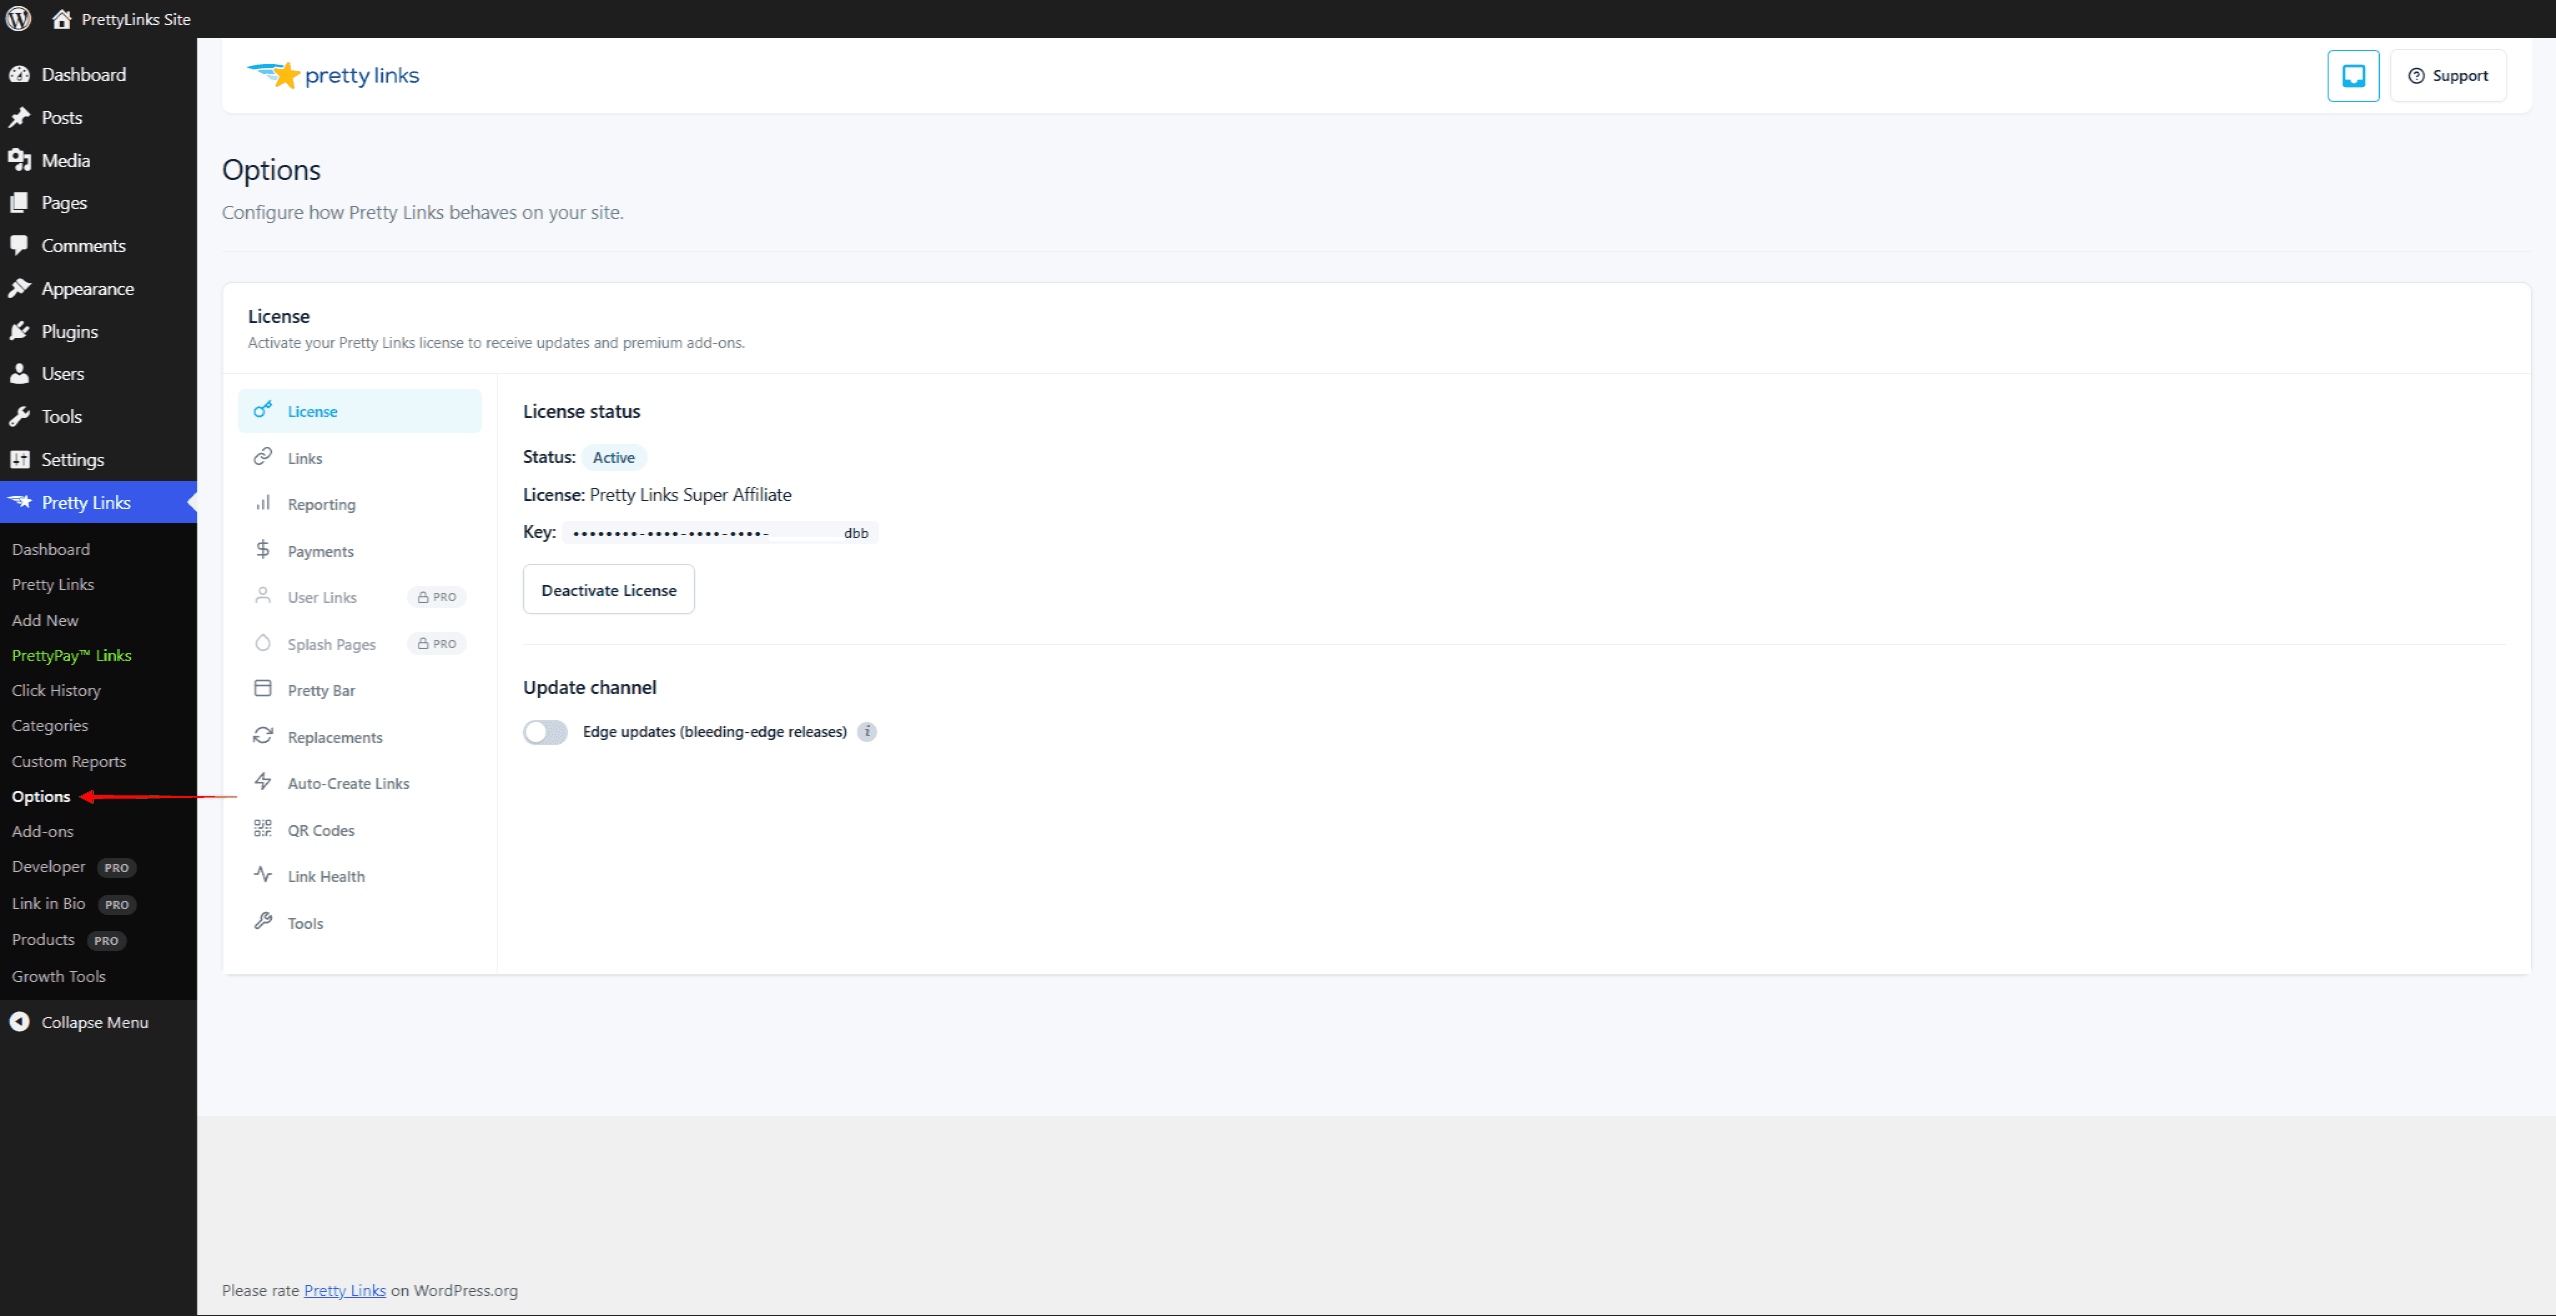
La mayor parte de la configuración global de Pretty Links se encuentra en Panel de control > Pretty Links > Opciones. La página está organizada en pestañas, cada una de las cuales agrupa ajustes relacionados. Esta página es tu guía.
Guardado automático
Una breve nota antes de comenzar el recorrido: la página «Opciones» no tiene un botón «Guardar». La configuración se guarda automáticamente unos 600 milisegundos (poco más de medio segundo) después de que dejes de escribir o modifiques un control. Verás un pequeño indicador de confirmación una vez que se haya guardado correctamente.
Esto significa que:
- No esperes “deshacer los cambios” al salir de la página: para entonces, tus cambios ya se habrán guardado;
- Si cometes un error tipográfico en un campo importante, corrígelo antes de salir de la página;
- Actualiza la página después de guardar para comprobar qué se ha guardado, sobre todo al modificar opciones delicadas como el modo de seguimiento.
Las pestañas
Las pestañas aparecen en un orden determinado. Primero aparecen las secciones de la versión Lite —Licencia, Enlaces, Informes, Pagos— y, a continuación, las secciones de la versión Pro y de los complementos, con Herramientas siempre es lo último.
Licencia
Gestiona tu licencia de Pretty Links Pro:
- Activar o desactivar la licencia en este sitio web;
- Consulta el estado de tu licencia, el nivel de tu plan y la fecha de renovación;
- Iniciar una comprobación manual de actualizaciones;
- Encuentra los recursos de atención al cliente.
Esta es la primera pestaña que hay que visitar tras instalar Pretty Links Pro en una nueva página web.
Enlaces
Valores predeterminados y reglas generales que se aplican a los nuevos enlaces simplificados que crees:
- Tipo de redireccionamiento predeterminado (301 o 302; el 307 está en desuso);
- Recuento de caracteres de los slugs generados automáticamente;
- Plantillas de «slug» reservadas (con opción de omisión por parte del administrador);
- Por defecto
rel="nofollow"yrel="patrocinado"botones de activación/desactivación para los nuevos enlaces.
Véase Configuración predeterminada de los enlaces Para más información.
Informes
Seguimiento de clics y análisis del comportamiento:
- Activar el conmutador “Realizar un seguimiento de los clics en todos los enlaces de forma predeterminada”;
- Modo de seguimiento — Normal, Ampliada o Simple;
- Haz clic en «Retención de datos» (ventana de eliminación automática);
- Anonimización de direcciones IP;
- Filtrado de bots y listas de direcciones IP permitidas y excluidas.
Pagos
Conecta Stripe y configura los valores predeterminados para los enlaces PrettyPay™ —enlaces optimizados que cobran el pago antes de redirigir—. Omite esta pestaña a menos que tengas pensado monetizar directamente tus enlaces cortos.
Enlaces públicos (A favor)
Configuración de creación de enlaces públicos:
- Activar / desactivar;
- Prefijo de URL;
- Categoría predeterminada;
- Medidas contra el spam.
Esta sección solo aparece cuando se utilizan enlaces públicos.
Pretty Bar (A favor)
Configuración de la Tipo de redireccionamiento «Pretty Bar»:
- Posición (parte superior o inferior de la ventana gráfica);
- Altura y colores de la barra;
- Subir el logotipo;
- Título, texto del botón y enlace predeterminados;
- Opciones para compartir en redes sociales dentro del bar.
Sustituciones (A favor)
Controles para palabra clave y Sustituciones de URL:
- Distinción entre mayúsculas y minúsculas;
- Aplicar «nofollow» o «patrocinado» en las sustituciones;
- Crear automáticamente las URL desconocidas;
- Lista global de exclusión;
- Lista de direcciones URL bloqueadas.
Creación automática (A favor)
Configuración para creación automática de enlaces con formato optimizado tras la publicación de la entrada:
- Suscripción por tipo de entrada;
- Categoría predeterminada para los enlaces creados automáticamente;
- Estrategia de generación de slugs.
Códigos QR (A favor)
Configuración de Generación de códigos QR:
- Activar/desactivar los códigos QR;
- Formato predeterminado (PNG / SVG);
- Opciones de superposición del logotipo.
Enlace Salud (A favor)
Configuración para el Comprobador de estado de los enlaces:
- Activar comprobaciones periódicas;
- Frecuencia de comprobación;
- Preferencias de notificaciones.
Botones sociales (A favor)
Configuración de botones para compartir en redes sociales:
- Qué botones mostrar;
- Ubicación (arriba, abajo, ambas);
- Activar/desactivar por CPT;
- Activar/desactivar el canal RSS.
Enlaces para usuarios (Complemento «Super Affiliate»)
Aparece cuando se instala el complemento «User Links». Configura el panel de control de enlaces cortos de la interfaz de usuario para los miembros que hayan iniciado sesión. Mientras el complemento no esté activo, la pestaña se muestra como un avance bloqueado.
Splash (Complemento «Super Affiliate»)
Aparece cuando se instala el complemento «Splash Pages». Valores predeterminados para el intersticial con la marca que se muestra antes de las redirecciones. Hasta que el complemento esté activo, la pestaña se muestra como un avance bloqueado.
Herramientas
Siempre es la última pestaña de la barra lateral. Incluye funciones de importación y exportación, herramientas de rendimiento y otras operaciones puntuales que no encajan claramente en las demás pestañas de configuración.
Configuración recomendada para la primera pasada
En el caso de una instalación nueva, ve revisando las pestañas más o menos en este orden:
- Licencia — Activar.
- Enlaces — Configura los valores predeterminados (la mayoría de los usuarios dejan el tipo de redirección en 302 y deciden si los nuevos enlaces deben ser «nofollow» o «patrocinados» por defecto).
- Informes — Asegúrate de que la opción “Realizar un seguimiento de los clics en todos los enlaces de forma predeterminada” esté activada, elige un modo de seguimiento (el modo «Normal» es el predeterminado y el adecuado para la mayoría de los casos), activa la anonimización de la IP y configura tu lista de IP excluidas con la IP de tu oficina.
- Creación automática — Decide para qué tipos de entradas se deben crear automáticamente enlaces optimizados. Actívalo, como mínimo, para las entradas del blog.
- Sustituciones — Decide si quieres activar la sustitución de palabras clave y URL de forma global. En el caso de los sitios web nuevos, lo más prudente es dejarlas desactivadas y añadir palabras clave en cada enlace según sea necesario.
- Botones sociales — Si quieres que aparezcan botones para compartir en tus publicaciones, actívalos aquí.
- Barra de opciones / Códigos QR / Enlaces públicos — Configúralas más adelante, a medida que vayas utilizando las funciones.
No es necesario que perfecciones la configuración de una sola vez. Los ajustes se pueden modificar en cualquier momento y la mayoría se aplican a los nuevos enlaces a partir de ese momento (los enlaces existentes conservan su configuración original a menos que los actualices de forma masiva).
Consejos
- El guardado automático es rápido, pero no instantáneo. Espera a que aparezca el indicador de confirmación antes de salir de la página;
- La pestaña «Licencia» es la fuente de información fiable para tu nivel de plan: añádelo a tus favoritos para consultarlo más adelante;
- Los ajustes de esta página se aplican de forma global. Las modificaciones específicas de cada enlace se realizan en la propia pantalla de edición del enlace;
- Modificaciones por entrada se configuran a través de la metabox de opciones de entrada en las propias publicaciones, no aquí.