
A Tracking-Pixel ist eine spezielle Art der Pretty-Links-Weiterleitung, die niemanden tatsächlich weiterleitet. Stattdessen wird ein unsichtbares 1×1-Bild angezeigt und die Anfrage als Klick erfasst.
Es handelt sich um einen Zähler, nicht um ein Navigationswerkzeug – und genau das macht ihn so effektiv für die Messung von Impressionen.
Wie es funktioniert
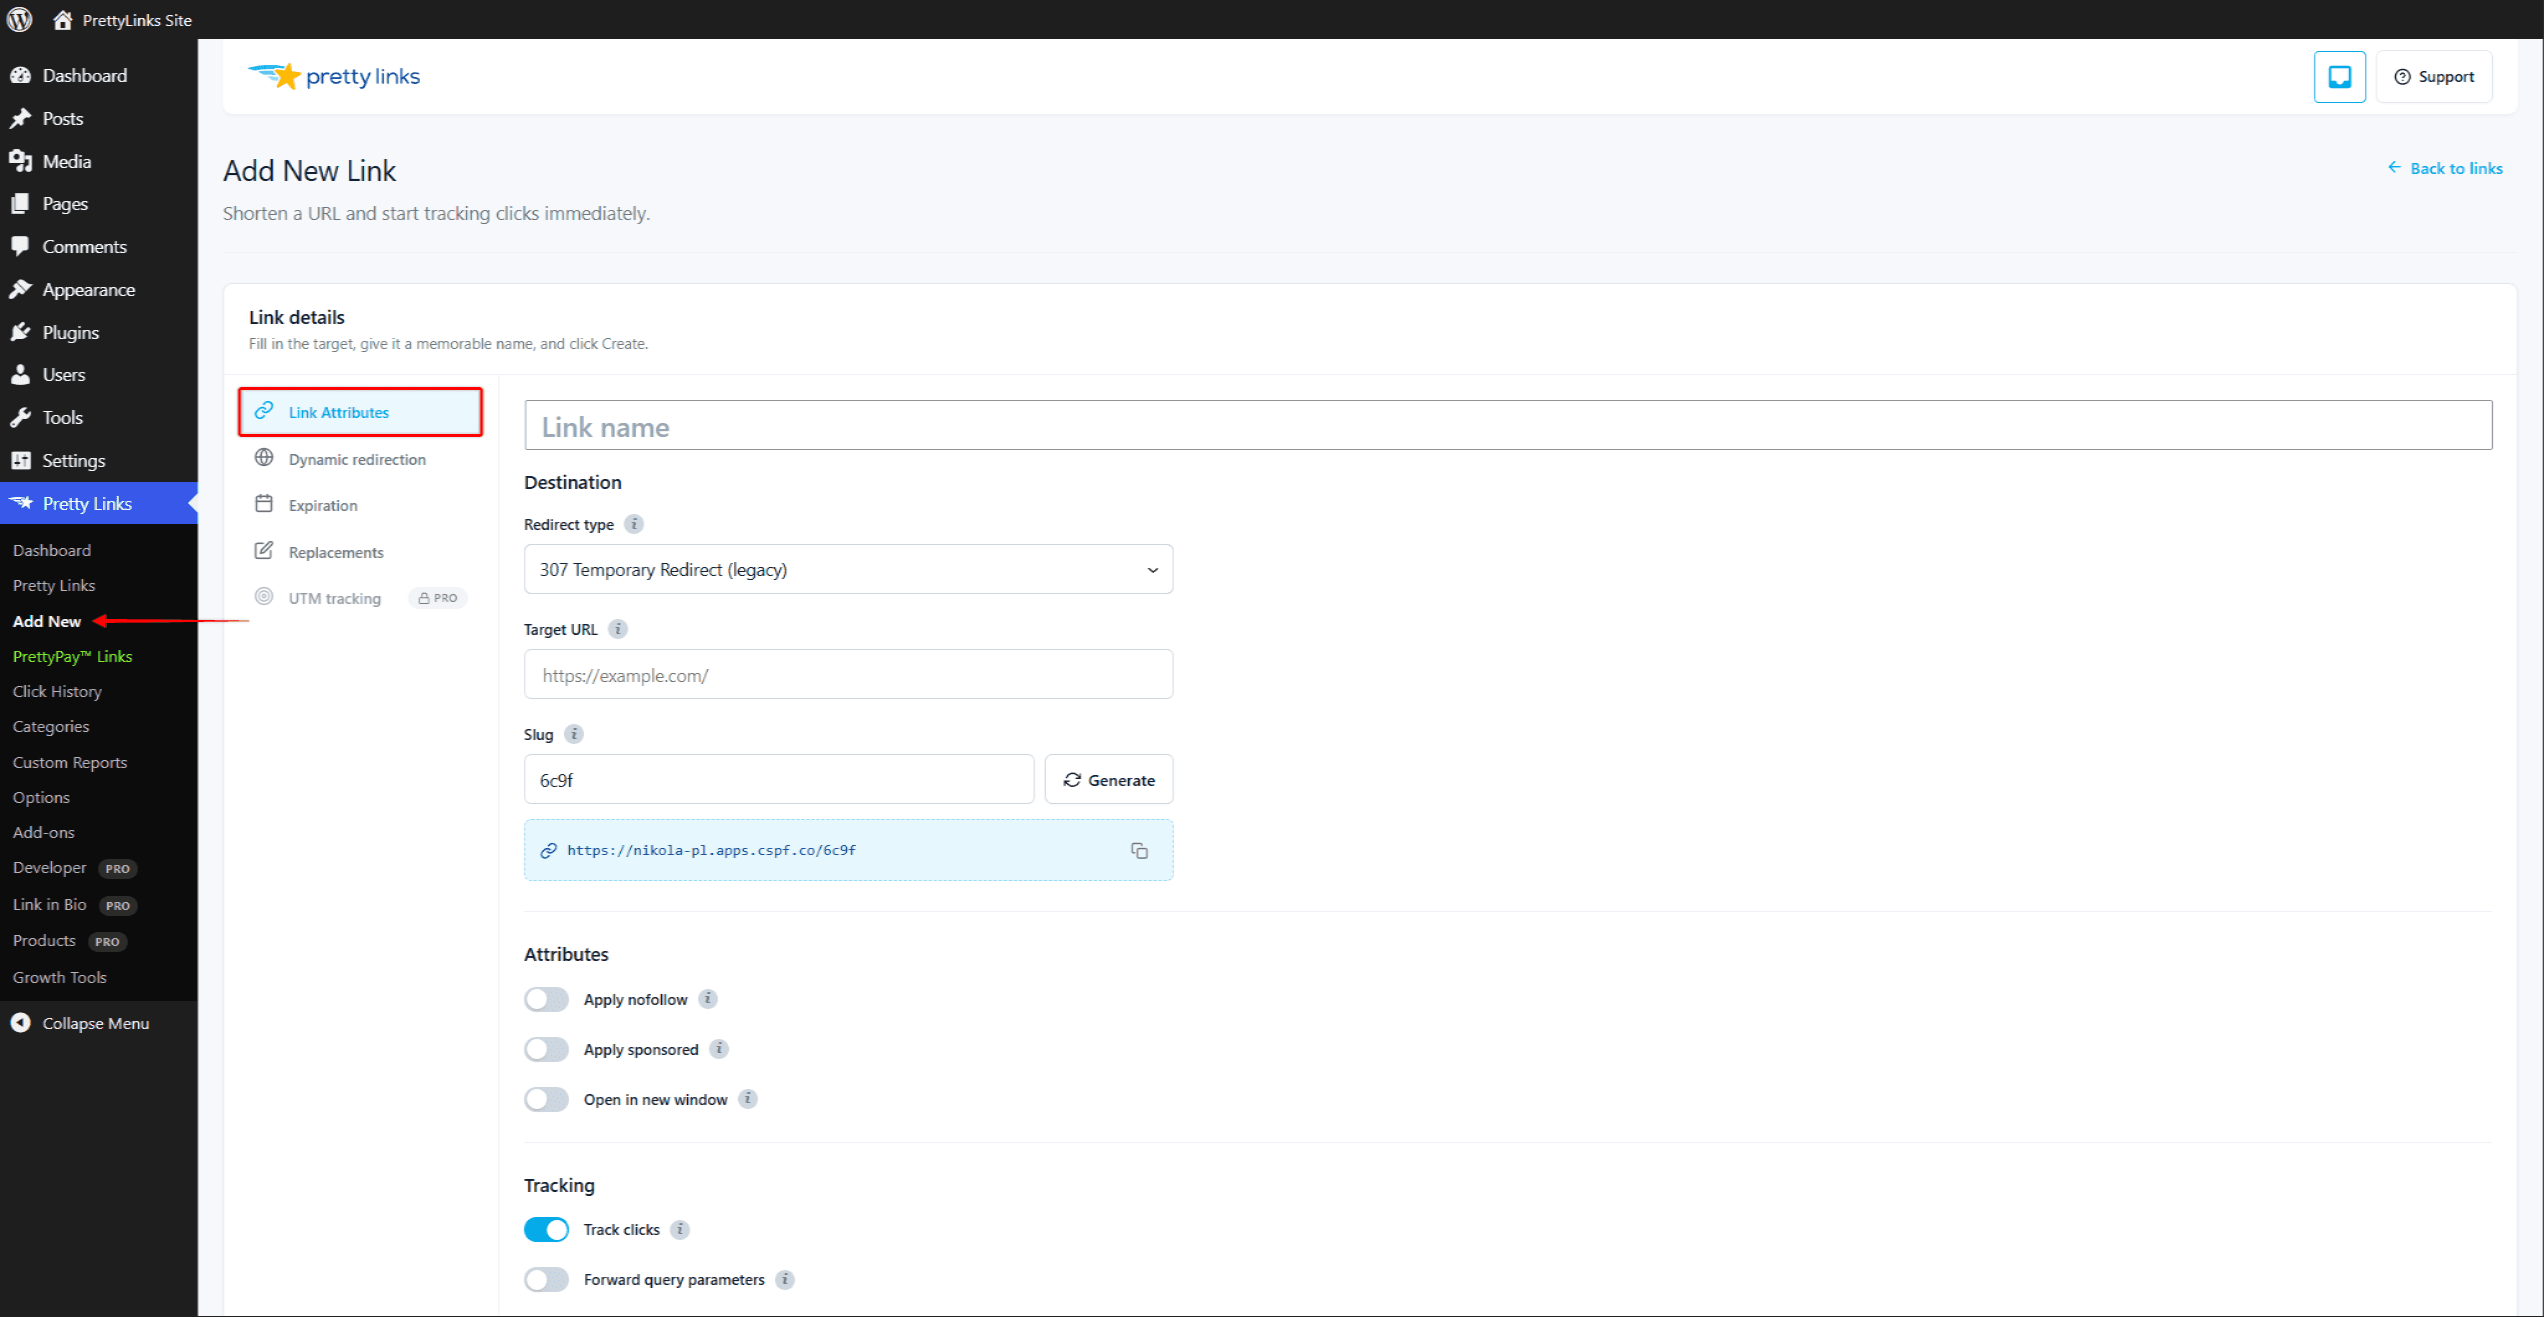
Wenn Sie den Weiterleitungstyp eines Links auf Tracking-Pixel und die Pretty-URL als <img> Tag (oder per Hotlink aus einer E-Mail oder einer Seite einbinden), Pretty Links:
- Empfängt die Anfrage.
- In Ihren Berichten wird dies als Klick erfasst.
- Gibt ein winziges, transparentes Bild mit einer Größe von 1×1 Pixel zurück.
Der Besucher sieht nie etwas Sichtbares. Er navigiert nie irgendwohin. Aber man erhält eine Zählung, wie oft das Pixel geladen wurde.
Wann sollten Tracking-Pixel eingesetzt werden?
- Nachverfolgung von E-Mail-Öffnungen — Betten Sie das Pixel in den HTML-Code einer E-Mail ein. Jedes Mal, wenn die E-Mail geöffnet wird (und die Bilder geladen werden), wird ein “Klick” für diesen „Pretty Link“ erfasst;
- Newsletter-Analysen — Füge pro Newsletter ein Pixel hinzu, um die Öffnungszahlen für jede Ausgabe zu erfassen;
- Zählung der Seitenaufrufe — Setzen Sie ein Pixel auf einer Seite eines Drittanbieters ein, auf der Sie keine vollständige Analyse einrichten können. Jeder Ladevorgang zählt;
- Sendungsverfolgung bestätigen — Fügen Sie ein Pixel auf einer Dankes- oder Bestätigungsseite ein, um erfolgreiche Aktionen zu zählen;
- Webseitenübergreifende Nachverfolgung von Impressionen — Binden Sie den Code in Partnerinhalte ein, um zu erfahren, wie oft Ihre Botschaft angesehen wurde.
So bettet man das Pixel ein
Verwenden Sie in Ihrer E-Mail oder im HTML-Code einen Standard- <img> Füge einen Tag mit deiner Pretty-URL als Quelle hinzu:
<img src="https://yoursite.com/your-pixel-slug" width="1" height="1" alt="" />Sobald die E-Mail oder die Seite geladen und das Bild abgerufen wurde, wird der Klick erfasst.
Einbetten mit dem Shortcode oder Block
Innerhalb von WordPress-Inhalten gibt es zwei weitere Möglichkeiten, ein Pixel zu platzieren. Verwenden Sie den Pixel-Shortcode in einem beliebigen Beitrag, auf einer beliebigen Seite oder in einem Widget:
[pretty_link_pixel id=123]Ersetzen 123 mit der ID des Pixel-Links. Pretty Links fügt das unsichtbare Pixel an der Stelle ein, an der sich der Shortcode befindet.
Der Block-Editor enthält außerdem einen Pretty Links-Pixel Block (pretty-links/pixel-block). Fügen Sie ihn über den Block-Einfüger hinzu und wählen Sie Ihren Pixel-Link aus.
Was wird aufgezeichnet?
Ein Pixel-Hit wird in Ihren Berichten genauso angezeigt wie ein normaler Klick:
- Zeitstempel;
- IP-Adresse des Besuchers (vorbehaltlich IP-Anonymisierung);
- Referrer (die Seite oder der E-Mail-Client, über den das Pixel geladen wurde);
- User-Agent;
- Land, Gerät, Browser usw. (in Klick-Tracking-Modi Erweiterter Verfolgungsmodus).
Der Standard Bot- und IP-Filterung Es gelten Bot-Filter und IP-Filter, sodass gängige Bots zum Vorabrufen von Bildern und Ihre eigenen IP-Adressen die Zählung nicht verfälschen.
Einschränkungen und Vorbehalte
- E-Mail-Clients, die Bilder blockieren — Viele E-Mail-Clients (und viele Menschen!) blockieren Bilder standardmäßig. Bei der pixelbasierten Öffnungserfassung werden die Öffnungen bei diesen Zielgruppen systematisch zu niedrig gezählt;
- Bildzwischenspeicherung — Manche E-Mail-Clients speichern Bilder intensiv im Cache, sodass das zweimalige Öffnen durch denselben Empfänger möglicherweise nur einmal gezählt wird. Die Pretty Links Erläuterungen zu Cookies
prli_dedupDas Cookie verhindert zudem, dass ein Eintrag doppelt gezählt wird; - Datenschutzbestimmungen — Die Verwendung von Pixel-Tracking in E-Mails unterliegt zunehmend gesetzlichen Vorschriften. Informieren Sie sich vor der Einführung über die in Ihrem Rechtsraum geltenden Vorschriften zum E-Mail-Tracking und zur Einwilligung;
- Datenschutz in Apple Mail — Apple lädt Bilder proaktiv im Namen des Empfängers, wodurch die Öffnungszahlen für Apple-Mail-Nutzer künstlich in die Höhe getrieben werden.
Einrichtung
- Erstellen Sie einen neuen Link über Links erstellen und bearbeiten. Die Ziel-URL spielt für ein Pixel zwar keine große Rolle, aber es ist ratsam, sie auf eine sinnvolle Seite wie Ihre Startseite zu verweisen, für den Fall, dass jemand die URL direkt aufruft.
- Set Umleitungstyp zu Tracking-Pixel.
- Wählen Sie einen einprägsamen Slug wie
/news-ausgabe-42damit Sie es in den Berichten erkennen können. - Speichere den Link.
- Kopieren Sie die übersichtliche URL und verwenden Sie sie als
srcAttribut eines<img>Tag in Ihrer E-Mail oder auf Ihrer Seite.
Kombination mit anderen Funktionen
Tracking-Pixel werden in der Regel eigenständig verwendet – es gibt kein Ziel, auf das sie ausgerichtet, rotiert oder im Split-Test getestet werden können. Sie lassen sich jedoch mit folgenden Funktionen kombinieren:
- Klick-Tracking-Modi — Pixel-Hits werden genauso detailliert erfasst wie normale Klicks;
- Bot- und IP-Filterung — sorgt dafür, dass automatisierte Anfragen nicht in Ihre Zählungen einfließen.
Pixel-Links lassen sich nicht mit Ablauf, Zielsetzung, Drehung, oder Split-Tests — Die Pixel-Antwort enthält keine Ziel-URL, zu der eine Weiterleitung, eine Deaktivierung oder eine Rotation erfolgen könnte.