
Der Bericht „Klickverlauf“ zeigt alle auf Ihrer Website erfassten Klicks an und verfügt über Filter, mit denen Sie die Anzeige genau auf die gewünschten Informationen eingrenzen können.
Zu finden unter Dashboard > Pretty Links > Klickverlauf (oder Klicks (je nach Menü).
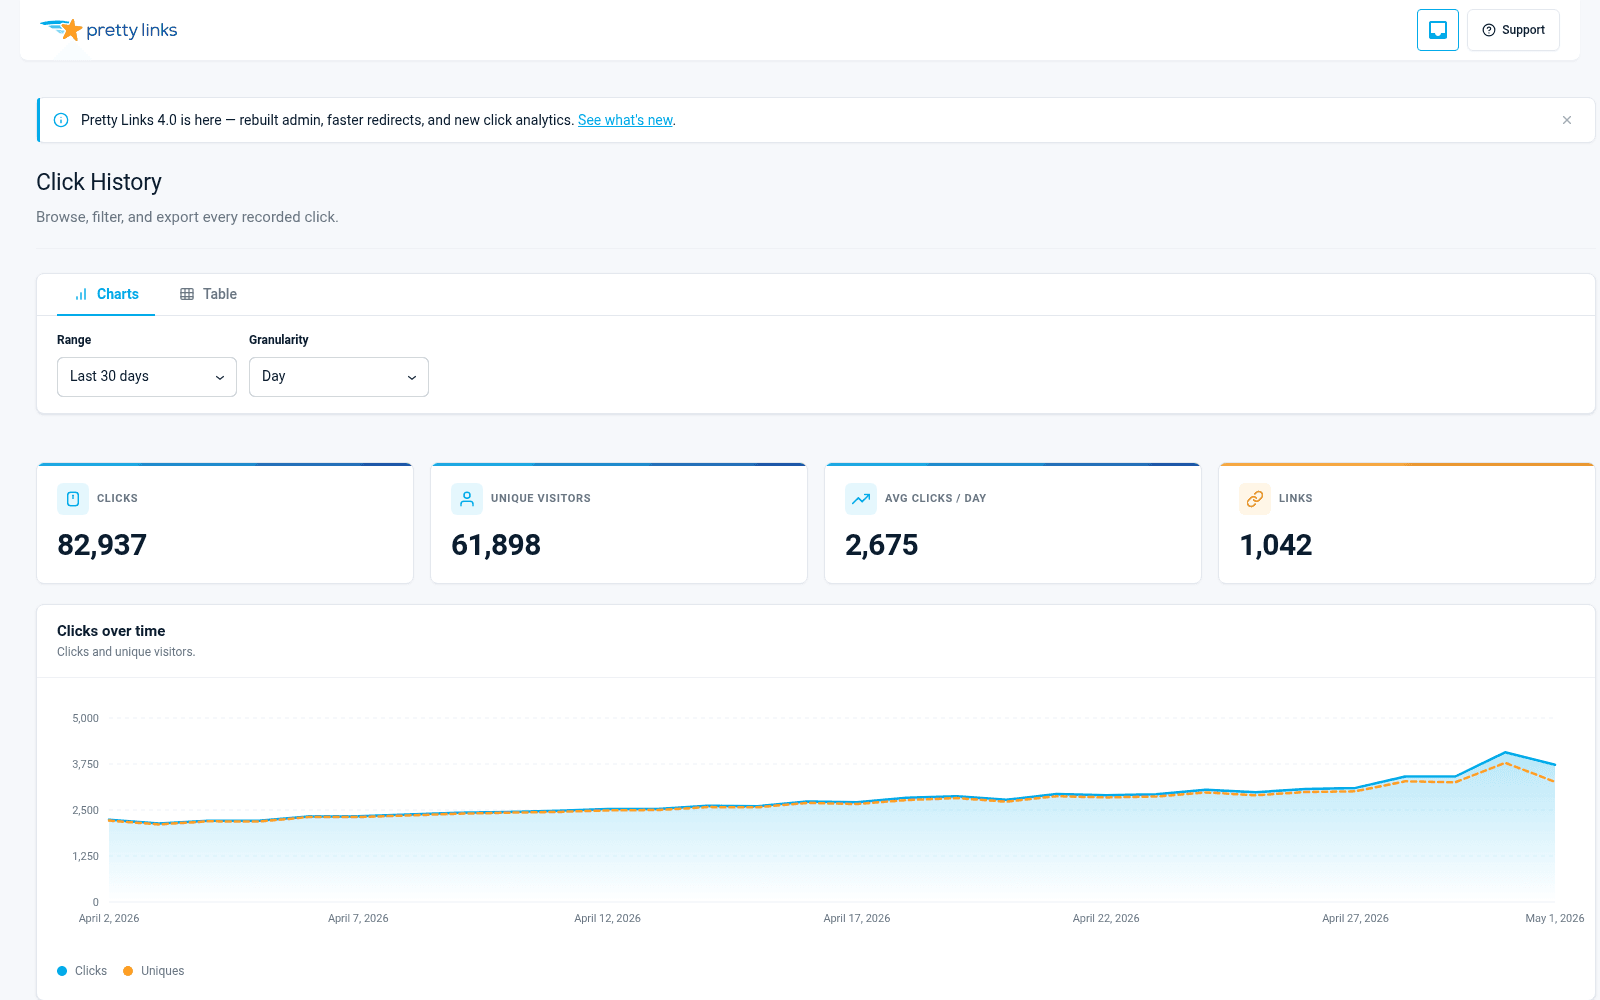
Die Klick-Tabelle
Jede Zeile in der Tabelle entspricht einem Klick. Die Spalten umfassen:
- Datum und Uhrzeit — Als der Klick erfolgte, in Ihrer WordPress-Zeitzone;
- Link — Welcher hübsche Link wurde angeklickt;
- IP-Adresse — Die IP-Adresse des Besuchers, anonymisiert, sofern Sie diese Option aktiviert haben IP-Anonymisierung;
- Besucher-ID — Eine Cookie-basierte eindeutige ID, mit der Sie wiederkehrende Besucher identifizieren können;
- Verweisende Seite — Die Seite, auf der sich der Besucher vor dem Klick befand;
- Land — Das Herkunftsland des Besuchers, das sowohl im Normal- als auch im erweiterten Modus erfasst wird;
- Gerät / Browser — Wird nur in Erweiterter Verfolgungsmodus.
Sie können Spalten mithilfe der Spalten Schaltfläche oberhalb der Tabelle. Ihre Spaltenauswahl wird zwischen den Besuchen gespeichert.
Filter
Über die Filterleiste am oberen Rand der Seite können Sie die Tabelle schnell eingrenzen. Sie können beliebige dieser Kriterien kombinieren:
- Link — Klicks für einen bestimmten Pretty-Link anzeigen;
- IP-Adresse — Alle Klicks von einer einzelnen IP-Adresse anzeigen;
- Besucher — Alle Klicks eines Cookie-basierten Besuchers anzeigen (in der Regel eine Person über mehrere Sitzungen hinweg);
- Datumsbereich — Auf heute, diese Woche, diesen Monat oder einen benutzerdefinierten Zeitraum beschränken;
- Suche — Freitextsuche in Referrer-URLs und anderen Feldern.
Klicken Sie hier, um alle Filter zu löschen Zurücksetzen um zur vollständigen Tabelle zurückzukehren.
Einzelne Besucher – Umschalten
Über der Tabelle findest du eine Einzigartige Besucher Schaltfläche. Ist diese aktiviert, werden mehrere Klicks desselben Besuchers in der Tabelle zu einer einzigen Zeile zusammengefasst, die dessen ersten Besuch darstellt.
Das ist nützlich, wenn Sie wissen möchten, “wie viele echte Nutzer auf diesen Link geklickt haben”, anstatt “wie viele Klicks es insgesamt gab” – zum Beispiel bei der Messung der Reichweite einer Kampagne.
Deaktivieren Sie diese Option, um wieder jeden einzelnen Klick anzuzeigen.
IP- und Besucherausweise
Neben jedem Klick siehst du zwei kleine Symbole:
- Die IP-Ausweis zeigt die anonymisierte IP-Adresse des Besuchers an. Klicken Sie darauf, um die Tabelle nach allen Klicks von dieser IP-Adresse zu filtern;
- Die Besucherausweis zeigt die Cookie-basierte Besucher-ID an. Klicken Sie darauf, um alle Klicks dieses Besuchers anzuzeigen.
Mit diesen Kurzbefehlen können Sie den Weg eines Besuchers über mehrere Links und Sitzungen hinweg verfolgen.
Einzelnes Glied genauer unter die Lupe nehmen
Klicken Sie in der “Pretty Links”-Liste auf die Klickzahl eines beliebigen Links, um zu einem vorgefilterten Klickverlauf zu gelangen, der ausschließlich die Aktivitäten dieses Links anzeigt. Dies ist der schnellste Weg, um Fragen wie “Wie gut läuft der Link in meinem Newsletter?” oder „Woher kommen die Klicks auf meinen Affiliate-Link?“ zu beantworten.”
CSV-Export
Um Ihren Klickverlauf außerhalb von WordPress zu speichern oder zu analysieren, klicken Sie auf In CSV exportieren oben auf der Seite „Klickverlauf“.
Pretty Links exportiert die Derzeit gefilterte Ansicht, wenn Sie also die Auswahl auf einen bestimmten Link oder einen bestimmten Datumsbereich eingegrenzt haben, werden nur diese Zeilen in die CSV-Datei übernommen. Löschen Sie zunächst Ihre Filter, wenn Sie alle Daten exportieren möchten.
Die CSV-Datei enthält je nach Tracking-Modus einen festen Satz an Spalten – im Normalmodus werden ID, Link, Zeitstempel, IP-Adresse, Besucher-ID, Land, Browser, Referrer, Anfrage-URI, Bot-Flag und First-Click-Flag exportiert; im erweiterten Modus kommen Host, Browsertyp/-version, Betriebssystem, Gerätetyp und Benutzer-ID hinzu. Die Umschaltfunktion “Spalten” in der Tabelle wirkt sich nur auf die Bildschirmansicht aus, nicht auf den Exportinhalt.
Große Exportdateien werden in Blöcken von bis zu 5.000 Zeilen pro Datei übertragen, sodass sehr umfangreiche Klickverläufe mehrere CSV-Dateien ergeben, die Sie zusammenfügen können. Öffnen Sie diese in Excel, Google Sheets oder einem beliebigen Tabellenkalkulationsprogramm, um sie genauer zu analysieren, Diagramme zu erstellen oder sie mit Ihren Teamkollegen zu teilen.
Tipps
- Falls Ihr Klickverlauf leer ist, überprüfen Sie bitte noch einmal, ob Sie sich nicht in Einfacher Tracking-Modus, das keine Zeilen pro Klick speichert;
- Falls bestimmte IP-Adressen (Ihr Büro, Ihre Testtools, bekannte Bots) die Zahlen künstlich in die Höhe treiben, richten Sie Folgendes ein: IP- und Bot-Filterung;
- Bei Websites mit hohem Datenverkehr sollten Sie vor dem Export den Datumsbereich eingrenzen – der Export von Zehntausenden von Zeilen auf einmal kann sehr lange dauern.