
Disponível no plano Marketer e nos planos superiores.
Este passo a passo te leva do zero até a publicação de uma página de biografia em cerca de dez minutos.
Este guia faz parte do Complemento Pretty Links Link in Bio, o ponto de acesso ao complemento “Link in Bio”.
Passo 1: Abra o Bio Page Builder
Na barra lateral de administração do WordPress, acesse Painel de controle > Links bonitos > Link na biografiae, em seguida, clique em Nova página de biografia.
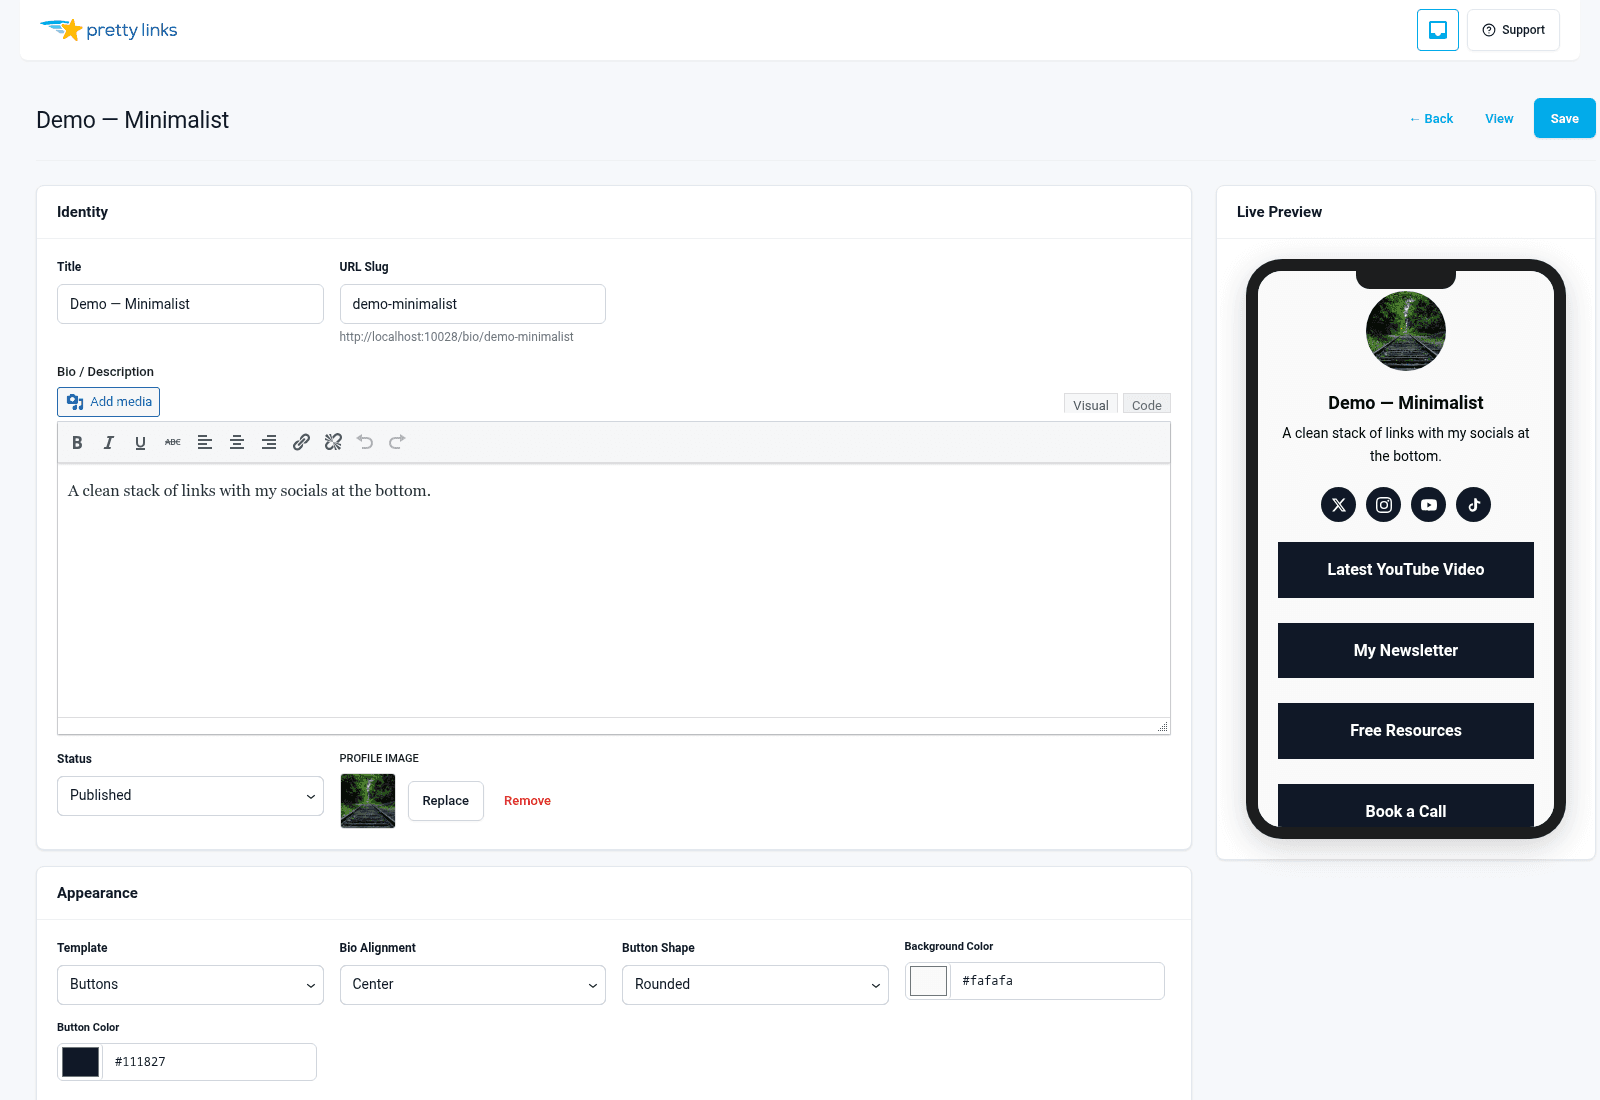
Você será direcionado ao editor da página de biografia, que está organizado em abas na parte superior: Perfil, Botões, Redes sociais e Configurações. Navegue por elas da esquerda para a direita.
Etapa 2: Guia “Perfil”
Esta é a parte superior da sua página — a primeira coisa que os visitantes veem.
- Título — Seu nome, marca ou título da página. Exemplo: “Maya Chen” ou “Bright Coast Coffee Co.”;
- Descrição — Uma ou duas frases curtas explicando aos visitantes quem você é e o que eles encontrarão. Exemplo: “Fotógrafo de viagens e avaliador de equipamentos. Toque abaixo para ver meus vídeos mais recentes e minha lista de equipamentos.”;
- Imagem de perfil — Envie uma foto de rosto ou um logotipo. Imagens quadradas são as mais indicadas. Na maioria dos modelos, a imagem é automaticamente recortada em formato circular.
Etapa 3: Guia “Botões”
Os botões são o ponto central da sua página de biografia — cada um deles é um alvo de toque que direciona os visitantes para algum lugar útil.
Clique em Adicionar botão para criar um. Cada botão possui:
- Etiqueta — O texto do botão (por exemplo, “Assista ao vídeo mais recente”, “Veja a lista de equipamentos”, “Agende uma ligação”);
- Destino do link — Escolha para onde o botão leva:
- Um Pretty Link já existente
- Um checkout do PrettyPay (caso você esteja usando o PrettyPay)
- Um vídeo (cole qualquer URL compatível com oEmbed — YouTube, Vimeo etc.)
- Um grupo de exibição de produtos (caso você tenha o complemento “Exibições de Produtos” no plano Super Affiliate)
- Ícone — Ícone opcional exibido ao lado do rótulo.
Adicione quantos botões forem necessários. Para reorganizá-los, segure a alça de arrastar no lado esquerdo de cada linha e solte-a no lugar desejado.
Conjuntos comuns de botões:
- Criador: Vídeo mais recente, Inscrição na newsletter, Loja de produtos, Patreon;
- Conferência: Programação, ingressos, patrocinadores, mapa do local;
- Lançamento do produto: Assista à demonstração, Faça a pré-venda, Kit de imprensa, Contato.
Etapa 4: Guia “Social”
Adicione ícones de redes sociais que levem aos seus perfis em outras plataformas. Suporte integrado para:
- Facebook;
- X;
- LinkedIn;
- Pinterest;
- Instagram;
- TikTok;
- YouTube;
- Site.
Cole a URL completa do seu perfil em cada campo que você quiser usar. Deixe o restante em branco — apenas as plataformas preenchidas serão exibidas.
Etapa 5: Escolha um modelo
Na guia “Configurações” (ou no seletor de modelos, dependendo do modelo escolhido), selecione um dos três layouts:
- Botões — Minimalista, com foco na pilha de botões;
- Conteúdo — Layout com abas e um formulário de contato opcional;
- Cartões — Grade de cartões que se integra aos Expositores de Produtos (plano Super Afiliado).
Leia Modelos para uma comparação lado a lado.
Passo 6: Dê um toque especial
Abra a seção de estilo para definir a cor ou imagem de fundo, as cores dos botões, o formato dos botões (arredondado, oval, quadrado) e a fonte. Uma visualização em tempo real à direita é atualizada à medida que você faz alterações, para que você possa ver exatamente como a página ficará.
Veja Personalização para consultar a referência completa de estilo.
Etapa 7: Configurações
A aba “Configurações” abrange itens como o slug da página (a parte após /bio/ (na URL), metadados de SEO e opções de ativação/desativação para o formulário de contato e o código QR.
Etapa 8: Salvar e publicar
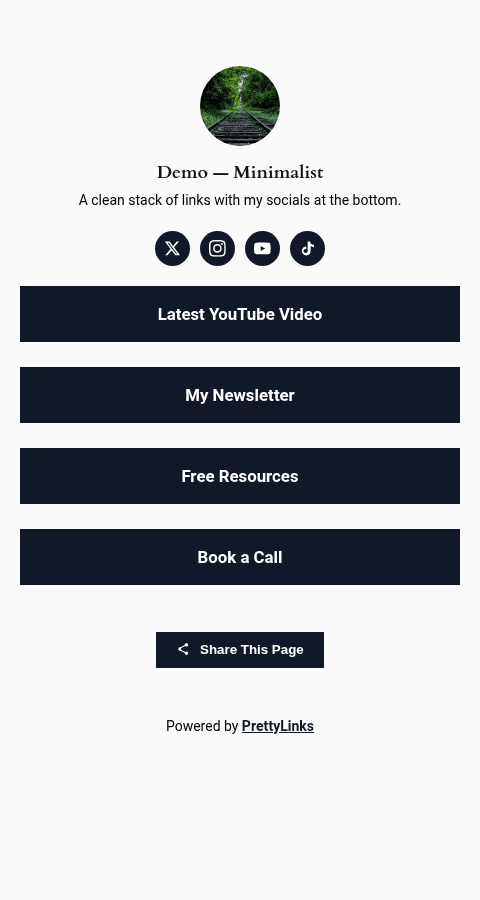
Clique em Salvar. Sua página de biografia já está no ar em yoursite.com/bio/yourslug/. Copie a URL e cole-a na sua biografia do Instagram, no seu perfil do TikTok, na sua assinatura de e-mail ou em qualquer outro lugar.
Para fazer alterações posteriormente, volte para Painel de controle > Links bonitos > Link na biografia, clique na página de biografia na lista e edite qualquer aba. As alterações entram em vigor assim que você salvar.